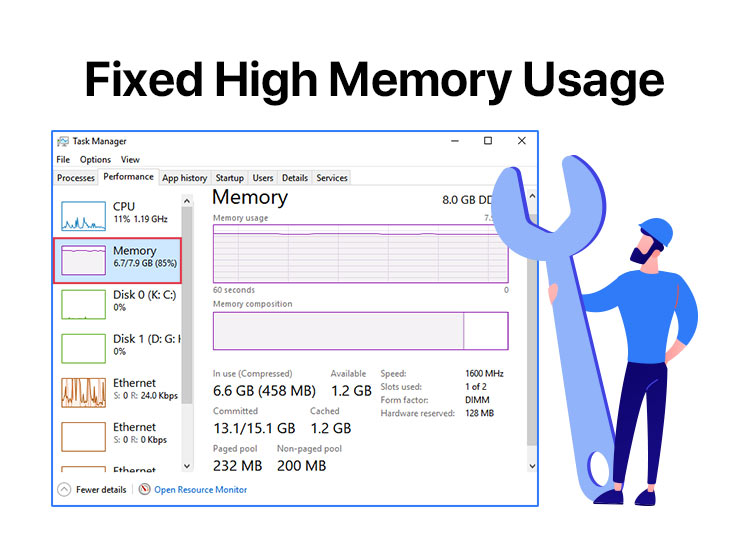
This article explains the quickest and easiest fixes for Windows 11 high RAM memory usage.
An upgrade from Windows 10 to 11 brings many exciting benefits. However, it also results in increased pressure on memory, prompting many users to search for how to fix Windows 11 high memory usage.
If you are also searching for how to lower Windows 11 memory usage to fix a slow or stuck computer, we are here to help. This article introduces you to the best possible solutions to the problem you are experiencing.
However, before proceeding to the solutions, let us discuss why this issue occurred in the first place to help you fix it better.
Causes of Windows 11 High Memory Usage
The following factors may be responsible for increased memory usage on your computer.
- Your computer has a lot of unnecessary apps and startup programs running on it
- The virtual memory is insufficient for effective performance of various tasks
- Your device is virus or malware-infected
- The hard drive is too fragmented
The above list was your answer to the question, “Why is my PC memory usage so high?” Let us now discuss how to reduce Windows 11 memory usage.
Fixes for Windows 11 High Memory Usage
You can apply the following fixes if you are looking for how to reduce Windows 11 RAM usage.
Fix 1: Close unnecessary programs and applications
Closing unnecessary running applications and programs can reduce memory usage. Hence, you can follow these directions to close them.
- First, right-click the Windows icon and select Task Manager from the on-screen options.

- After opening the Task Manager, you can navigate to the Process tab and look for any extra memory-heavy programs that you do not use.
- Next, click the program you want to close and choose End Task from the available options.
- Repeat the above step for all the programs you wish to close one after the other.
- Lastly, exit the Task Manager and restart your computer after closing all the unnecessary applications and programs.
Also know: The Best Free Disk Space Analyzer for Windows
Fix 2: Disable unnecessary startup programs
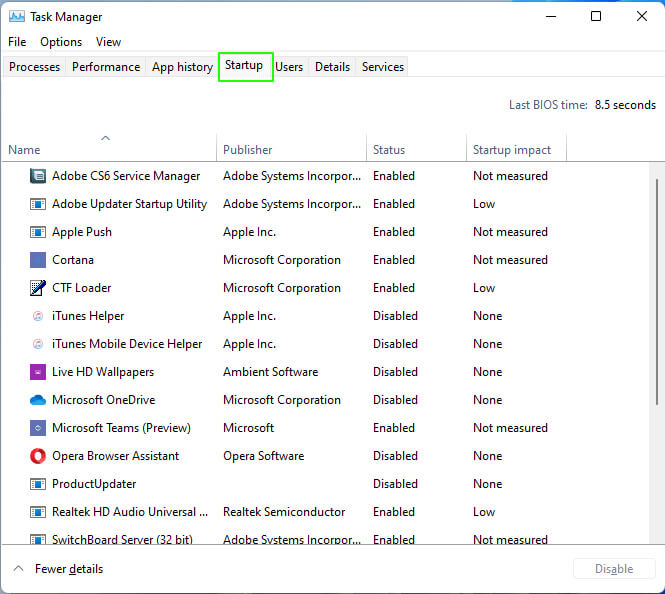
While some startup programs are crucial for a computer’s functioning, some programs run unnecessarily, increasing memory usage. Hence, below is how to reduce Windows 11 memory usage by disabling these programs.
- The first step requires you to open the Task Manager. You can use the Ctrl+Alt+Del shortcut to open it.
- In this step, click Startup, right-click the application you want to deactivate, and click Disable.

- Repeat the above step for all the applications you wish to disable.
Note: If you are confused about what an application is and what it does, do not disable it to ensure your computer’s functionality does not get hampered.
- Lastly, exit the Task Manager and restart your computer to complete the process.
Fix 3: Defrag the hard drive
Hard drive fragmentation causes increased RAM usage. Hence, the following steps explain how to fix Windows 11 high memory usage by defragmenting the hard drive.
- First, input Defragment and Optimize in the “Type here to search” box on the Taskbar.
- Secondly, choose Defragment and Optimize Drives from the search results on your screen.
- In this step, choose the drive you wish to defragment and click Optimize to begin the defragmentation.
- After the defragmentation process is complete, restart the computer.
Fix 4: Increase the virtual memory
Your computer has two types of memories. One is the RAM, and the other is the Virtual Memory. All programs and applications use RAM. However, when the RAM is insufficient for any program or application, Windows uses virtual memory temporarily. Hence, increasing the virtual memory can reduce the pressure on your RAM. Here is how to increase it.
- First, right-click the Windows icon on the Taskbar and choose File Explorer from the available options.
- After opening the File Explorer window, right-click This PC and select Properties from the on-screen menu.
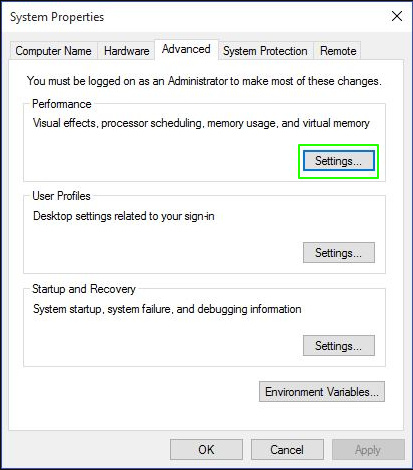
- Next, navigate to the Related Settings segment and choose Advanced System Settings.
- In this step, navigate to the Advanced tab and select Settings from the Performance section.

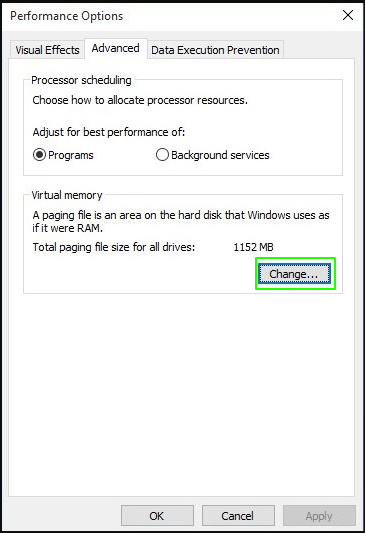
- The Performance Options window will appear on your screen. Navigate to the Advanced tab.
- Next, click Change in the Virtual Memory section.

- In this step, uncheck the Automatically manage paging file size for all drives box and select your C: drive.
- You can now choose the No paging file option and select Set.
- A warning message will appear on your screen. Click Yes.
- Next, find and select a non-system partition and choose the Custom Size option.
- In this step, set the Initial size and Maximum size. Ensure this value is as large as twice or 1.5 times the physical memory. If you wish, you can keep the same value for both sizes.
- Lastly, click Set and OK to apply the changes.
Also know: Best Duplicate Photo Finder and Cleaner Tools for Windows
Fix 5: Check your device for virus or malware infection
Increased memory usage is a common symptom of malware or virus infection. Hence, you can follow these directions to check if your computer is infected to fix the issue.
- First, search for and open Virus & threat protection.
- Secondly, navigate to the Scan options, select Full Scan, and click Scan Now.
Note: If you find the above process time-consuming and cumbersome, you can use one of the best antimalware software to scan for and eliminate malware from your computer.
Fix 6: Deactivate the Superfetch service
Superfetch service allows Windows to preload programs and files you use frequently. Though this service saves time, it consumes a lot of memory. Hence, below is how to reduce Windows 11 RAM usage by disabling the Superfetch/SysMain service.
- The first step is to access the Run tool. You can access this utility using the Win+R keyboard shortcut.
- Secondly, input Services.msc in the on-screen Run box and press Enter to open the Services window.
- In the Services window, scroll down to find and double-click SysMain.
- Next, change the Startup Type to Disabled and select Stop to prevent the service from running.
- Lastly, click Apply and OK to save the changes.
Windows 11 High Memory Usage: Fixed
This article elaborated on how to fix high memory usage in Windows 11. You can apply the above fixes sequentially to reduce the use of RAM on your computer. Please note you need not try all the solutions. Simply, start with the first solution and stop when the problem resolves. However, if you have any questions, doubts, or suggestions about this guide, you can leave a comment.

