The print queue in Windows is a temporary area where print jobs are held before sending them to the printer. This helps manage and monitor print jobs, allowing you to pause or cancel pending print jobs whenever required.
Moreover, it becomes crucial to check the printer queue on Windows to troubleshoot printing problems, manage print jobs, clear stuck print jobs, and monitor the printer status.
However, if you are puzzled about how to view and manage your print queue, this article is going to be your best companion. In this detailed guide, we acquaint you with the quickest and easiest ways to check your printing queue and clear it to resolve stuck print jobs and fix printing problems (for instance, printer not responding). Let us dive right into checking the printer status to save valuable time.
Methods to Check Print Queue on Windows 11
You can follow the methods below to check the printer queue on your Windows 11 computer.
Method 1: Check the print queue via Settings
You can check the printer queue through the computer Settings. To do so, follow the steps below.
- First, access Settings using the Win+I keyboard shortcut.
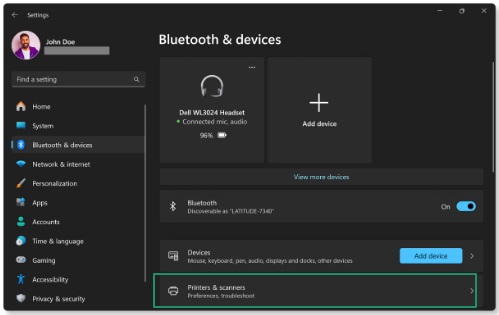
- Once the Settings window appears, choose Bluetooth & devices from the left panel of the on-screen window.
- Next, choose Printers & scanners from the Bluetooth & devices menu.
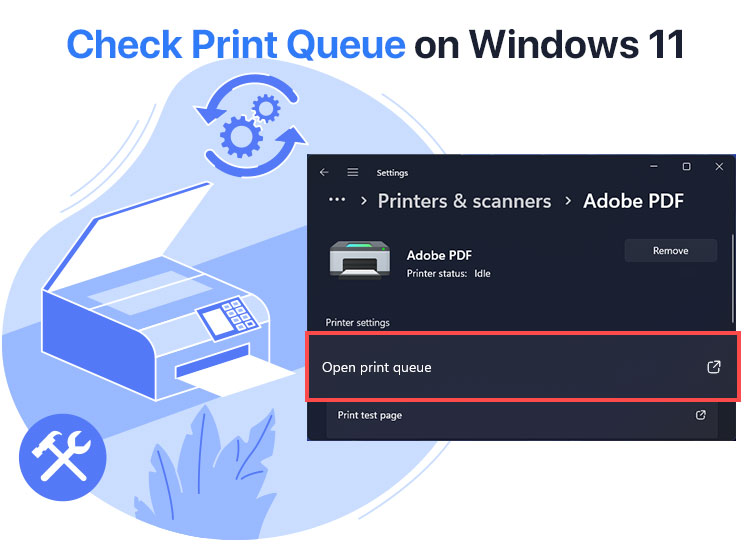
- In this step, select the printer for which you want to check the print queue.
- Lastly, click on the Open print queue option in the printer settings to view the printing queue.
Also know: How to Fix USB Keeps Disconnecting in Windows
Method 2: Check the print queue through the Control Panel
Control Panel is a built-in Windows application through which you can manage many of your computer’s settings and configurations. You can also check the printer queue using the Control Panel. Here is how.
- First, activate the Windows search utility using the Win+S keyboard shortcut.
- Second, type Control Panel in the search bar and click on the first search result to open it.
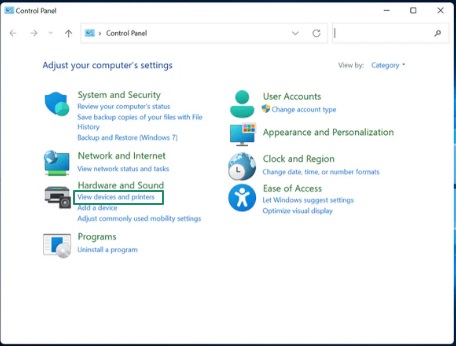
- Once the Control Panel appears on your screen, choose Category from the “View By” menu.
- Next, select Devices and Printers from “Hardware and Sound.”
- In this step, select the printer for which you wish to check the print queue.
- You can now right-click on the printer icon and select See what’s printing from the on-screen context menu to check your printing queue.
Method 3: Use Windows search to check the print queue
The search functionality also allows you to view the printing queue. Below is how to use it.
- In the first step, press the Windows key on your keyboard.
- Next, type print in the search bar that appears on the screen and press Enter.
- In the Printers & scanners window, locate the printer you wish to check the print queue for and click on it.
- Lastly, click on the Open print queue option to view the desired printer queue.
That was how to check the print queue. Let us now answer one of the most frequently asked questions, “How do I clear the print queue in Windows 11?” to resolve stuck printing jobs, fix print issues, and troubleshoot printer problems.
How to Clear Print Queue on Windows 11
Now that you know how to open the print queue, you can take the following steps to clear the print queue to fix various problems you may be experiencing.
- In the print queue window, right-click on the document you want to remove from the printing queue and choose Cancel from the context menu.
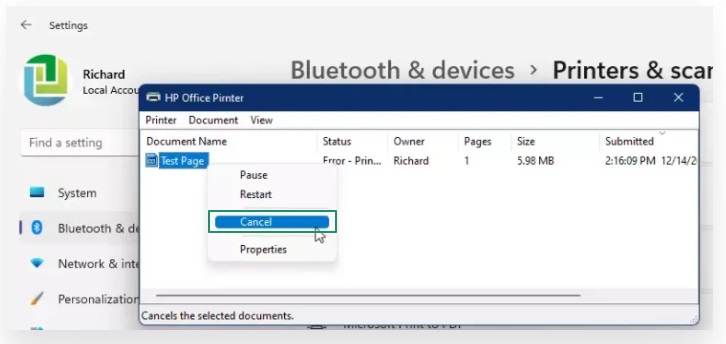
- You can repeat the above step for all other stuck or unwanted print jobs.
Also know: Printer Driver Download, Install, and Update For Windows 10, 11
Summing Up the Guide to Check and Clear the Print Queue
This brings us to the end of our detailed and straightforward guide to checking and managing the printer queue effectively. You can follow the methods above to quickly identify if there are any problems leading to delays in printing and then take the necessary steps, such as clearing the print queue, to resolve various issues and ensure your printing process runs smoothly and efficiently.
However, if you have any doubts, concerns, questions, confusion, suggestions, or feedback regarding this article, please do not hesitate to share them in the comments section. We will be more than happy to assist you in the best way possible.
