Are you bored with the same UEFI boot logo that appears every time you turn on your PC? Do you wish to customize your PC’s boot-up experience by replacing the manufacturer (OEM) logo with custom icons or animations to make your PC look unique? Then you can use the HackBGRT Windows 10 UEFI boot logo changer to modify the boot logo. It is important to note that this tool only changes the boot logo and does not affect the background image on your login, sign-in screen, or lock screen.
Previously, there was no way to customize the UEFI boot logo on Windows 10. However, now Metabolix’s HackBGRT tool serves as a UEFI boot logo changer for Lenovo, HP, and other manufacturers that support Intel 64-bit UEFI systems.
This article answers all your questions about this tool, including what exactly HackBGRT is, how it works, whether it is safe, what to do if it does not work, and, if need be, how to remove it. Let’s get started.
What Is the HackBGRT Tool
Our computer displayed Lenovo every time we turned the PC on. While previously there was no way to change that logo, our IT administrator used the HackBGRT Lenovo UEFI boot logo changer to change the Lenovo logo into the corporate logo on our computers.
Windows stores these vendor-defined logos, such as the Lenovo logo, on the UEFI firmware in a section known as the Boot Graphics Resource Table (BGRT).
The Boot Graphics Resource Table (BGRT) is a data structure created by the system firmware (UEFI) and passed to the operating system. This data structure defines your PC’s hardware configuration and power management capabilities, allowing your computer to manage power, configure hardware, and handle device discovery. Moreover, it provides a pointer to the image (manufacturer’s logo), enabling Windows to display that logo instead of the default loading screen.
HackBGRT is a custom UEFI application that overwrites the Boot Graphics Resource Table (BGRT) during the boot process so that Windows 10 UEFI boot logo changes to your personalized Windows 10 boot logo.
Please note that HackBGRT only works on PCs that support UEFI. Generally, almost all computers shipped with Windows 10 offer UEFI firmware support.
However, to check whether your PC supports UEFI or not, power on your computer and sign in to your account, open the Windows installed drive (usually the “C” drive), open the Windows folder, locate and open the Panther folder, open the Setupact text file in Notepad, locate the Detected Boot Environment entry using the Ctrl+F shortcut, at the end of Detected Boot Environment, find UEFI.
Alternatively, you can quickly check for UEFI support by using the ‘msinfo32’ command. Press Windows + R to open the Run dialog, type ‘msinfo32’, and press Enter. In the System Information window, find the ‘BIOS Mode’ entry, which will indicate either ‘UEFI’ or ‘Legacy.’ Tech-savvy users might find this method more convenient.
Before proceeding towards changing the Windows 10 UEFI boot logo using the HackBGRT tool, here are a few important things to note.
Note 1: As recommended by the HackBGRT tool developer, disable Secure Boot. To disable Secure Boot in Windows 10, restart your computer and enter the UEFI setup (generally by pressing F2, F10, F12, or Del), go to the Security or Boot tab, find Secure Boot, and change it to Disabled.
Note 2: Create a system restore point or a full image backup of your Windows 10 installation, as your Windows 10 computer might become unbootable if anything goes wrong while changing the boot logo.
To create a system restore point, search for and open Create a restore point, navigate to the System Protection tab in the System Properties, click on the Create button, enter a description or name of the new restore point, and click Create to finish the restore point creation process.
To create a full image backup of your Windows 10, type Backup and restore in the taskbar search box and press Enter, choose Create a system image from the left pane of the Backup and Restore (Windows 7) window, choose a location to save the system image (we recommend an external drive), click Next to continue, click Start Backup to begin the system image backup creation process, click Close when the process is complete.
Note 3: Ensure the image you want to use as your Windows 10 UEFI boot logo is a 24-bit BMP file with a 54-byte header. The dimensions of the image, i.e., its width and height, should be 200px by 200px or 300px by 300px, and you name the image splash.bmp.
The limitation to 24-bit BMP files is due to the simplicity and compatibility of the BMP format with the BGRT specification used in UEFI firmware, which does not support complex image formats with transparency or compression. Currently, no workarounds exist for using other image formats directly; however, future updates to HackBGRT might address wider format support, allowing advanced users more flexibility in their customizations.
After ensuring all the above, you can install and set up the GitHub Metabolix HackBGRT Windows 10 boot logo changer.
How to Install and Set Up HackBGRT Windows 10 UEFI Boot Logo Changer
You can follow the steps below to complete the HackBGRT download, installation, and setup on your computer.
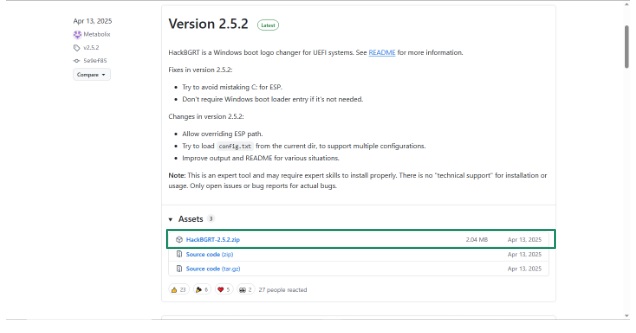
- First, navigate to the HackBGRT download page.
- Next, scroll down to Assets and click HackBGRT-2.5.2.zip or the latest release ZIP file.
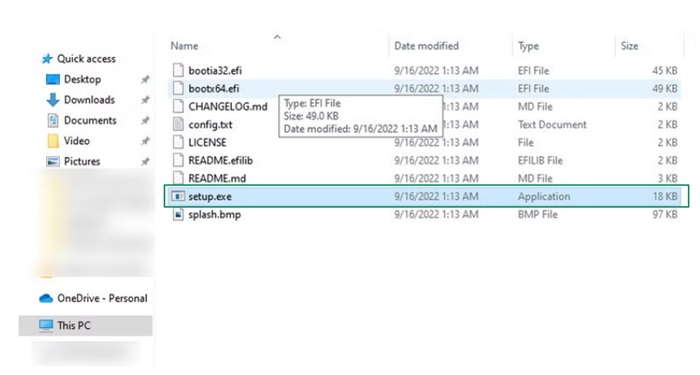
- Now, navigate to the folder where you downloaded the HackBGRT tool and unzip the file to extract it on your computer.
- Next, double-click setup.exe in the extracted folder to launch HackBGRT.
- Click Yes when the UAC prompt appears to allow the HackBGRT Windows 10 UEFI boot logo changer to make changes to your computer.
- In the Command Prompt window that appears, press I on your keyboard to begin the HackBGRT installation.
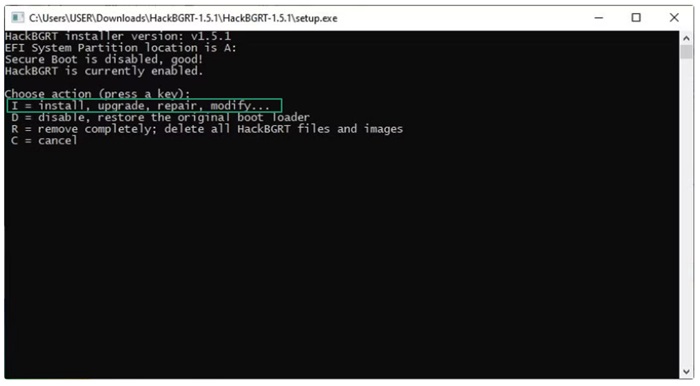
- Close the Notepad window that appears.
Once the Notepad window closes, you can proceed to the section below to create a graphic and use the HackBGRT tool to change your boot logo.
Also know: How to Fix bootrec /fixboot Access is denied Error in Windows 11
How to Use HackBGRT to Change Windows 10 UEFI Boot Logo
After the setup is complete, you can follow the steps below to make a logo graphic of your desired image and change the Windows 10 boot logo using the HackBGRT tool.
- First, follow the steps in the section above if you have not done so already.
- Next, select the Paint window from the Taskbar if it does not launch automatically.
- In the Paint window that appears, click File and choose Open from the File menu.
- Next, choose This PC from the navigation menu on the left.
- When you navigate to the This PC window through Paint, a partition appears that you have probably never seen before. For example, SYSTEM (A:) in the screenshot below.
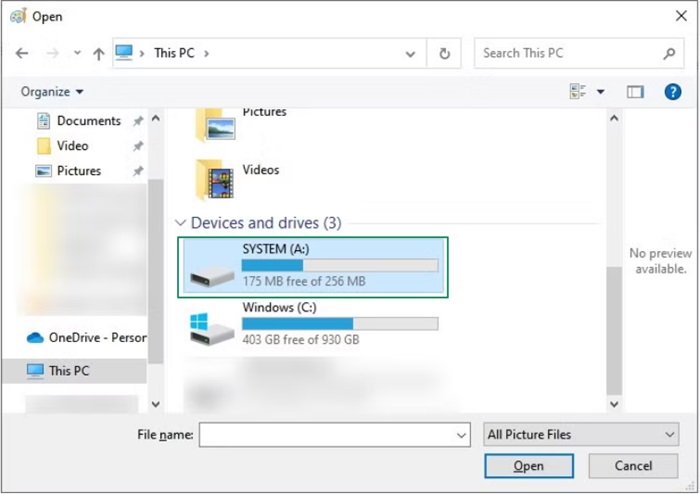
- Double-click this never-before-seen partition to open it.
- Next, navigate to the EFI > HackBGRT folder to find the splash.bmp image of the HackBGRT logo.
- Copy and paste the custom logo into the HackBGRT folder from this window.
- Click Replace the file in the destination if Windows notifies you that the image you created and the one currently in the folder have the same name.
- Next, exit all Windows, including Paint.
- Launch the Command Prompt window for HackBGRT.
- Check the “HackBGRT is now installed” message.
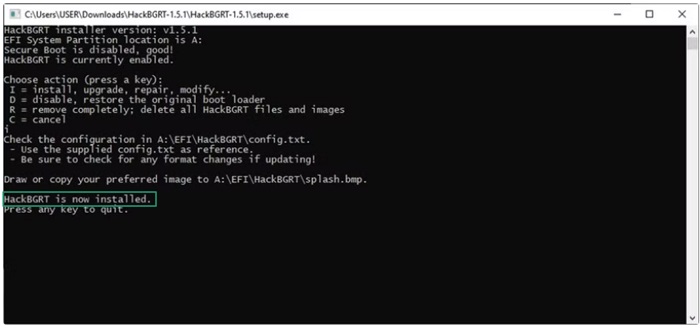
- Press any key to close HackBGRT and restart your computer.
- After rebooting, choose OK.
- Next, press any key to perform MOK management.
- Choose Enroll hash from disk.
- Next, select the first disk.
- Choose EFI/.
- Select HackBGRT/.
- Choose grubx64.efi.
- Choose Continue.
- Select Yes.
- Lastly, choose Reboot.
When your computer restarts, your custom logo will appear during the boot process.
However, if you do not like the change and wish to switch back to the default Windows boot screen logo, you can do so using the HackBGRT tool.
How to restore the old Windows boot screen logo
To get your old Windows logo to the boot screen, you can follow the steps below.
- Open HackBGRT.
- In the Command Prompt window, press D on the keyboard.
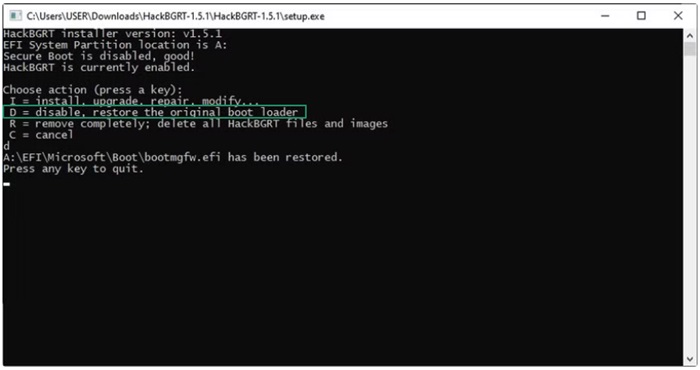
- Check the “Old Windows logo has been restored” message.
- Lastly, press any key to exit HackBGRT and restart your computer.
The above steps explained how to change the Windows 10 UEFI boot logo with HackBGRT. However, if, for some reason, the HackBGRT tool does not work on your HP/Dell/Lenovo or other Windows 10 UEFI system, you can follow the troubleshooting guide below.
What to Do If HackBGRT Is Not Working
Here are the steps you can take if the HackBGRT tool does not work on your computer.
- If not already disabled, disable Secure Boot.
- Ensure the logo fulfills the image format requirements. It must be a 24-bit bitmap (.bmp) file named splash.bmp, sized around 300×300 pixels, with transparency changed to black.
- Run the HackBGRT setup.exe again, remove the current installation (R), and install it again (I).
- Enter UEFI to check boot options. Ensure you prioritize HackBGRT over the Windows Boot Manager.
- If a blue screen appears during the boot process, select “Enroll key from disk” to trust the HackBGRT key.
Even if HackBGRT works, a question lingers: Is HackBGRT safe?
Will HackBGRT Brick Your Computer? Is it Safe?
While HackBGRT is a powerful boot logo customization tool, it can make your system unbootable, i.e., brick it if the tool is not installed properly. It is safe only for those users who take the proper precautions.
Should your system become unbootable, immediately use recovery media or installation media to boot into the Windows Recovery Environment. There, you can access the Command Prompt to perform fixes such as using the bootrec /fixboot or bootrec /rebuildbcd commands to repair boot-related issues. Alternatively, restore your system to a previous state using the System Restore feature if a restore point was created prior to the changes.
It is beneficial to take the following safety precautions to use HackBGRT without harming your system and to ensure a safer experience.
- Before installing HackBGRT, ensure that you create a rescue disk on a USB drive or Windows installation media to access the Command Prompt and repair your boot files if anything goes wrong.
- If you have BitLocker enabled, locate and save your recovery key, as boot component modification can cause BitLocker recovery or data loss.
- Ensure your PC boots with UEFI and your system drive uses the GPT partition style. You can verify this in Windows Disk Management.
- Follow all instructions in this guide very carefully.
However, if you are unsure, you can remove the HackBGRT UEFI boot logo changer for Windows 10.
Also know: Solved: Fastboot Not Working and Not Detecting any Device in Windows 11
How to Remove HackBGRT Windows 10 UEFI Boot Logo Changer
You can follow the steps below to remove the HackBGRT tool.
- First, launch the folder where you extracted the HackBGRT tool.
- Next, right-click setup.exe and select Run as administrator.
- Press R in the Command Prompt window to uninstall or remove the HackBGRT tool.
- Lastly, press any key and restart your computer once the prompt says HackBGRT is disabled or removed.
If you do not have the folder, you can download HackBGRT’s latest version again and then run the removal process.
With that, we come to the end of our HackBGRT Windows 10 UEFI boot logo changer guide. We hope it helps you customize your Windows boot screen logo effortlessly for an improved user experience, a cohesive look, or ensure a more professional Windows startup to impress stakeholders.
