This article elaborates on the quickest and easiest ways to solve the Destiny 2 game voice chat issues if it is not working. Bungie’s Destiny 2 is one of the most loved free online first-person shooter games. Features, such as voice chat that allow gamers to communicate and team up with other players add to the gaming fun. However, we have encountered many user complaints that the Destiny 2 voice chat is not working.
Are you also experiencing a similar problem? If yes, this article is exactly what you need to solve this problem. Here, we are going to acquaint you with the tried and tested fixes to the issue. However, let us first discuss what may have caused this problem so that you can solve it better.
Why Is Destiny 2 Voice Chat Not Working?
The following factors may be responsible for the Destiny 2 voice chat problems on your PC.
- There may be a speaker and headphone connection problem
- Your computer may be having internet connection issues
- Voice chat may be disabled in your Steam game launcher
- Your device has improperly configured privacy settings
- The audio driver is outdated
- Your device’s sound may be disabled or muted
- Windows audio service is not working
Above, we listed all possible culprits behind the error you are trying to resolve. Let us now walk you through the best possible solutions to your problem.
Fixes for Destiny 2 Voice Chat Not Working Problem
You can apply the following solutions if the voice chat is not working in the Destiny 2 game on your PC.
Fix 1: Ensure you have a fast and stable internet connection
A smooth internet connection is necessary to support the voice chat game feature. Hence, you can switch from a wireless to a wired connection, reposition your computer closer to the router, or restart your modem/router to solve the network problems.
Fix 2: Check your audio device
Speaker and headphone connection issues, such as loose cords or cables, may be responsible for the voice chat problem. Hence, you can perform the following actions to fix the issue.
- Ensure all cables and cords are properly plugged in
- You can unplug and re-plug the headphone
- Make sure the mic switch is turned on if your device has one
- Ensure you have an Xbox Certified headset to use the voice chat feature
Fix 3: Enable voice chat in Steam
The voice chat feature is disabled in Steam may be another reason you are unable to chat while playing Destiny 2. Hence, you can take the following steps to enable this feature in Steam.
- Firstly, you are required to open your computer’s Steam application.
- Secondly, navigate to Steam’s Settings.
- Next, choose Sound from the on-screen menu.
- Lastly, exit the game and launch it again on your console.
Also read: Realtek Audio Console Download and Update for Windows 10, 11
Fix 4: Check your computer’s privacy settings
The privacy settings on your computer may be blocking the game’s access to the microphone, causing the “Destiny 2 voice chat not working” problem on Windows PC. Thus, here are the steps you can take to change the settings.
- The first step is to close Destiny 2 (if it is open) and launch your computer’s Settings. You can access the settings using the Windows+I hotkey.
- In the second step, choose Privacy from the available settings.
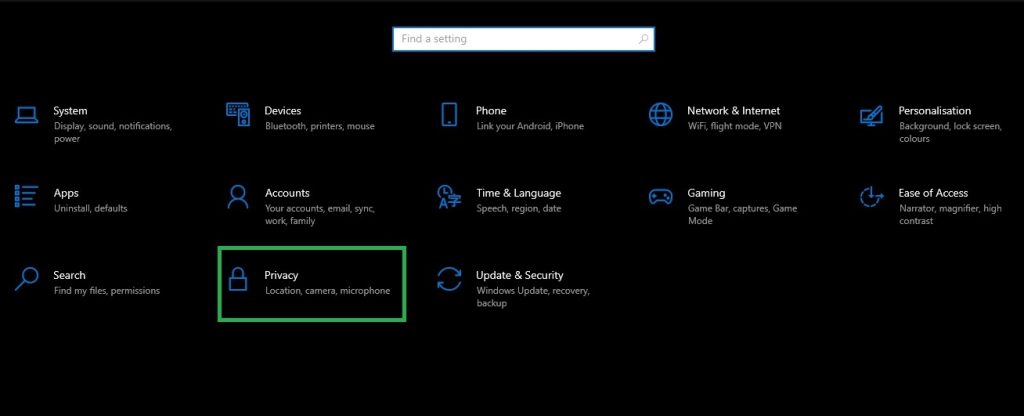
- Next, you are required to choose Microphone from the left panel of the on-screen privacy settings.
- You can now Allow apps to access your microphone.
- Next, scroll down to find Destiny 2 in the list of applications and toggle it ON to access your microphone.
- Lastly, relaunch Destiny 2 to check if the problem is resolved. However, do not lose heart if the problem remains unresolved, as there are more ways to fix it.
Fix 5: Update the audio and other drivers
The driver is an interface that connects your audio device to the computer for the correct execution of your commands. It helps the system understand your instructions so that you can use voice chat and other features smoothly.
However, if the driver is outdated, this connection gets blocked, resulting in voice chat and other issues. Moreover, other outdated drivers may interfere with the computer’s smooth functioning, contributing to the problem.
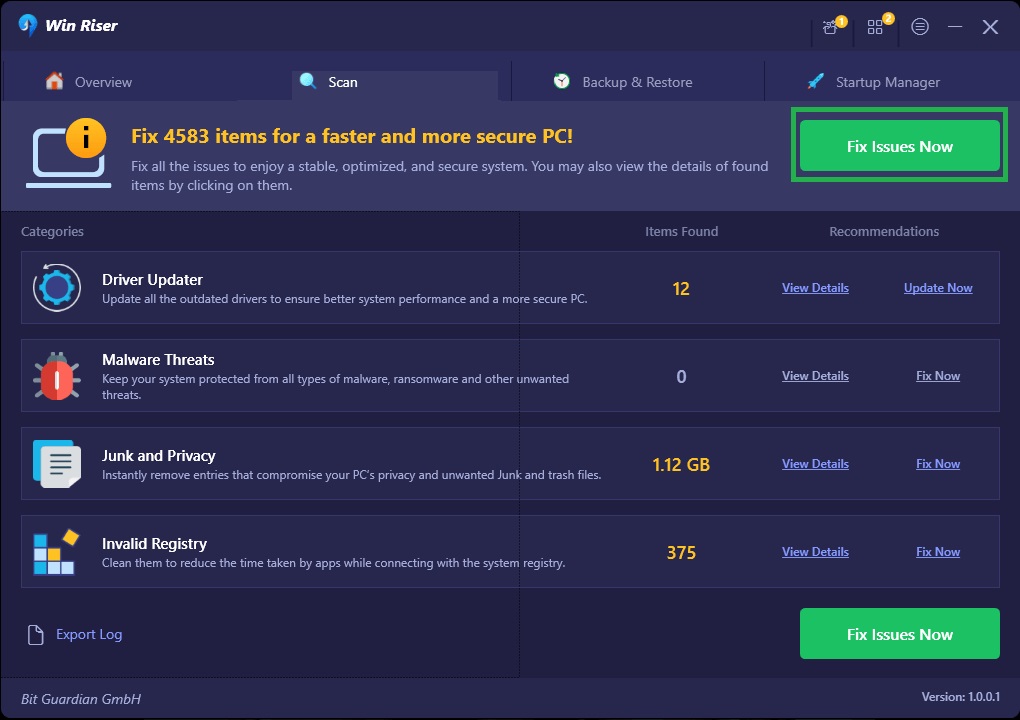
Hence, performing a driver update is among the best solutions to the issue. You can update drivers hassle-free with only a few clicks using Win Riser, i.e., one of the best programs for automatic driver updates.
With Win Riser, you can run comprehensive PC scans, schedule driver updates, clean invalid registry entries, backup and restore existing drivers with one click if driver updates create a problem, delete junk, eliminate malware, and perform other actions to elevate your computer’s performance.
You can experience all the benefits of this software yourself by downloading and installing it from the following link.
After installing Win Riser, let it scan your computer for a couple of seconds, go through the scan results, and solve all the problems automatically with a single click on the Fix Issues Now button. Lastly, please remember to restart your computer to save the changes.
Fix 6: Unmute your microphone and set it as your default device
The Destiny 2 game’s voice chat may not be working on a Windows PC if your microphone is muted or not set as the default device. Hence, you can follow these directions to unmute and set your microphone as default.
- The first step is to right-click on the Speakers icon on your taskbar and choose the Open Volume mixer option to access the volume controls.
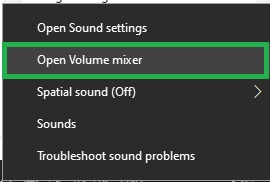
- Secondly, ensure none of the on-screen volume controls are muted.
- In this step, right-click the Taskbar’s Speakers icon and choose Sounds from the available options.
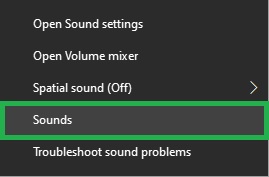
- Next, navigate to the Playback tab, choose the headphones you wish to use, and click on the Set Default button.
- You can now go to the Recording tab, choose your microphone, and click the Set Default button.
- Lastly, click OK to save and apply the changes you have made in the previous steps.
Fix 7: Ensure Windows audio service is working correctly
Windows audio service is responsible for managing the audio devices on your computer. The audio devices may not function correctly if this service stops. Hence, you can restart the Windows audio service by performing the following steps.
- Firstly, open Run on your computer using the Win+R hotkey.
- Secondly, input services.msc in the Run box on your screen and click on the OK button.
- The Services window will appear on your screen. You can locate your computer’s Windows Audio service in the on-screen list.
- Right-click Windows Audio service and choose Restart from the context menu.
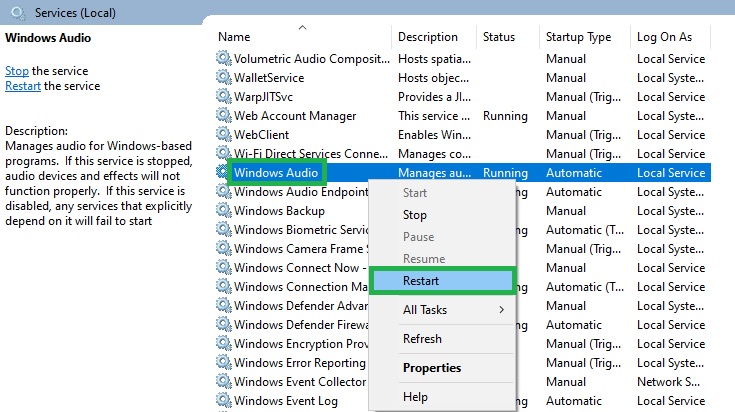
- Now, right-click on the Windows Audio service and choose Properties from the on-screen menu.
- In this step, choose Automatic from the Startup type options and click OK.
- Lastly, complete the process by restarting your computer.
Also read: Fix Onikuma Headset Mic Not Working on Windows PC
Windows PC Destiny 2 Voice Chat Not Working: Fixed
We hope one of the above solutions fixed the Destiny 2 game voice chat problem on your computer. However, if you have any doubts, questions, or ideas for improvement of this guide, kindly do not hesitate to let us know through the comments section. Also, stay connected with us to learn more about solving various tech problems.

