Are you a gaming programmer or someone interested in video rendering or other multimedia tasks? Then, you need DxDiag to create stunning games that can run on almost any computer without glitches. This software comes pre-installed in Windows 10 and 11. However, if, for any reason, you require the latest version of this program, here is a comprehensive guide to help you install and run the Windows 10/Windows 11 DirectX Diagnostic tool.
Please note that DxDiag is often confused with DirectX. While DxDiag and DirectX are related, they are different components of Windows. DirectX is a collection of Application Programming Interfaces (APIs) that help multimedia apps and games to communicate directly with hardware, especially graphics and audio.
On the other hand, DxDiag is an acronym for DirectX Diagnostic Tool, a utility that is a part of DirectX. This tool allows you to view and diagnose information about your system’s hardware, drivers, and DirectX components. Hence, downloading DxDiag means downloading DirectX on your computer.
However, please note that a standalone version of DirectX12 is not available for download. You can only update your DirectX Diagnostic tool to the latest version by updating your computer’s operating system.
In the case of versions below DirectX 11.2, you can either download an entirely new version through the DirectX End-User Runtime Web Installer or download the missing files via Windows update. Let us discuss all these options.
Methods to Download and Install DxDiag and Run It on Windows 11/10
You can get the latest version of DxDiag downloaded and installed through Windows Update and Runtime Web Installer. Let us discuss both methods and then proceed to run the tool on your computer.
DxDiag download and install
Method 1: Update your operating system (OS) to the latest version
As mentioned earlier, the DirectX Diagnostic tool comes preinstalled on Windows 10/11 computers. You can only update it to the most recent version by performing an OS update. Here is how to do it step by step.
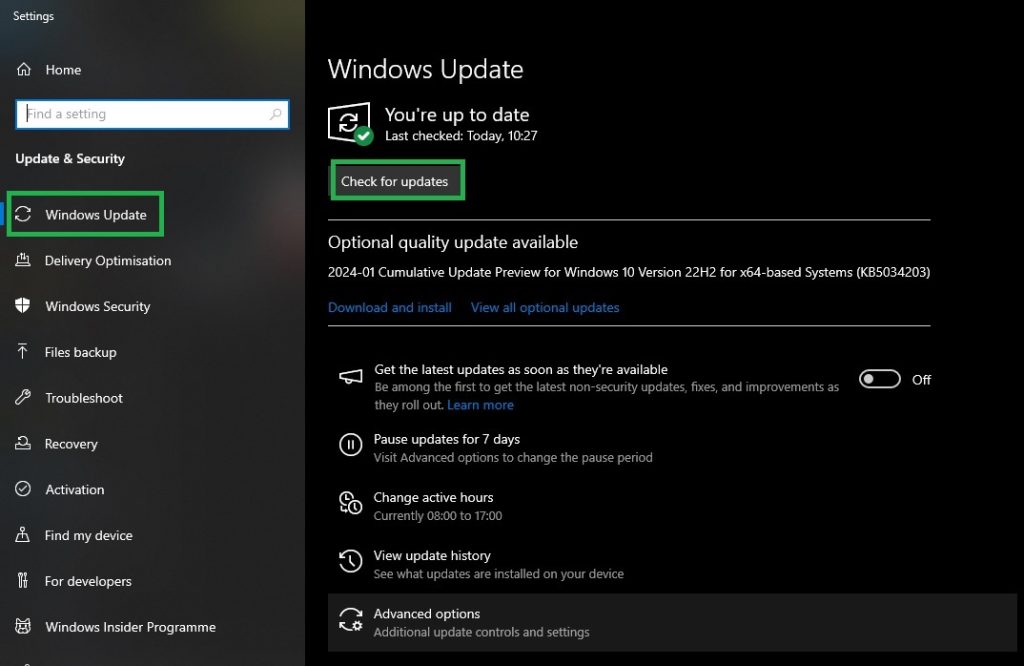
- First, open settings using the Windows+I keyboard shortcut.
- Next, select Update & Security from the on-screen settings menu.
- Choose Windows Update from the available options.
- Click Check for updates to allow Windows to look for the latest OS updates.
- Next, download and install the suggested updates for your operating system.
- Lastly, restart your computer.
Also know: How to Fix Task Host Window Preventing Shutdown
Method 2: Download and Install DxDiag using the Runtime Web Installer
DirectX 10 or any version lower than DirectX 11.2 is available for download via the End-User Runtime Web Installer. You can follow these steps to download and install it from there.
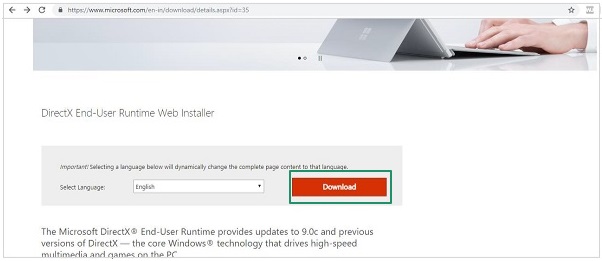
- First, click on this link to navigate to the Microsoft website.
- Next, select your language and click the Download button to download the DirectX End-User Runtime Web Installer setup file.
- Click on the setup you downloaded in the previous step.
- Next, click Yes to allow the application to make the required changes to your computer.
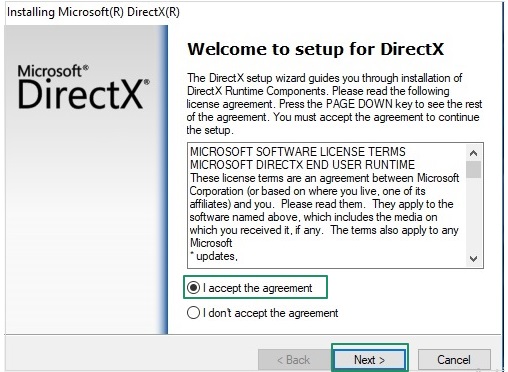
- Click I accept the agreement and click Next to proceed further.
- In this step, click Next to install the DirectX Runtime Optional Components.
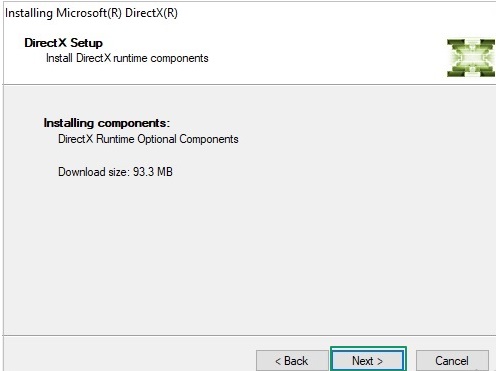
- Wait until the installation is complete.
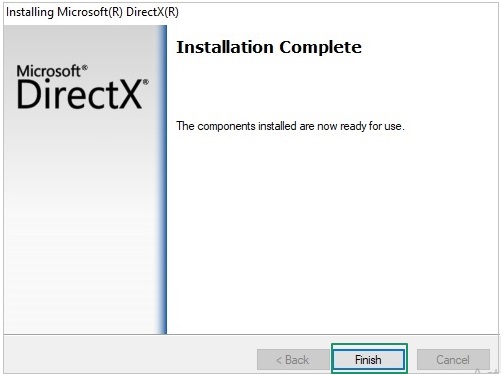
- After completing the installation, click Finish and restart your computer.
Above is how to download and install DxDiag, i.e., the Windows 10/11 DirectX Diagnostic tool. Let us now answer your question, “How do I run the DxDiag of my PC?”
Run the DxDiag command on Windows 11/10
Method 1: Use the Windows Run command
You can follow these steps to open and run DxDiag using the Run command on Windows.
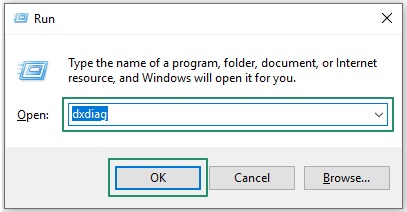
- First, press the Windows and R keys on your keyboard to launch the Run command.
- Next, input DxDiag in the on-screen box and click OK.
Method 2: Use the Start/Search function
Below are the steps to run the DirectX Diagnostic tool on your PC using the Start or Search option.
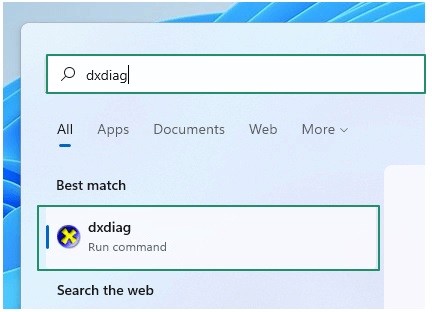
- First, click the Start button or the Search box on your taskbar.
- Next, input DxDiag in the on-screen box.
- Choose DxDiag Run Command from the on-screen search results to open it.
Method 3: Run Windows 10/Windows 11 DirectX Diagnostic tool using Command Prompt (CMD)
You can follow these steps to use the Command Prompt to run the DxDiag command on your computer.
- First, launch the Run function using the Windows+R keyboard shortcut.
- Next, input cmd in the on-screen Run dialog box and press Enter/click OK to open the Command Prompt.
- After opening the Command Prompt, input dxdiag.exe in the command line and press Enter to run the DirectX Diagnostic tool.

Also know: How to Fix High Memory Usage in Windows 11
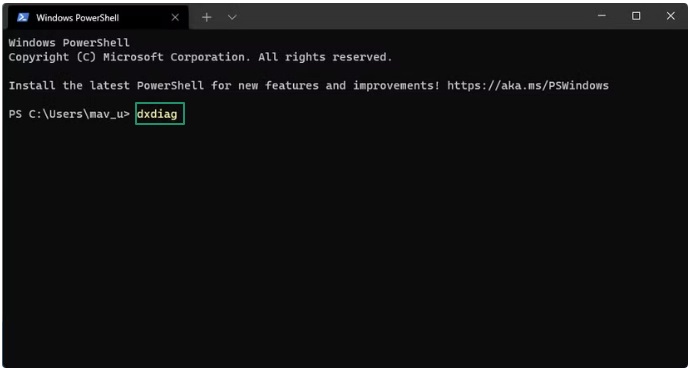
Method 4: Run DxDiag using Windows PowerShell
Below is how to use Windows PowerShell to open the Windows 10/Windows 11 DirectX tool.
- First, use the Windows+X keyboard shortcut to open the quick access menu.
- Next, choose Windows PowerShell (Admin) from the on-screen menu.
- Lastly, input dxdiag in the on-screen window and press Enter to run the command.
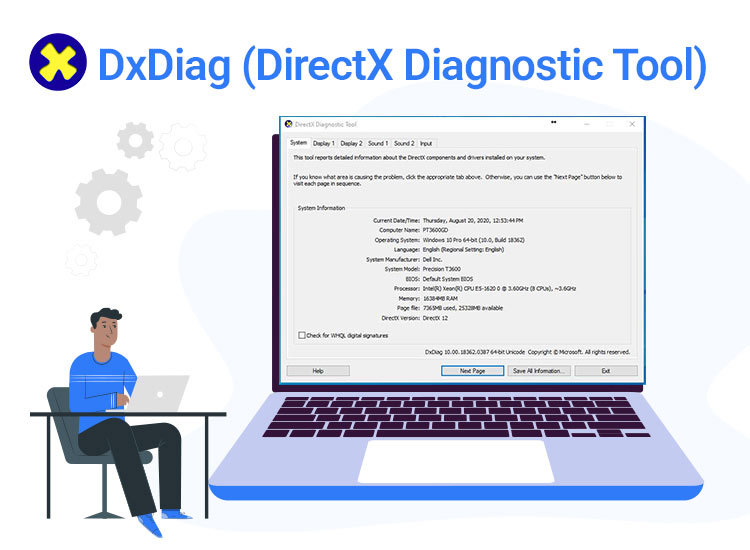
After running the DirectX Diagnostic Tool, you can display your current computer name, OS version, DirectX version, etc., by going to the System tab. Moreover, you can get information about your display driver, monitor, and graphics card via the Display tab. Furthermore, view your audio device and drivers in the Sound tab and get the details about various input devices in the Input tab.
Download, Install, and Run DxDiag on Windows 11/10: End Note
This article explains how to download, install, and run the DirectX Diagnostic Tool on Windows 11 and 10. Using DxDiag, you can execute almost all multimedia functions effortlessly and avoid annoying hardware/graphics problems. For more how-to guides like this one, keep visiting this blog.
Frequently Asked Questions
Q1. How to get the DirectX Diagnostic Tool?
You can download the DirectX Diagnostic Tool through Windows Update or the Runtime Web Installer. Both of these methods are detailed in the guide above.
Q2. Is DirectX 12 free to download?
Yes, developed by Microsoft Inc., the DirectX 12 offers a free license for Windows laptops and desktops.
Q3. How do I check if DirectX 12 is installed?
To check if you have DirectX 12 installed on your computer, press Windows + R, type dxdiag in the Run utility, press Enter, navigate to the System tab, and then check your DirectX Version.
