It is a pain to send and receive faxes or scan documents in Windows, even with the built-in Windows Scan. However, we did not want to use a third-party application to send and receive faxes directly from our computer, as we find these third-party manufacturer software bloated, like many others do. We use an optional or on-demand Windows Fax and Scan feature in Windows 11 for faxing, scanning, and document management.
Hence, if you are also looking for the Windows Fax and Scan download, this is the place. While this utility was earlier a part of the Windows operating system out of the box, it is not included in the new Windows 11.
Windows 11 replaces the Windows Fax and Scan tool with the Windows Scan app. While the new Scan app is a pretty excellent tool, it can only scan documents and not fax, often fails to detect the connected scanner, and runs into the “Something went wrong” error.
The good news is that, if you are experiencing similar problems and do not wish to use a third-party fax and scan app, you can install Windows Fax and Scan on your Windows 11 computer. This article explains how to install and set up Microsoft Windows Fax and Scan, along with solutions to the common problems you may encounter.
While the Windows Fax and Scan installation is simple through Settings>Apps/System>Optional Features, let’s clear the basics around this built-in Microsoft application before exploring it in more detail.
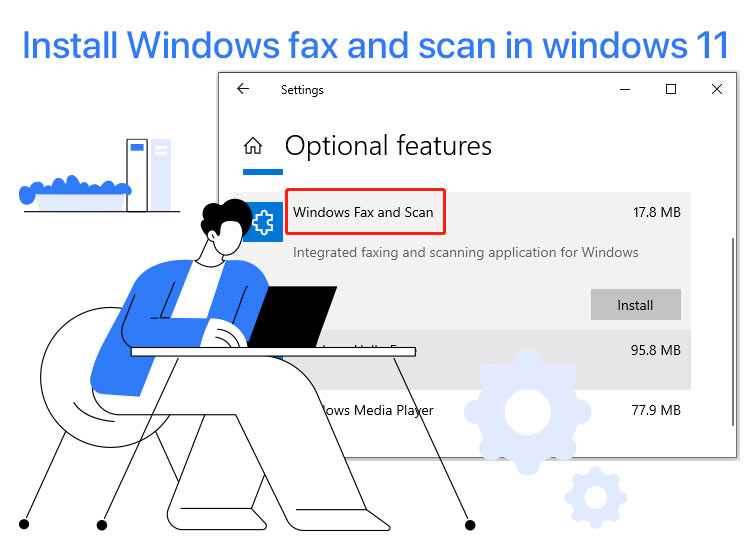
What Is the Windows Fax and Scan Feature
Windows Fax and Scan is a pre-built application in the Windows operating system through which you can send and receive faxes directly from your computer without a fax machine.
This application simplifies the faxing process with support for multiple document types, such as PDFs, images, Word documents, and more. Moreover, admins can use this application to manage various fax machines, fax servers, or multifunction printers through a centralized program.
Before installing Windows Fax and Scan, it’s important to understand the hardware requirements. Your computer either needs a built-in fax modem or you must connect an external fax modem. A fax modem is a device that enables a computer to send and receive faxes using a telephone line, acting as a bridge between digital and analog signals.
Without a fax modem, either internal or external, you cannot use the Windows Fax and Scan feature in Windows 11.
To check whether your computer has a built-in fax modem, right-click the Start button, choose Device Manager, and then search for a category for Modems. If you can see a category named Modems, you have a built-in fax modem.
If you do not have a built-in fax modem, you can set up an external fax modem on your computer. Common types of external fax modems include USB fax modems and PCI fax modem cards. USB fax modems are widely available and easy to use, often simply connecting via a USB port. You can find these online from retailers like Amazon or Newegg, and they usually come with driver software for installation. We will explain more about setting up these modems in the setup section.
How to Download Windows Fax and Scan
As mentioned before, Windows Fax and Scan is a feature built into your Windows 11 computer. While it does not come enabled out of the box, it is not something you download, but install or enable from the settings on your PC.
Where is Windows Fax and Scan on your computer
The Windows Fax and Scan is located in the optional features in the “System” settings in Windows 11. However, some Windows 11 versions may find it under Settings>Apps. You can refer to the sections below to install (enable) and set it up on your computer.
Also know: Epson Scan 2 Software for Windows 10, 11
How to Install Windows Fax and Scan in Windows 11
You can follow the steps below to get the Windows Fax and Scan installed or enabled in Windows 11.
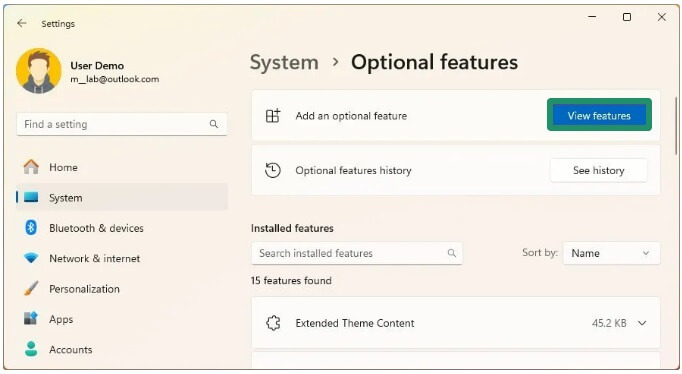
- First, click the Start button on the Taskbar and type Optional Features in the search bar that appears.
- Next, click Optional Features, i.e., the first search result.
- Once the Optional Features page appears on your screen, click the View Features button next to add an optional feature.
- Click See Available Features to load the complete list of features you can add to Windows 11.
- Next, scroll down and select Windows Fax and Scan from the list of available optional features.
- Click the Next button.
- On the confirmation page, click Add.
- Wait for the Windows Fax and Scan download to complete.
- Once the download and installation are complete, restart your computer.
After restarting your computer, you can search for the Windows Fax and Scan app in Windows 11 to find it. Next is how to set it up on your computer.
How to Set Up Windows Fax and Scan
As mentioned before in this article, you need a fax modem to set up and use Windows Fax and Scan in Windows 11. If you have a built-in fax modem, you are good to go. However, if you do not have an internal fax modem, you can find external fax modems, often as a card you can install into the PC’s PCI slot or a USB device.
When choosing an external modem, check the manufacturer’s manual, plug the modem into your computer’s USB port, ensure you install the drivers if the modem comes with a driver CD, and shut down the computer and install the modem card (if you have one) in an available PCI slot and restart the computer. You can seek professional help to avoid damaging your PC if you are unsure.
After setting up the fax modem, you also need to link a phone line to your computer through the fax modem. To do so, connect a landline to your PC in the appropriate jack, or the jack present on the external fax modem.
Once you are done with the fax modem and phone line setup, you can follow the steps below to set up Windows 11 Windows Fax and Scan.
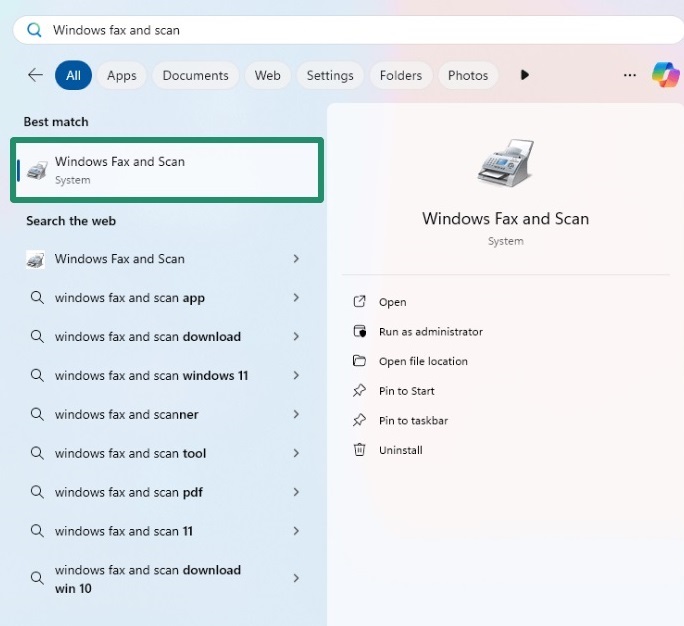
- First, click the Start button and type Fax and Scan in the search bar.
- Next, choose Windows Fax and Scan from the search results.
- Once the Windows Fax and Scan app opens, navigate to the Tools menu.
- Choose Fax Accounts from the Tools menu.
- Next, click Add in the Fax Accounts window.
- Once the Fax Setup dialog box appears, click Connect to a fax modem.
- After connecting the fax modem to your computer, the necessary Windows Fax and Scan driver should install automatically. However, check the fax modem manual for correct installation if the driver is not installed automatically.
Once you set up the fax modem and complete the installation, choose whether the phone line will answer calls automatically or manually.
If you choose the automatic option, the Windows Fax and Scan app will automatically answer calls and receive faxes. If you select the manual option, you will need to manually choose Receive a Fax Now in the application each time you want to receive a fax.
To send a fax with Windows Fax and Scan, you can follow the path New Fax>recipient’s fax number in the “To” field>cover page>Subject>your message>add any additional documents or media you want to share through the toolbar at the top>Send.
However, if you experience problems with the Windows Fax and Scan download/enabling it or its use, you can check the section below for fixes to common issues.
Also know: Best Open-Source Vulnerability Scanners & Tools
How to Troubleshoot Windows Fax and Scan
You can find solutions to the common Windows Fax and Scan problems below.
Can’t find Windows Fax and Scan
If you cannot find Windows Fax and Scan, it is possible you are using the Windows Home Edition. Windows Fax and Scan is often unavailable in this edition of Windows 11. Therefore, it is essential to confirm that your operating system is updated to the latest version. If the feature remains absent, consider upgrading to Windows Pro or consult a reliable third-party fax and scan application compatible with Windows Home.
Windows Fax and Scan not found error
If the Windows Fax and Scan feature is not found, you can follow the steps below.
- Right-click the Start button and select Windows PowerShell (Admin).
- Next, copy and paste dism /Online /Add-Capability /CapabilityName:Print.Fax.Scan~~~~0.0.1.0 in the PowerShell window and press Enter.
“Server busy” or “could not complete scan” error
If you encounter “Server busy” or “could not complete scan” errors while using Windows Fax and Scan, restart your computer, check the scanner connection, and update Windows.
However, if your issue remains unresolved, you can seek expert assistance. Consider reaching out to Microsoft support for help with Windows faxing and scanning issues.
That’s all for our complete Windows Fax and Scan download and setup guide. Hope it helps!
