Windows Security signatures are digital fingerprints that verify the integrity and authenticity of various software components, such as drivers and updates, to ensure they have not been tampered with. These signatures must be up-to-date to ensure your antivirus, including Microsoft Defender, effectively detects and protects against the latest malware threats. While Microsoft Defender generally updates these signatures automatically, you may need to update Windows Security signatures manually on Windows.
The situations when you are required to update Windows 10/11 Windows Security signatures manually may include troubles with Windows Update or the system missing recent security updates, the need to update your system offline, or other specific scenarios where an automatic update does not work.
However, if you need help performing manual Windows Security signature updates, this article is for you.
In this article, you are going to learn how to update Windows Defender signatures manually in the quickest and easiest ways possible.
However, first let’s clear up the basics and any confusion you may have about Windows Security Signatures.
What Are Windows Security Signatures
Imagine walking on a street. You bump into a masked person, and suddenly their mask falls off, exposing their face, reminding you of the wanted criminal poster you saw the other day. That poster is how you identify the person as a bad actor and hand them over to the police.
Just like you need a poster (a photo/sketch) of wanted criminals to identify them, Windows Defender needs virus definitions or malware definitions to recognize known threats. These virus or malware definitions are called Windows Security Signatures, helping Windows detect and neutralize various types of threats, such as viruses, ransomware, trojans, etc.
These security signatures may include digital signatures for the boot process (such as bootloader, UEFI, and kernel) to ensure authenticity and integrity, and signatures that antivirus software uses, such as virus definition types, spyware definitions, network inspection signatures, behavioral analysis patterns, and rootkit detection data to identify and block malicious files and network traffic.
While these signatures are automatically updated, you may, at times, need to update them manually. Let’s explain that next.
When to Update the Windows Security Signatures Manually
Generally, these signatures update automatically several times a day. However, you may need to update them manually in certain circumstances, such as a stuck Windows update, your system being brand new and vulnerable to threats, and when it is necessary to apply a specific update immediately. Below, we look at all these situations.
- Automatic updates not working: You can ensure that your system is protected from threats by updating Windows Security Signatures manually if they are not updating automatically.
- New Windows installation: Newly installed systems are vulnerable, as the installation image may not contain the latest definitions. Hence, manual updates ensure system protection.
- Apply a specific update: If a critical threat comes and you want to protect your system without waiting for the next automatic update cycle, you can manually update the Windows Security Signatures.
Now that you understand when you may need to update your Windows Security definitions manually, take note of the following prerequisites before proceeding with the update.
Prerequisites to Update the Windows Security Signatures Manually
You must ensure the following to update the Microsoft Defender signatures manually.
- Administrator rights: Ensure you have administrator privileges by typing “cmd” in Windows search, right-clicking Command Prompt in search results, and selecting “run as administrator” from the on-screen menu.
- Correct update file: You must download the correct security intelligence update file for your system’s architecture (32-bit or 64-bit) from the Microsoft Security Intelligence Portal.
- Working internet connection: You need a good network connection to download the update files from the Microsoft website.
- Verified DNS settings: Your DNS settings must be configured correctly if you are updating the Windows Security Signatures on a server or complex network.
That’s all for the Windows Security Signatures basics. Let’s now help you update them on your computer.
Methods to Update Windows Security Signatures Manually Windows 10/11
You can follow any of the following methods, depending on your convenience, to update Windows 11/Windows 10 Windows Security signatures manually.
Method 1: Use the update functionality of Microsoft Defender
You can update Microsoft Defender using the built-in update tool to download and install the update for Windows Security signatures manually on Windows. While this method may not work if you are already experiencing problems with Windows Update, below is how to try it.
- First, right-click the Windows icon on the taskbar and choose Settings from the menu that appears.
- Once the Settings window appears, click on the Update & Security settings. If you are a Windows 11 user, choose Privacy & Security.
- In this step, choose Windows Security from the left panel of the on-screen window.
- Next, click Virus & Threat Protection.
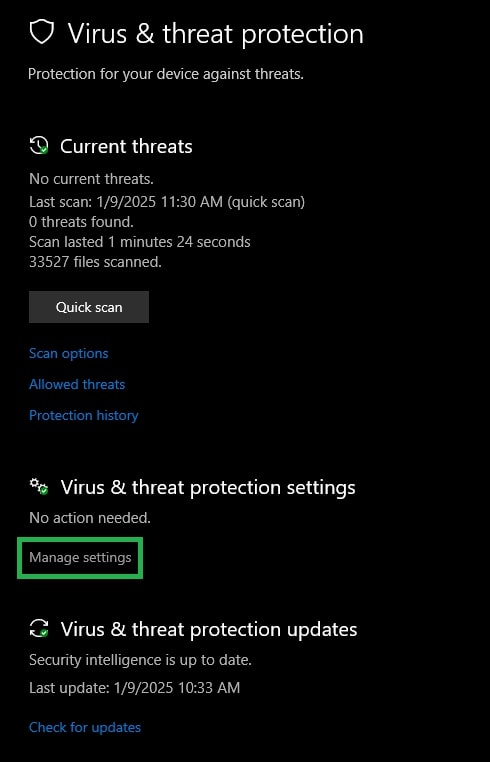
- In this step, choose the option to Check for Updates from the Virus & Threat Protection Updates section.
- Wait until Windows downloads and installs the available updates.
- Lastly, restart your computer to allow the updated Windows Security signatures to take effect.
Also know: How to Activate Windows Security on Your Device
Method 2: Update Windows Security signatures manually using Windows PowerShell
You can use a unique PowerShell command to update Windows 10/Windows 11 Security signatures manually. Here is how.
- In the first step, right-click the Windows icon on the taskbar and select Windows PowerShell (Admin) from the options on your screen.
- Once the Administrator PowerShell appears, type or copy and paste the following command and then press Enter.
Update-MpSignature
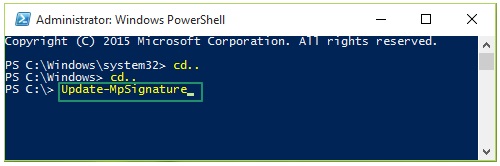
- Lastly, wait for the process to complete and restart your computer after it completes.
Method 3: Update Windows Security signatures manually through the Microsoft web page
Microsoft has a webpage called “Microsoft Defender Update for Windows Operating System Installation Images,” containing three Defender environment components. These components include the platform version (signatures for a specific Windows 10/11 edition), engine version (specific anti-malware engine version), and security intelligence version (current security intelligence updates). All these versions get periodic updates that you can download and install by following the steps below.
- First, navigate to the Microsoft Defender Update for Windows Operating System Installation Images page.
- Next, click on the link to obtain the update, depending on whether you have a 32-bit, 64-bit, or ARM64 operating system.
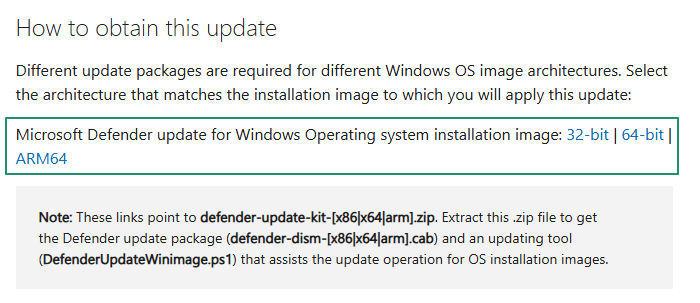
- In this step, extract the downloaded .zip file to obtain the Defender update package (defender-dism-[x86|x64|arm].cab) and an updating tool (DefenderUpdateWinimage.ps1).
- After extracting the downloaded file, right-click on the Windows icon and select Windows PowerShell (Admin).
- Once the Windows PowerShell (Admin) appears, type or copy and paste the following command and press Enter.
PS C:\> DefenderUpdateWinImage.ps1 -WorkingDirectory <path> -ImageIndex ImageIndexNumber -Action AddUpdate -ImagePath <path_to_Os_Image> -Package
Method 4: Update Windows Security signatures manually via Microsoft Update Catalog
Another way to update Windows Security signatures manually on Windows is through the Microsoft Update Catalog. You can search the current anti-malware platform updates on the Update Catalog and then download and install these updates by following the directions below.
- First, visit the Microsoft Update Catalog.
- Next, type Microsoft Defender in the search bar on the Microsoft Update Catalog and press Enter.
- In this step, click on the Download button for the most recent update. 0
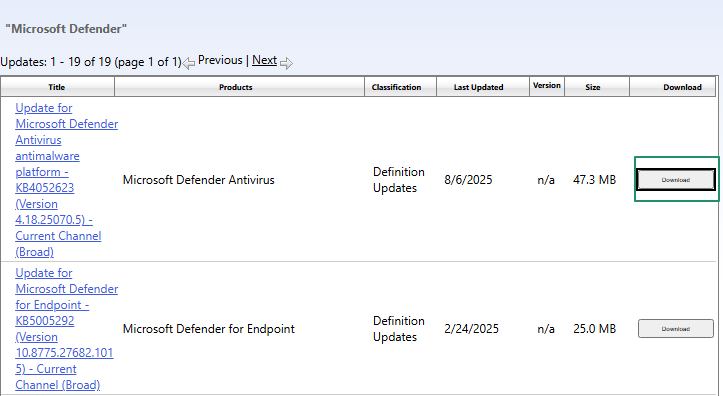
- Next, click on all links that appear on your screen to download the update file.
- You can now double-click on the downloaded files and follow the on-screen instructions to complete the manual Windows Security signature update.
Method 5: Manually Trigger Defender Updates Using Task Scheduler via Control Panel
If you are looking for another way to manually update Windows Defender signatures without using PowerShell or Command Prompt, you can do it through the Control Panel using Task Scheduler. This method is useful if other update methods are not working or if you prefer using built-in Windows tools. Follow the steps below:
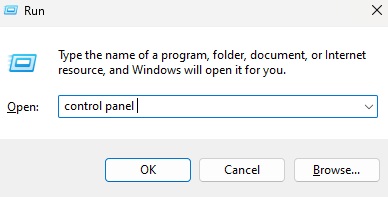
- Press Windows + R to open the Run dialog box.
- Type Control Panel and press Enter.
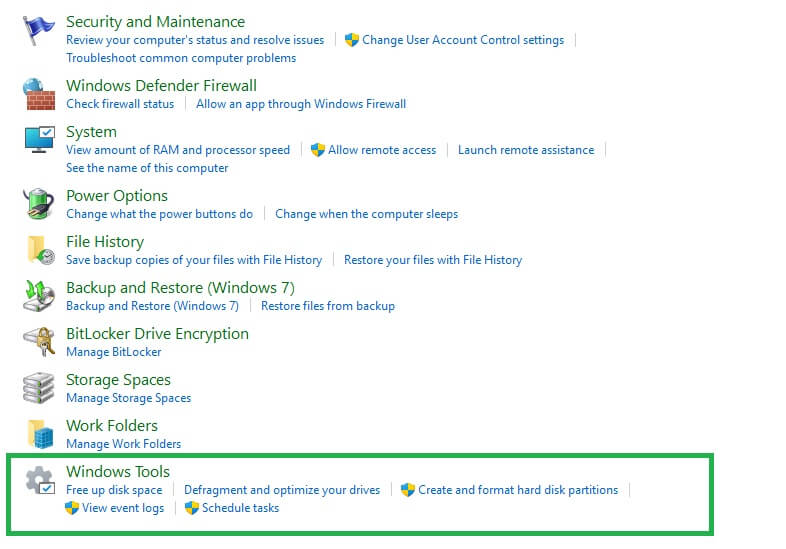
- In the Control Panel, go to System and Security > Windows Tools.
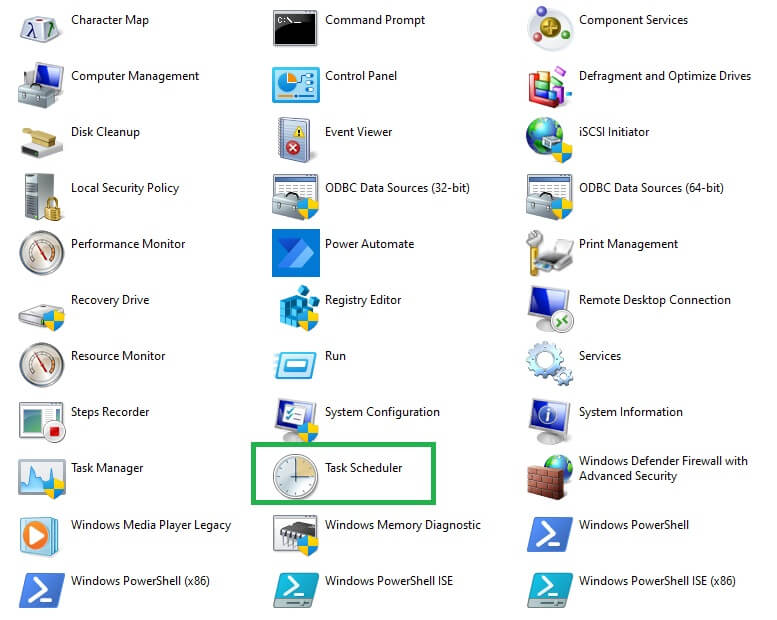
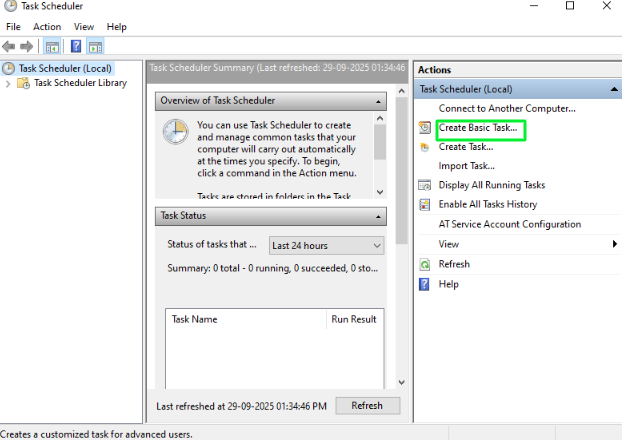
- Now double-click on Task Scheduler.
- On the right side of the Task Scheduler window, click Create Basic Task.
- Give a name like “Manual Defender Update” and click Next.
- Choose one time and click Next. This ensures the task only runs once (manually triggered).
- Set the time you want the update to run (you can set the current time), then click Next.
- Select Start a program, then click Next.
- In the Program/script box, enter the following path:
- C:\Program Files\Windows Defender\MpCmdRun.exe
In the Add arguments field, type the following:
- -SignatureUpdate
- Click Next, review your settings, and then click Finish.
- Now, your task is ready. To manually run it.
- In the Task Scheduler Library, find your task.
- Right-click on it and select Run.
This will immediately start the update process for Windows Defender signatures using the internal updater.
Also know: How to Fix Kernel Security Check Failure Error in Windows 10,11
Method 6: Update Windows Security Signatures Using Microsoft PC Manager (Beta)
Another convenient way to update Windows Security signatures is through the Microsoft PC Manager (Beta) tool. This is a new utility from Microsoft that helps manage system performance, cleanup, and security all in one place. You can download the setup file from the official Microsoft PC Manager webpage and install it by running the downloaded MSPCManager.exe file.
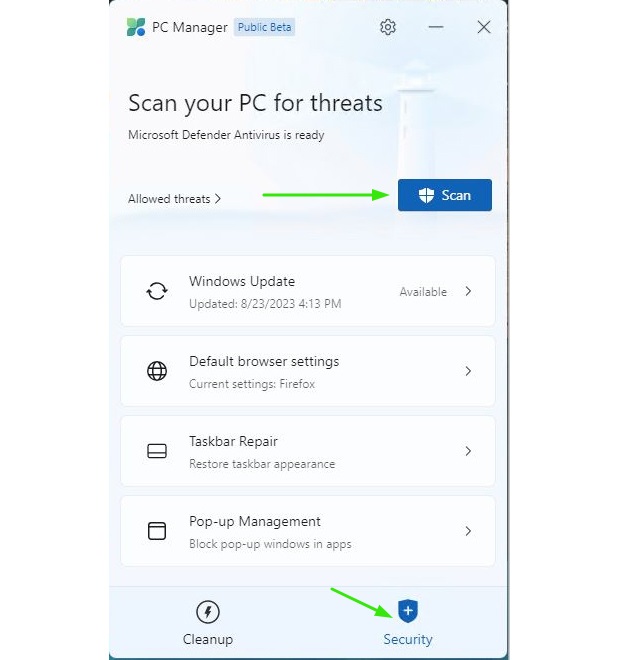
Once downloaded, install the MSPCManager.exe file and open the app from the start menu (simply type “PC man” to find it quickly). After launching the program, click on the Security button located at the bottom-right corner of the window. Next, choose the scan option from the top-right corner.
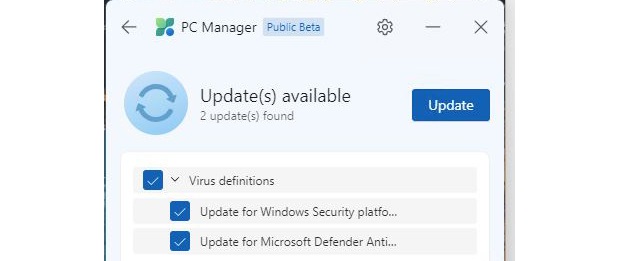
Under the Windows Update section, you can view and install any pending updates for your PC, including updates for the anti-malware platform and Windows Security signature. This method provides a simple way to manually check and apply updates without using PowerShell or the Control Panel.
However, if Windows Update itself is not functioning properly, this method may not work as expected since Microsoft PC Manager relies on Windows Update services to download and install updates.
Windows Security Signatures Updated Manually
This is how to update Windows Security signatures manually on Windows 10/11 to protect against the latest malware and cyber threats. You can follow any method from the guide above, depending on which of these methods works best for you.
However, if you need help updating Windows Security signatures or have any feedback about this article, you can leave it in the comments section. We will be glad to address your queries and suggestions.
FAQs
Q.1 When should I update Windows Security signatures manually?
Ans. Manual updates are helpful when automatic updates fail due to issues with Windows Update, offline usage, or missing recent security patches. If your system shows outdated threat protection or you notice malware detection issues, it is a good idea to update Windows Security signatures manually using the methods shared above.
Q.2 What is the PowerShell command to update Windows Security signatures?
Ans. To update Windows Security signatures manually using PowerShell, open Windows PowerShell as Administrator and type the following command:
- Update-MpSignature
Press Enter, wait for the process to finish, and then restart your computer. This method is quick and does not require downloading files manually.
Q.3 Can I update Windows Security signatures offline?
Ans. Yes, you can update Windows Security signatures offline by downloading the required update files from the Microsoft Defender Update page or the Microsoft Update Catalog. Once downloaded, install the updates manually on your system by following the step-by-step instructions shared in Methods 3 and 4 of this guide.
Q4. How do I manually update the Windows Security signatures?
To manually update your Windows Security signatures, right-click on the Start button, click Settings, click Update & Security (if Windows 11, click Privacy & Security), select Windows Security, click Virus & Threat Protection, click Check for Updates, wait until Windows installs the available updates, and then restart your computer. For more details and alternative methods, refer to the guide above.
Q5. How often should antivirus signatures be updated?
Ideally, antivirus signatures on Windows update automatically every one to four hours. If this does not happen with your antivirus signatures, you can update them manually.
