Stuck with websites not loading, long loading times, or messages like “Server not found” or “No internet?” It is not uncommon to experience issues like these if your DNS server is not responding.
A DNS server not responding is a typical error that occurs when your device fails to communicate with the Domain Name System (DNS) server, which translates website names into their corresponding IP addresses, thereby blocking access to the internet or specific websites.
However, there is nothing to panic about if the DNS server isn’t responding, as the issue is easily fixed by switching to another browser, connecting with another device, booting the computer in safe mode, performing network connection troubleshooting, updating the network adapter driver, and other quick and easy fixes in this article.
Before explaining the solutions in detail, it is important to answer the question: Why is my DNS server not responding? Knowing the answer to this question will help you troubleshoot the problem correctly.
Why Is the DNS Server Not Responding
Various factors, such as network issues like router problems, firewall or antivirus interference, outdated DNS cache, misconfigured network settings, and the DNS server being down or overloaded, may have contributed to the DNS not responding problem on your computer. Below is a detailed look at all these causes of the issue you are experiencing.
- Network connection problems: Network connectivity problems, like incorrect network or server settings or a poor signal, may be a reason your DNS server isn’t responding.
- Hardware problems: Issues such as problems with hardware connected to your PC, for instance, problems with modems, routers, and network adapters, may result in an unresponsive DNS server.
- Interference from antivirus programs: Your antivirus software, VPN, or firewall may interfere with the communication between your system and the DNS server, causing issues like DNS not responding.
- Incorrect DNS server records: If the correct DNS server address for a website is not available, it may lead to problems like the ones you are trying to solve.
- Outages of the DNS server: DNS server outages, occurring due to technical issues or high traffic, may result in the DNS server not responding, with no internet problem.
Now that you know why the issue may have occurred, let’s answer the burning question: How do I fix the DNS server that is not responding?
Fixes for the DNS Server Not Responding Problem
Fixing an unresponsive DNS server is simple. All you have to do is follow the fixes below sequentially until the problem is resolved.
Fix 1: Switch to another browser
Browser-specific issues may have caused the DNS server not responding. Hence, you can try a browser other than your regular web browser. For example, if you generally use Google Chrome, you can choose from one of the best browsers for gaming or otherwise, such as Opera GX, Wave, Mozilla Firefox, Microsoft Edge, Brave, Maxthon, and Vivaldi.
Fix 2: Try connecting with another device
If switching the browser does not solve the problem, you can try connecting to a second device (if you have one) to access the desired website. If the website opens after connecting to a different device, it is clear that the problem is on your side.
Also know: Best DNS Servers for Gaming
Fix 3: Boot your computer in safe mode
The safe mode boots your system with limited files and resources, eliminating the possible causes of the DNS server not responding. Hence, below is how to access safe mode on your computer.
- First, click on the Start button on the Taskbar and then hover over the power icon.
- Second, press and hold the Shift key while clicking on the Restart option.
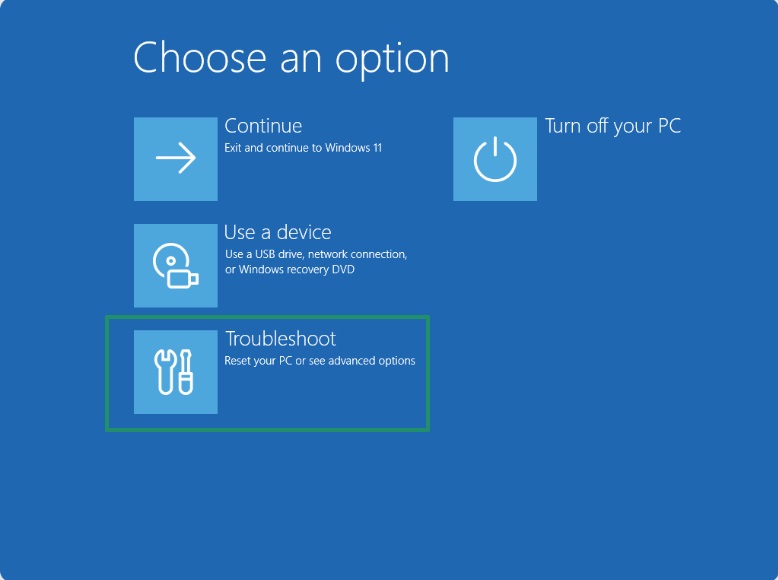
- Next, click on Troubleshoot when you are prompted to choose an option.
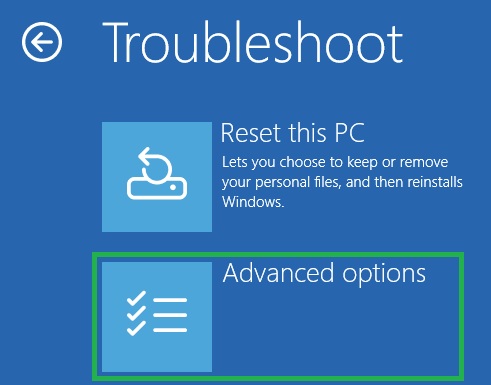
- From the troubleshooting options, select Advanced options.
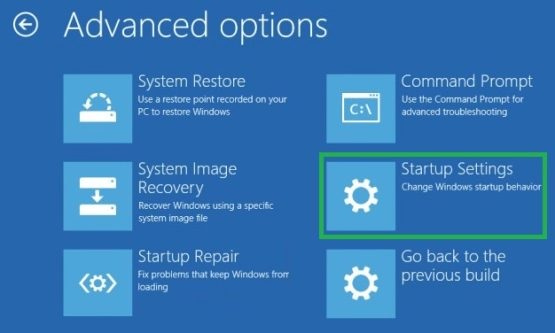
- In this step, choose Startup settings from the Advanced options and then click on Restart.
- Once your PC restarts and a list of options appears, press F5 on your keyboard to enter Safe mode with networking.
- You can now open the website you were trying to access.
Fix 4: Perform network connection troubleshooting
Windows offers a built-in troubleshooting tool for various network connection problems. You can use this tool to find and fix network issues, including when the DNS server is not responding. Here is how.
- In the first step, click on the Start button and then type Control Panel in the search bar that appears.
- Second, choose the Control Panel from the search results to open it.
- Once the Control Panel appears, change the view to Category by selecting it from the View By dropdown menu.
- In this step, choose Network and Internet from the on-screen options and then navigate to the Network and Sharing Center.
- Next, select the option to Change your networking settings from the left pane of the on-screen window, and then click on Troubleshoot problems.
- You can now go to Additional troubleshooters, click Internet Connections, and then click on the Run the troubleshooter button.
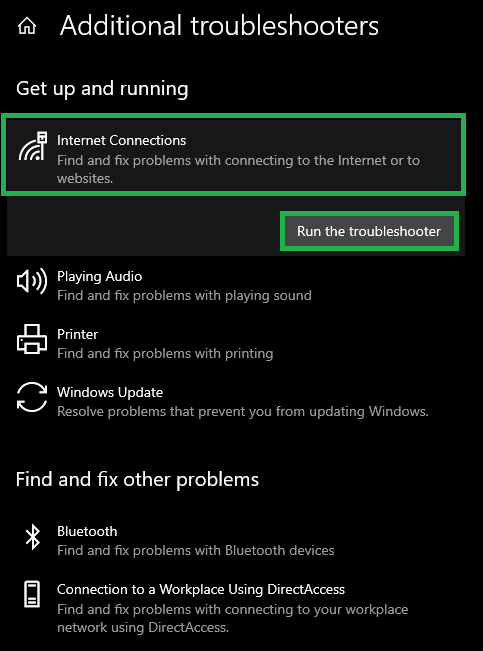
- In this step, follow the on-screen instructions to fix the detected issues and similarly run the troubleshooter for your network adapter.
- Lastly, restart your computer to complete the network troubleshooting.
Fix 5: Try restarting your router
Restarting the router flushes the router cache and helps fix the problems when your DNS server is not responding. Thus, you can follow the directions below to restart your router.
- First, press the power button on your router to turn it off.
- Next, unplug the power cable to restart your PC.
- Now, wait for at least 30 seconds.
- After waiting for 30 seconds, plug in the power cable and turn on your router.
Fix 6: Flush your DNS cache
Your DNS cache may have expired or be corrupted, resulting in your computer not connecting to the appropriate IP address of the desired website, leading to the DNS not responding problem. Thus, you can follow the steps below to flush the DNS cache of your operating system to clear the expired or corrupted cache.
- Begin by accessing the Run utility using the Windows key+R key shortcut.
- Next, type cmd in the on-screen Run box and press Shift+Ctrl+Enter.
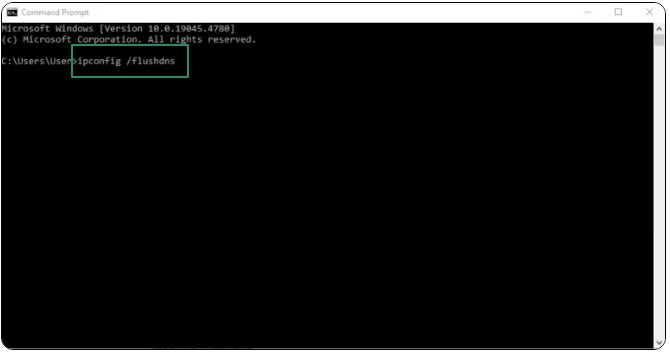
- Once the Command Prompt window appears, type or copy-paste the ipconfig/flushdns command in the on-screen command line and then press Enter.
- Lastly, restart your computer after completing the above steps.
Also know: Best Proxy Server for Free to Use
Fix 7: Update your network adapter driver
An old or outdated network adapter driver breaks the communication between your system and the network adapter, making it difficult for the system to understand and execute your instructions. Moreover, this may be a reason the DNS server isn’t responding on your computer. Hence, updating your network adapter driver by following the steps below can solve your problem.
- First, right-click on the Start button and then choose Device Manager from the options that appear.
- Once the Device Manager opens, double-click on the Network Adapters category.
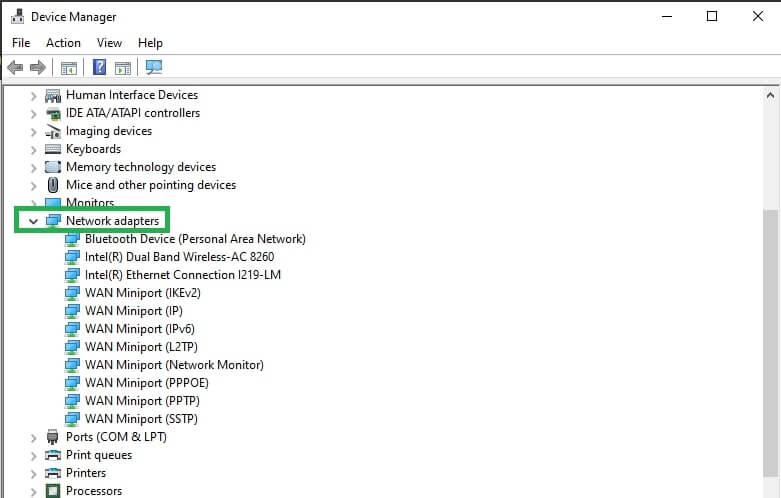
- In this step, right-click your network adapter and select Update Driver from the on-screen menu.
- Next, choose the search automatically for drivers option.
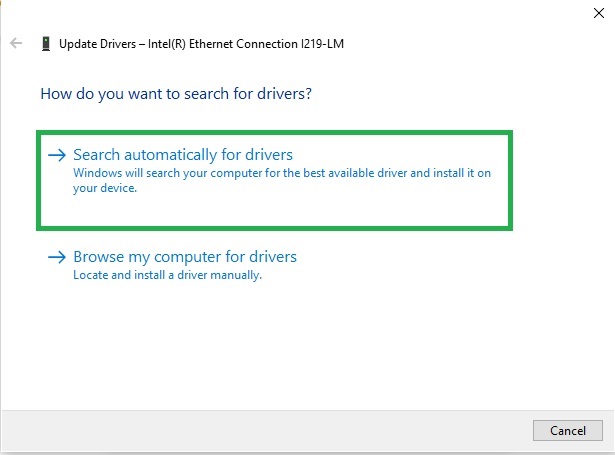
- You can now follow the on-screen wizard to download and install the latest network driver on your system.
- Lastly, restart your computer to allow the updated driver to take effect.
Fix 8: Try changing your DNS server address
While your computer obtains IP addresses automatically when you enter a domain name in the browser, it may be unable to do so if your OS does not connect to a functional DNS server, and this may cause the DNS server not responding issue. Hence, you can follow the steps below to change your DNS server address to solve the problem.
- The first step is to click on the Start button, type Control Panel in the search bar, and then click on Control Panel to open it.
- Once the Control Panel window appears, change its view to Category through the View By dropdown menu.
- Next, click on Network and Internet and then choose Network and Sharing Center.
- In this step, navigate to the View your active networks section and then select your active network.
- Next, click on the Properties button in the pop-up window on your screen.
- You can now select Internet Protocol Version 4 from the list: This connection uses the following items.
- Next, click on the Properties button.
- In this step, click on the Obtain an IP address automatically box and then select the Use the following DNS server addresses radio button.
- Next, type your desired replacement DNS server addresses in the Preferred DNS server and Alternate DNS server sections. For instance, you can set 8.8.8.8 (Google’s DNS server) as your Preferred DNS server and 8.8.4.4 as your Alternative DNS server.
- Lastly, check the Validate settings upon exit box and click OK to complete the process.
Fix 9: Deactivate your VPN, firewall, or antivirus temporarily
While VPNs, firewalls, and antivirus software protect your system from various threats online, they may also interfere with the communication between your computer and the DNS server. Hence, you may disable these security measures temporarily to solve the problem you are experiencing.
While the steps to deactivate the VPN and antivirus software vary from one software to another, and you need to check your software manual to learn how to disable it, you can go through this guide to turn off or disable the firewall in Windows 11/10.
Fix 10: Disable IPv6 on your computer
IPv6 (the most recent Internet Protocol version) routes traffic between your network and the Internet. However, since it has still not been fully adopted across all websites and devices, it may be responsible for the DNS server isn’t responding issue on your computer. Hence, below is how to solve this problem by disabling IPv6.
- First, right-click on the Network icon in the right corner of the Taskbar and then choose Open network and internet settings from the options that appear.
- Second, select Network and Sharing Center.
- In this step, choose the option to Change adapter settings from the left sidebar.
- Next, right-click your Wi-Fi connection and then select Properties from the on-screen options.
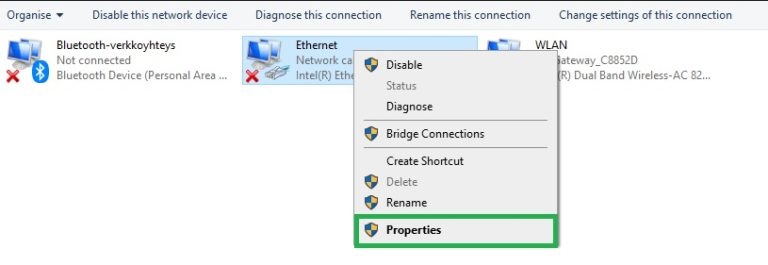
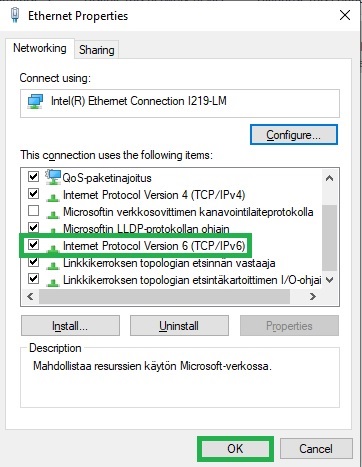
- Navigate to the Networking tab and untick the Internet Protocol Version 6 (TCP/IPv6) box.
- Lastly, click OK and restart your computer.
Fix 11: Reset your DNS settings
If all else fails, you can try resetting your DNS settings to solve the problems if your DNS server isn’t responding. Here is how.
- To begin with, use the Windows key+R key shortcut to access the Run tool.
- Next, type cmd in the on-screen Run box and press Shift+Ctrl+Enter to open Command Prompt.
- In this step, copy and paste the commands below into the Command Prompt window and press Enter after each command.
ipconfig /registerdns
ipconfig /release
Ipconfig /renew
netsh winsock reset
- Lastly, perform a PC restart to complete the process.
Also know: Best SQL Server Management Tool
DNS Server Not Responding Issue Fixed
The guide above explains how to fix the Windows DNS server not responding issue. Hopefully, these fixes solve the problem for you. However, if you come across any better solutions or have questions/suggestions/feedback about this article, please feel free to leave us a comment.
If you like this article and find it helpful, help more people solve this problem by sharing these solutions with your peers, and do not forget to subscribe to our newsletter to get such quick and simple fixes to the most annoying tech issues delivered right into your mailbox.
