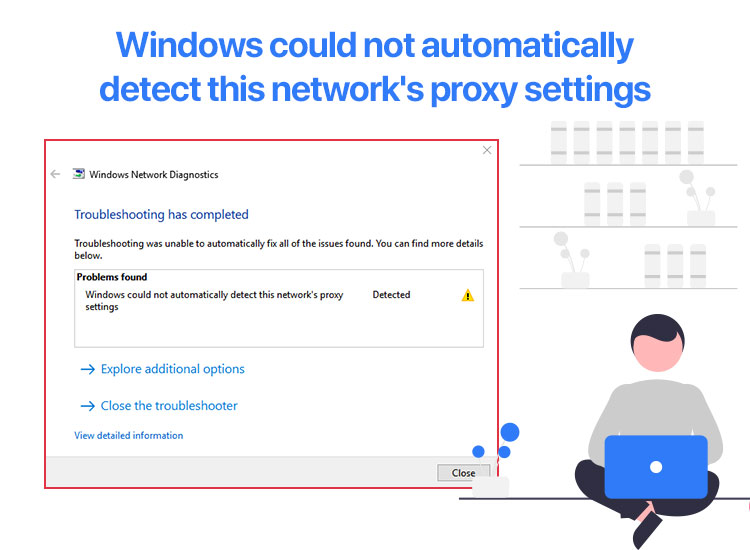
Frustrated with the “Windows could not automatically detect this network’s proxy settings” error? You are not alone in this problem. Many users have reported this annoying problem when connecting to a proxy server, owing to misconfigured network settings, issues with the network adapter, or outdated drivers.
Hence, this article presents a quick and easy guide with the most suitable solutions for the “Windows could not detect this network’s proxy settings” error. Let us dive right into them without wasting valuable time.
Fixes for “Windows Could Not Detect Proxy Settings” Error
You can apply these fixes in order (beginning with the first solution and moving down the list of fixes) until the “Windows could not detect proxy settings” issue disappears.
Fix 1: Restart your computer
Before moving to complex solutions, restarting your computer is the easiest thing to do to fix the “Windows could not detect proxy settings” error. Hence, you can follow these steps to restart your computer.
- First, click the Start button on the taskbar.
- Next, click the power icon (a circle with a vertical line).
- Lastly, click Restart and let your computer reboot.
Also know: What is an ISO File in Windows and How to Download It for Windows 7/10/11?
Fix 2: Restart your router
If restarting your computer did not work, restarting your router may help fix the “Windows could not detect this network’s proxy settings” error. Hence, here are the steps to reboot the router.
- First, locate your router’s power button and turn off the device.
- Wait for at least 5 minutes before powering on your router.
Fix 3: Restart your network adapter
Since network adapter problems may have contributed to the “Windows could not detect proxy settings” error, restarting the network adapter is a quick workaround you can try. Here is how to do it.
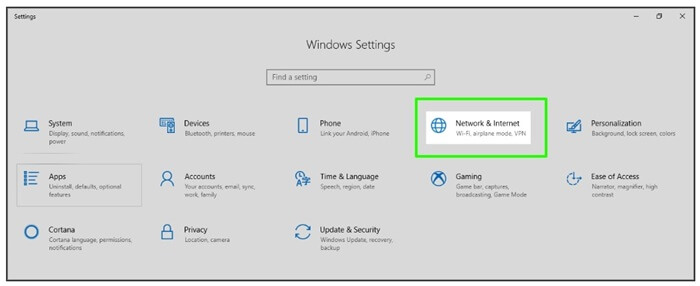
- First, use the Win+I keyboard shortcut to navigate to your computer’s settings.
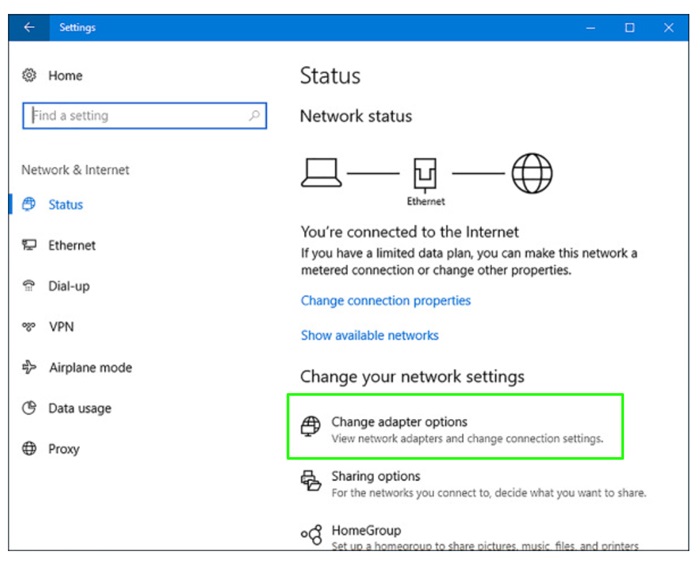
- Next, go to the Network & Internet settings.
- In this step, click Change adapter options.
- Next, select your network connection.
- Click the Disable this network device option.
- After waiting for 15 to 30 seconds, click the Enable this network device button to re-enable your network adapter.
Also know: How to Fix DISM Error 0x800f081f on Windows 10 and 11
Fix 4: Check your proxy network settings
Since the “Windows could not automatically detect this network’s proxy settings” error relates to the proxy settings, verifying the proxy settings is a logical solution. You can follow these steps to check the proxy settings.
- First, launch Windows settings using the Win+I keyboard shortcut.
- Next, navigate to the Network & Internet settings.
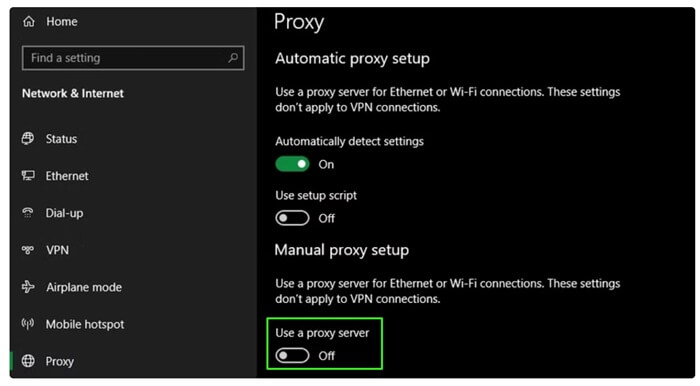
- In this step, click Proxy.
- If you do not use a proxy, ensure the Use a proxy server option is off. Moreover, if the Automatically detect settings option is already enabled, leave it on.
Fix 5: Update network adapter drivers
Outdated drivers are among the top reasons for connectivity problems and may also be responsible for the “Windows could not detect proxy settings” problem. Hence, you can follow these directions to update the network drivers on your computer.
- First, right-click the Start button on your taskbar and choose Device Manager.
- Once the Device Manager appears, locate and expand the Network adapters category by double-clicking on it.
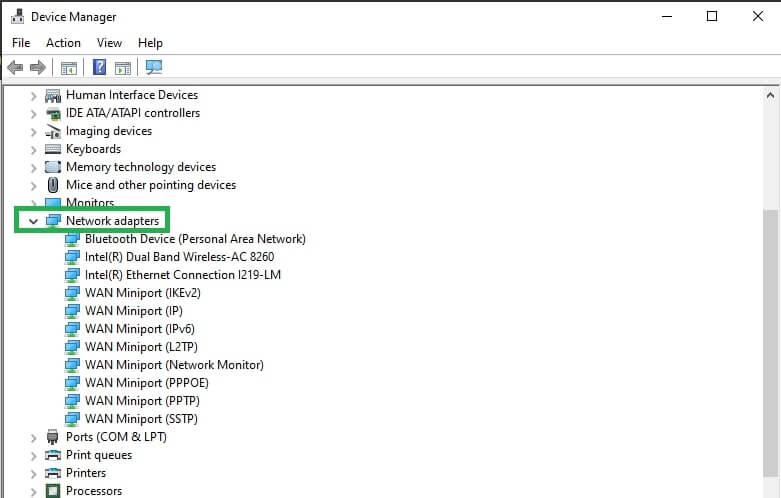
- Right-click your WiFi or Ethernet network adapter and select Update driver from the context menu.
- Choose the option allowing Windows to search automatically for drivers.
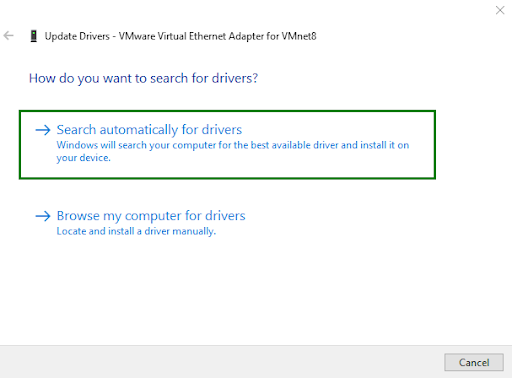
- Wait for the driver update process to complete.
- Lastly, restart your computer after completing the above steps.
Fix 6: Check your DNS and IP server addresses
Manually obtaining the IP and DNS server addresses may be a reason your computer runs into the “Windows could not detect this network’s proxy settings” error. This is so because when a pre-configured address is entered, the computer only uses that address to access the internet, and if the address does not work, it leads to problems.
Hence, below is how you can check and allow your computer to get the IP and DNS address automatically.
- First, use the Win+R keyboard shortcut to launch the Run utility.
- Next, input Control in the Run box and press Enter to open the Control Panel application.
- Once the Control Panel opens, set the view mode to Category.
- Next, click Network and Internet.
- In this step, navigate to the Network and Sharing Center.
- Next, choose the Change adapter settings option.
- If using a wireless network, right-click WiFi. If using a wired or LAN connection, right-click Ethernet.
- Choose Properties from the on-screen context menu.
- Next, click Internet Protocol Version 4 (TCP/IPv4).
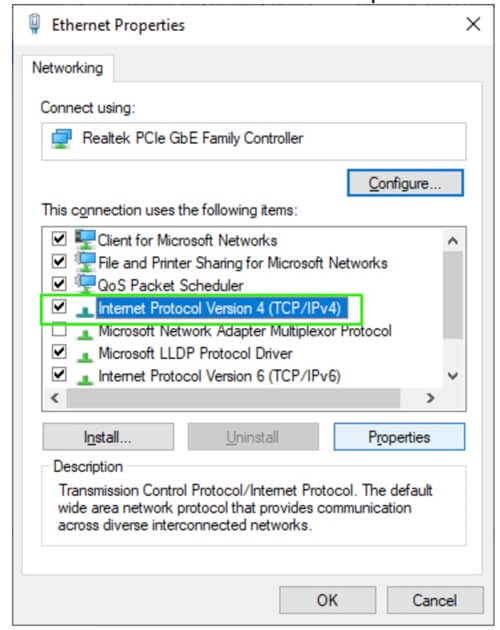
- In this step, click Properties.
- Choose to obtain an IP address automatically, and obtain a DNS server address automatically.
- Lastly, click OK to exit the window.
Also know: Fixed: Something Went Wrong 1001 Error on Windows 11 and 10
Fix 7: Perform network troubleshooting
Windows boasts a built-in internet connection troubleshooting utility that might help you troubleshoot issues like “Windows could not automatically detect this network’s proxy settings.” You can follow these steps to utilize this network troubleshooter to solve the problem.
- First, use the Win+I keyboard shortcut to open Windows settings.
- Next, navigate to System settings.
- Choose Troubleshoot from the system settings menu.
- Next, navigate to the other troubleshooters.
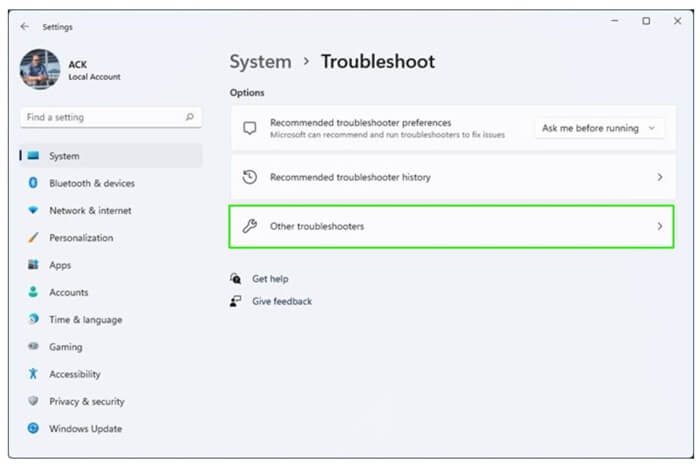
- In this step, scroll down to and click on Network Adapter.
- Click Run to begin the troubleshooting.
- Lastly, follow the on-screen instructions after completing the above steps.
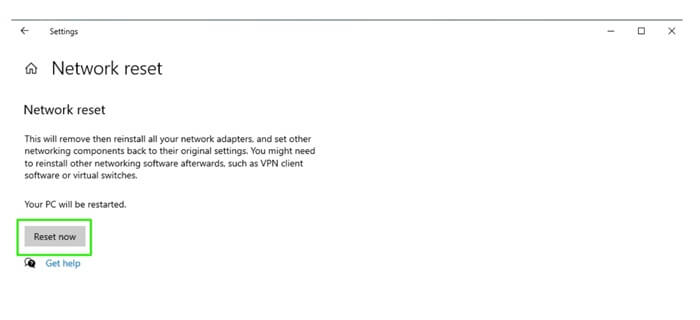
Fix 8: Reset network settings
If none of the above solutions did the trick for you, you may try resetting your network settings. Network settings reset restores the proxy servers to the default settings and roll back network configurations to their initial settings. Hence, after closing all the background applications, you can follow these steps to reset the network settings.
- First, press the Windows and I keys simultaneously to launch Settings.
- Next, choose the Network & Internet settings.
- In this step, click Advanced network settings.
- Scroll down to More settings and click Network reset.
- Lastly, click Reset now, wait for the process to complete, and restart your computer.
Fix 9: Clean boot your computer
Third-party applications may interfere with your network connection and cause issues like “Windows could not detect this network’s proxy settings.” Hence, performing a clean boot can help fix the problem. Here is how to do it.
- First, use the Win+R hotkey to launch the Run utility.
- Next, type msconfig in the on-screen Run box and press Enter.
- Once the System Configuration window opens, navigate to the Services tab.
- In this step, select the Hide all Microsoft services option.

- Next, click Disable all.
- In this step, navigate to the Startup tab and click Open Task Manager.
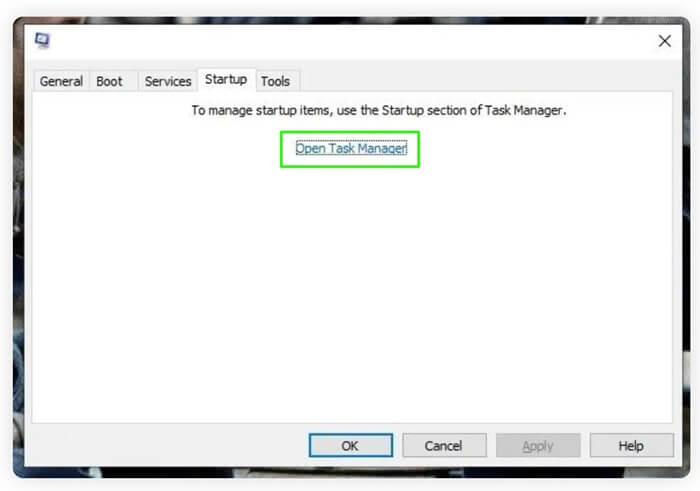
- Once Task Manager opens, right-click each startup item and choose Disable.
- Exit the Task Manager.
- Return to the System Configuration window and click OK.
- Lastly, restart your computer to complete the task.
Also know: How to Fix bootrec /fixboot Access is denied Error in Windows 11
“Windows Could Not Automatically Detect This Network’s Proxy Settings” Error Fixed
That is all for fixing the “Windows could not detect proxy settings” error. We hope one of these solutions will solve the problem for you. However, if you have any questions or feedback about this guide, do not hesitate to let us know through the comments section. Also, if you liked this article, please give us a thumbs up by subscribing to our posts so we can continue to work hard to make tech easy.
