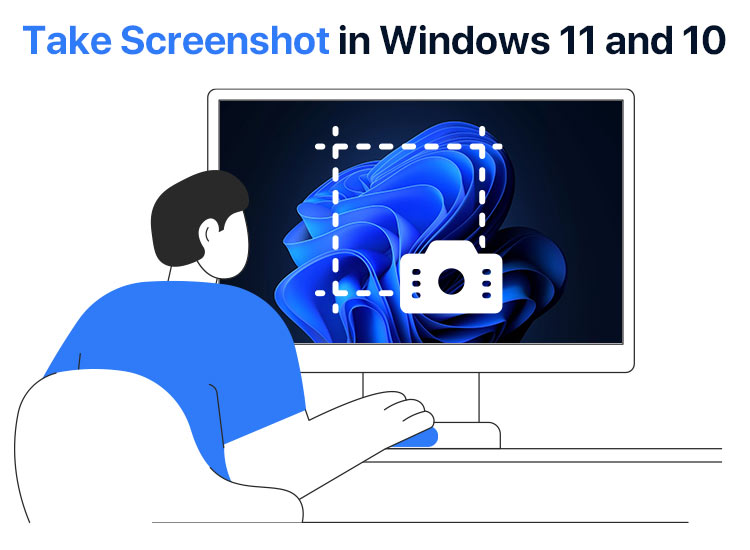
Are you unable to save important information instantly on your computer (such as payment receipts, transaction IDs, or purchase confirmations), trying to level up your presentations with training sessions highlighting steps or procedures, wanting to make detailed notes when attending online classes, or simply wishing to capture your memorable moments? Then, learning how to take a screenshot in Windows 11 can be helpful.
Screenshots in Windows 11 capture all the desired information with one click, helping you take your presentations and learning journey to the next level. They can also save your special moments from video calls, social media posts, and record your gaming scores.
Hence, this article walks you through multiple quick and easy methods to take a screenshot on Windows 11. Moreover, it touches upon how to take better screenshots and solve common problems. Let’s get started.
How to Take Screenshot on Windows 11
You can capture a screenshot in Windows 11 with the shortcut keys Windows+Shift+S, Windows+PrtSc, or Alt+PrtSc (each of these shortcuts has a specific purpose). Alternatively, you can use the Snipping Tool or Game Bar to take screenshots. The following sections explain all these methods in detail.
Method 1: Use the Windows 11 screenshot shortcut key
The Windows 11 screenshot shortcuts, Windows+Shift+S, Windows+PrtSc, and Alt+PrtSc can come in handy to take a screenshot. Below is when and how to use these shortcut keys.
Windows+Shift+S shortcut to take a screenshot in Windows 11
The Windows+Shift+S Windows 11 screenshot shortcut opens the snipping tool to take screenshots. You can follow these steps to capture a screenshot with this shortcut.
- First, apply the Windows+Shift+S shortcut, i.e., press the Windows, Shift, and S keys on the keyboard simultaneously.

- Next, choose the type of screenshot you want to take. The following are the four types of screenshots you can capture.
- Rectangle: Allows you to capture a desired area.
- Window: Captures the active window.
- Full screen: Take a screenshot of the whole screen.
- Freeform: Lets you drag and draw any desired shape around the section you wish to capture.
- Now, click on the notification that appears on the lower-right side if you wish to crop the image, mark up the screenshot with a highlighter or pen, or draw straight lines with a ruler. Once done, you can save the image in your desired location and format (GIF, PNG, etc.). If you miss the notification, you can access it through the notification panel.
Note: If you do not wish to paste the screenshot into another application without editing it in the snipping tool, instead of clicking on the screenshot notification, you can directly copy and paste the image from the clipboard into the desired application.
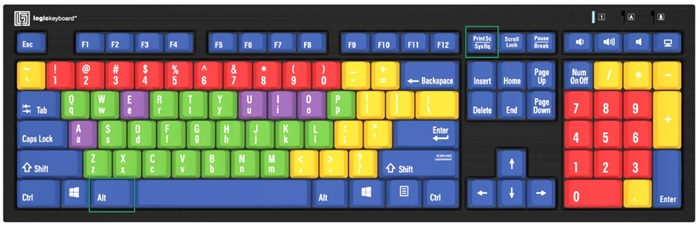
Windows+PrtSc shortcut to take a screenshot in Windows 11
You can use the Windows+PrtSc or Windows+Print Screen shortcut to take a screenshot of the entire screen on Windows 11. Below is how to do it.
- First, locate the PrtSc or Print Screen key in the top-right section of the keyboard.
- Next, press the Windows key and PrtSc/Print Screen keys simultaneously to capture and save a screenshot on the clipboard.

- Open Microsoft Paint, Adobe Photoshop, or another image editing application.
- Now, press the Ctrl and V keys simultaneously to paste the screenshot into the application.
- Lastly, make the desired edits or save the image in any format (JPEG, GIF, PNG, etc.).
Alt+PrtSc shortcut to take a screenshot in Windows 11
The Alt+PrtSc shortcut captures only the active window. Below is how to take a screenshot in Windows 11 of the currently active window using the Alt+PrtSc keyboard shortcut.
- First, press the Alt key and the PrtSc/Print Screen key at the same time to take a screenshot and save it to your clipboard.
- Next, open Microsoft Paint, Adobe Photoshop, or another image editing program that you use.
- Press the Ctrl and V keys at the same time to paste the screenshot into the image editing application.
- Lastly, perform the required edits or directly save the image in any desired format, such as GIF, JPEG, PNG, etc.
Quick Tip: If your computer does not have the PrtScn Windows 11 screenshot shortcut key, you can capture a full-screen screenshot with the Fn+Windows+Spacebar shortcut. The captured screenshot will be available in the Pictures>Screenshots folder.
Also know: How to Organize Photos Digitally on Windows
Method 2: Capture a screenshot with the Windows 11 Snipping Tool
Windows 11 has a built-in Snipping Tool that lets you capture screenshots and record your screen. Moreover, with this tool, you can crop screenshots, highlight important sections with pens or highlighters, or use text actions to add more details to the screenshot.
Additionally, this tool allows you to record a video snip, save, share, and print your screenshots, and even delay your screenshots to capture drop-down menus. You can follow the steps below to use this tool.
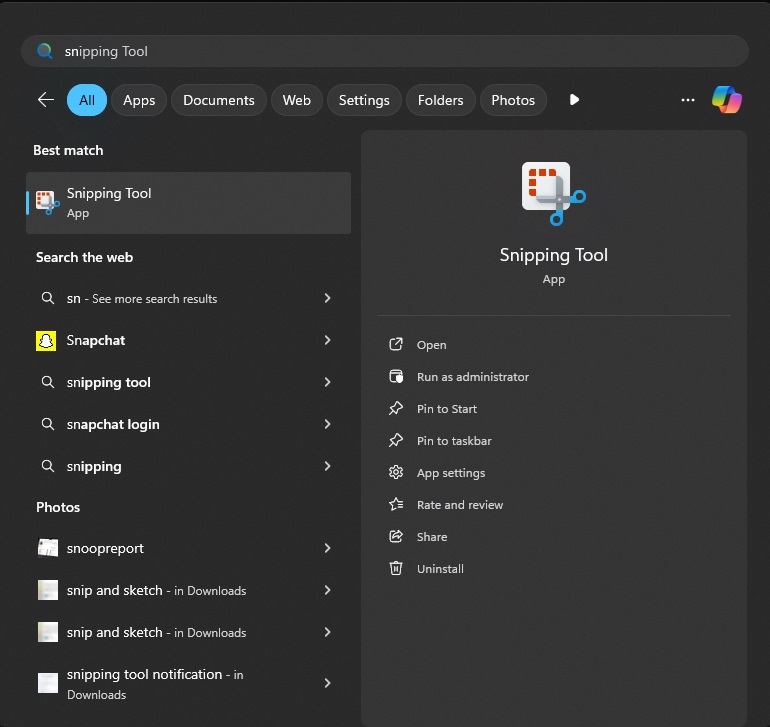
- First, access Windows search using the Windows+S shortcut.
- Second, type the Snipping Tool in the on-screen search bar and click on it in the search results.
- Once the Snipping Tool appears, you have multiple options on your screen. You can delay the screenshot by 3, 5, or 10 seconds, or choose to record a video by highlighting the portion of the screen you want to record and clicking the recording icon on the Snipping Tool window.
- To take a screenshot in Windows 11, click on the New button in the Snipping Tool.
- Choose whether you want to capture a rectangular, free-form, full-screen, or window snip.
- After taking the screenshot, you can edit it in the Snipping Tool application, share it directly from here, or save the screenshot in the preferred format (PNG, JPEG, GIF, etc.) at the desired location.
Method 3: Use Game Bar to take a screenshot in Windows 11
You can capture your screen mid-game using the Game Bar. Below are the step-by-step directions to do so.
- Begin by checking if the Game Bar is enabled on your computer through Settings>Game Bar.
- Next, apply the Windows+G shortcut to access the Game Bar.
- Once the Game Bar appears, click Capture.
- Click Capture again to take a screenshot of the game in Windows 11. You can also use the Windows+Alt+PrtSc shortcut to capture the screenshot.
All that was about taking general screenshots on Windows 11. To ace your screenshots, follow the tips in the next section.
How to Take Better Screenshots in Windows 11: Helpful Tips
- Ensure your screen does not have unwanted windows before capturing a screenshot.
- Crop out the undesirable desktop space, taskbar icons, and open tabs from the screenshot.
- Highlight the key areas in your screenshot with the built-in annotation tools to bring attention to relevant elements.
- Save your screenshots in PNG format to maintain sharp lines and text in the captured image.
- Do not stretch or compress the screenshot.
- Save the screenshot in well-organized folders for quick and easy access.
Having trouble with a screenshot in Windows 11?
Then, you can find the solution to your problem below.
Also know: What is Visual Search and How to Use it on a Windows PC
Common Screenshot Issues in Windows 11 and Their Solutions
Below are some common problems with taking a screenshot in Windows 11, with their fixes.
- Screenshot shortcut is not working: This issue may occur due to outdated or corrupted keyboard drivers. Hence, update your keyboard drivers.
- Screenshots cannot be found or are not saving automatically: Incorrect save location settings, a missing screenshot folder, or the wrong shortcut may cause this issue. Hence, use the Windows+PrtScn shortcut to save files to the Pictures>Screenshots folder automatically.
- Blurry, washed-out, or poor-quality screenshots: Display Scaling, resolution settings, or HDR settings may be responsible for this problem. Hence, adjust the display settings and disable Use HDR in Settings>System>Display>HDR.
- Snipping Tool freezing, crashing, or not opening correctly: The app may be buggy, Windows may be outdated, or other software may conflict with the tool. Hence, repair or reset the Snipping Tool (follow Settings>Apps>Installed Apps>Snipping Tool>Advanced Options). Also, update Windows (Settings>Windows Update>Check for Updates>Download & Install>PC restart) and disable Focus Assist (Settings>System>Focus Assist).
That’s how to take a screenshot in Windows 11 like a pro. Hope it helps!
