Microsoft Outlook is among the most popular professional email management, calendar, and scheduling, contact management, task and to-do list management, and file sharing platforms. However, lately, there has been considerable concern surrounding how to send a secure email in Outlook to protect sensitive information from unauthorized access, verify the sender’s identity, and ensure data privacy.
If you have similar questions in mind, this article is for you. Here, we explain the simplest possible ways to ensure email security in Outlook, with encrypting emails being one of them.
Before beginning with how to encrypt email in Outlook, and other ways of sending secure emails in Outlook, let’s have a look at what security and encryption mean in Outlook in the first place.
What Is a Secure Email in Outlook
To send a secure email in Outlook means encrypting it to prevent unauthorized access and applying restrictions such as “Do not forward.” It ensures the recipient cannot forward, print, or copy the email content.
Moreover, Outlook email security controls help organizations enforce policies, such as restricting access to attached files in an email, ensuring only authorized recipients open it.
Talking about the methods to send secure Outlook emails, encrypting the emails is the most widely used. Hence, let’s help you understand it a little better.
What Is Email Encryption in Outlook
Cybercrimes are growing faster than anyone can imagine, and emails are among the most powerful weapons hackers use. Through emails, hackers access your personal data, such as name, address, and login credentials, to commit crimes like identity fraud and identity theft.
Hence, email data encryption is a process that protects your information from hackers by preventing messages from being read by any unauthorized individual. It scrambles and converts the original message into an undecipherable or unreadable format.
Thus, experts advise encrypting emails in Outlook to protect your messages and attachments, and allowing only authorized recipients to access them. Moreover, encryption helps IT professionals manage sensitive communications and information in highly regulated industries, for example, finance, legal services, and healthcare.
There are two ways you can send encrypted emails in Outlook. Let’s explain them next.
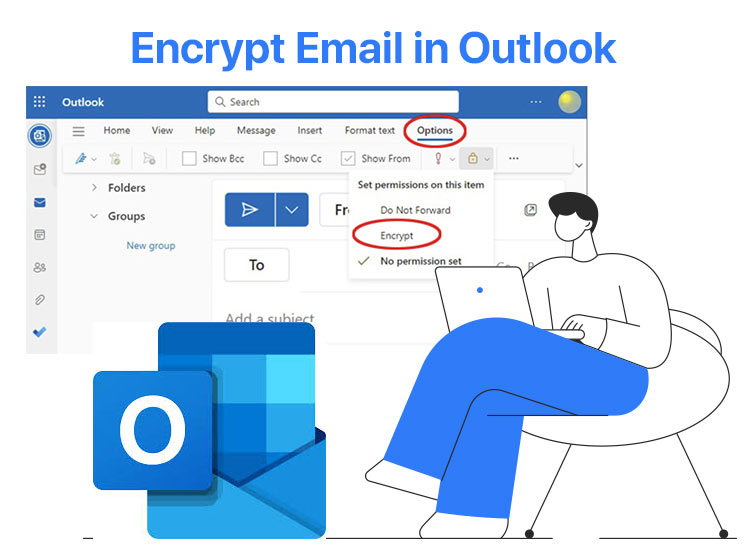
How to Encrypt an Email in Outlook
You can follow any of the following methods to encrypt your Outlook emails.
Method 1: Send an encrypted email in Outlook by setting up S/MIME
If you are sending Outlook emails for an organization that uses certificate-based authentication, S/MIME (Secure/Multipurpose Internet Mail Extensions) is an ideal encryption method. For encrypting emails this way, you need a digital certificate from a trusted and reputable Certificate Authority, for example, GlobalSign, DigiCert, and Entrust. Below is the complete process to obtain the certificate and encrypt emails.
- First, select a reputable Certificate Authority to get the certificate. Your organization may already have a provider, or you can pick an independent authority like GlobalSign, DigiCert, or Comodo.
- After selecting the authority, purchase an online certificate. You may need to provide the details of your organization to get the certificate.
- Once you receive the certificate, follow the instructions from your Certificate Authority to generate the certificate in your browser and export it for use in Outlook.
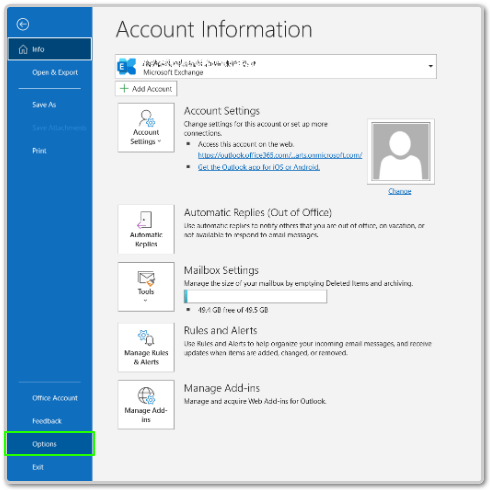
- Next, open Outlook on your computer.
- Now, click on the File tab and choose Options from the on-screen menu.
- In this step, navigate to the Trust Center and then choose Trust Center Settings.
- Once the Trust Center Settings appear, choose Email Security from the left pane.
- In this step, under the Encrypted email section, click Settings.
- Next, navigate to the Certificates and Algorithms section and click on the Choose button next to Encryption Certificate to select your certificate.
- Now, click OK to save the certificate.
- Navigate back to the Trust Center Settings, in the Encrypted email section, check the Encrypt contents and attachments for outgoing messages box. You can also configure Outlook to digitally sign all outgoing emails for enhanced security.
- Next, compose a new email, add recipients, and content as you normally do.
- Now, click Options and then choose Digitally Sign Message or Encrypt.
- Lastly, click Send to finish sending an encrypted email in Outlook.
Note: The recipient must also have an S/MIME certificate, and they must have shared the public keys with you to decrypt the email.
Also know: Best Ways to Protect Identity and Personal Data on the Internet
Method 2: Enable Microsoft 365 Message Encryption to send encrypted Outlook emails
If you do not have a certificate or find the process of obtaining a certificate complex, you can opt for Microsoft 365 message encryption. It comes with Microsoft 365 Enterprise plans. Below is how to encrypt an email in Outlook with the Microsoft 365 message encryption.
- Begin by checking Microsoft’s official documentation to ensure that your Microsoft 365 plan contains message encryption. This feature is generally, by default, supported by plans such as Microsoft 365 Enterprise E3 or E5.
- Next, log in as a global or security admin to the Microsoft 365 Admin Center.
- After logging into the Microsoft 365 Admin Center, navigate to Security & Compliance Center.
- In the Security & Compliance Center, go to Threat Management and then choose Policy.
- Next, set rules to encrypt specific emails (for instance, emails with sensitive attachments or keywords).
- Now, compose a new email as you would normally do.
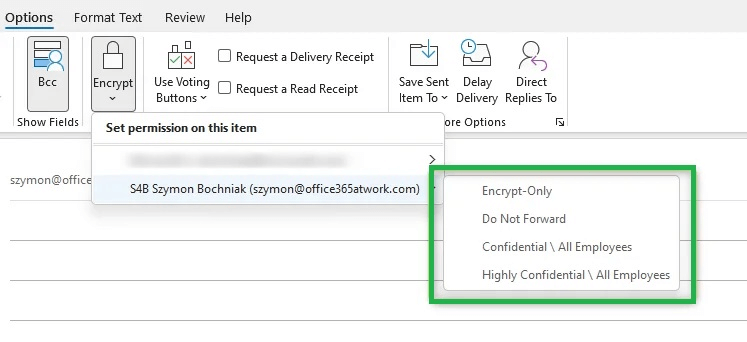
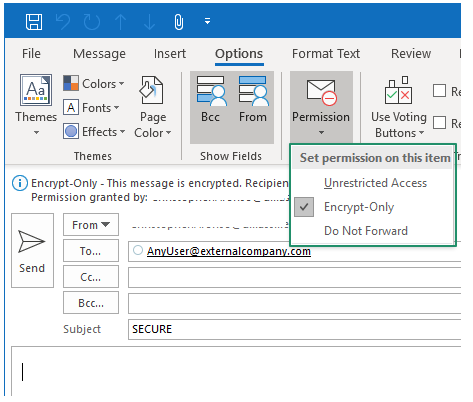
- After composing the email, click on the Options tab and choose Encrypt from the available options.
- Next, choose your desired level of encryption (for example, encrypt only, do not forward).
- Lastly, add content to your message and send the email.
Note: While the native Outlook encryption is quite strong, you may miss out on advanced features, such as expiration controls, in-depth tracking, and easier access for other users, which are often offered by built-in secure message settings and third-party tools to send secure emails in Outlook.
That was all for sending encrypted emails in Outlook, a highly popular method to send secure Outlook emails. Apart from encryption, there are other methods to send secure emails. Let’s walk you through them next.
How to Send a Secure Email in Outlook
If you do not want to encrypt your emails, you can secure them in any of the following ways.
Method 1: Use the built-in Secure Message Settings
There are built-in settings in Microsoft Outlook to secure your email communications. These settings offer fine-grained control over sensitive information. Below is how to use secure message settings in Outlook.
- Begin by composing a new email.
- Next, click on the Options tab.
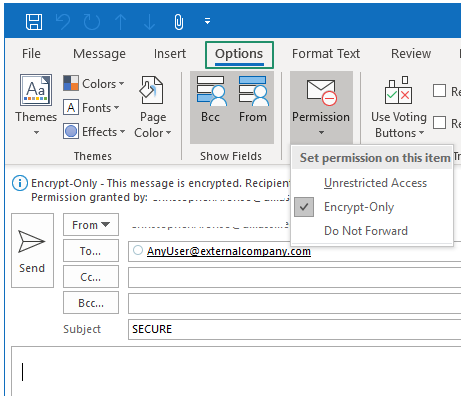
- In this step, choose Permissions and then pick a setting like Encrypt Only or Do Not Forward (depending on your desired control level).
- Now, set sensitivity labels in Microsoft 365 Admin Center.
- Next, apply the appropriate sensitivity label when composing an email to enforce the compliance policy.
- You can now manage sent emails using the Microsoft 365 Admin portal to change or revoke email permissions as and when required.
Note: While the built-in settings offer in-depth access control and real-time updates without recipient tool dependencies, they do not work outside the Microsoft ecosystem, lack encryption-level security, and do not protect from screenshots or manual sharing of sensitive information.
Method 2: Send a secure email in Outlook via third-party tools
You can select the right tool depending on your organization’s needs and ensure it has all the essential features. Some of the necessary features include easy recipient access, end-to-end encryption, and integration with security platforms like DLP to experience the power of rich encryption, comprehensive tracking, and easy access control options.
Some of the top-rated tools you can choose from include Mimecast, Virtru, Proofpoint, and OpenText.
Below are the general steps to work with these tools on Outlook.
- Once you have selected the right tool for your requirements, install any plugin or configure any settings necessary to integrate it with Outlook.
- Next, configure organization-wide settings and policies, such as secure delivery for certain domains or encryption for emails containing specific keywords.
- Now, test the tool to ensure it works seamlessly.
- In this step, provide your staff with the necessary training to use the tool and access emails securely.
- Lastly, use the built-in reporting and analytics features of the email security software to ensure compliance with policies.
Note: While third-party email security tools offer enhanced security features, customizable policies, cross-platform compatibility, Data Loss Prevention (DLP), and are scalable, ensure they fit your budget, are easy on resources, are not heavily dependent on external vendors, have seamless integration, and do not overlap with the Microsoft 365’s features (if you already use it).
Also know: How to Pin Your Favorite Contacts to the Taskbar on Windows PC
Outlook Emails Encrypted and Secured Successfully
That’s how to send a secure email in Outlook by encrypting it or otherwise to prevent your sensitive information from going into the wrong hands and comply with the regulatory requirements. We hope this guide will help you protect your emails.
However, if you have any doubts, questions, or concerns about this article, you can reach out to us through the comments section. You can also write a comment if you have any suggestions or feedback to improve this guide. And, for more such guides, bookmark this blog and subscribe to our newsletter.
