Here is a lucid guide to help you fix the web Logitech camera not working issue effortlessly.
Logitech has established itself as one of the best webcam manufacturers. Logitech cameras are known for their top build quality and dandy features yet reasonable prices. However, even these cameras are not immune to unexpected problems, such as the Logitech camera not working with Teams or other applications on Windows 10/11.
Are you also struggling with Logitech camera issues? If yes, you can breathe a sigh of relief as you are reading the right article. Having experienced this problem ourselves, we researched deeply to find the most suitable solutions to it.
However, before walking you through these solutions in the coming sections of this article, it is crucial to learn why the Logitech webcam is behaving erratically. Knowing what may have triggered the issue helps troubleshoot it correctly. Hence, the next section discusses the same.
Why Is the Logitech Webcam Not Working
Your Logitech camera may have stopped working because of any of these reasons.
- There is a problem with the connection port
- Your webcam hardware is damaged
- The webcam firmware is outdated
- Other applications on your computer conflict with the webcam’s functioning
- The webcam driver is missing, corrupted, or outdated
- Camera settings are not configured correctly
After understanding what may have triggered the Logitech camera problem, let us focus on fixing the issue.
Fixes for the Logitech Camera Not Working Issue
You can fix the Windows 10/11 Logitech web camera stopped working problem in the following tried and tested ways.
Fix 1: Check the connection wire and port
Tangled wires or weakened connections can be a reason your Logitech webcam is not working. Hence, you should ensure the wires connecting the camera to your computer are sorted. If the wires are arranged correctly, you should check the USB to make sure it is not loose in the port.
Fix 2: Check your computer’s privacy settings
You can protect devices, such as webcams, from unauthorized access using the Windows privacy settings. However, incorrectly configured settings can prevent the webcam from functioning and can be a reason your Logitech camera has stopped working. Hence, you can check and correct the settings by following these directions.
- The first step is to open Settings. You can open it using the Win+I hotkey.
- Next, select Camera from the left pane of the settings window.
- Toggle on the option to Allow apps to access your camera.
- You can now go through the application list and toggle on the applications for which you want to enable the camera access.

Fix 3: Disable the conflicting applications
Various applications that use the webcam on your computer, such as Discord and Skype, may interfere with the camera’s functionality. Hence, you can follow the below steps to disable these applications to fix the dysfunctional Logitech camera.
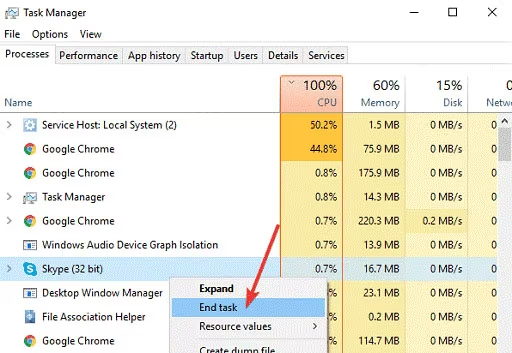
- Firstly, use the combination of Ctrl, Shift, and Esc to access Task Manager.
- After the Task Manager appears on your screen, find and right-click on a program like Skype, VPN, Discord, etc.
- Choose End Task from the right-click menu.
- You can now repeat the above process for all the conflicting apps.
Fix 4: Reinstall the Logitech camera software
Corrupted or outdated Logitech software may be responsible for camera problems on your computer. Hence, you can uninstall and reinstall the software. Here is the detailed process to do so.
- Firstly, activate the Run tool using the Win+R hotkey.
- Secondly, input appwiz.cpl in the text box on your screen and click OK to open Programs and Features.

- Next, find the Logitech camera software in the list of programs.
- Right-click on the Logitech webcam software and choose Uninstall from the on-screen options.
- Next, choose THE DRIVER when the option to select it appears during the uninstallation. This step uninstalls only the driver.
- Allow the uninstallation to complete.
- After completing the uninstallation, check whether or not the Logitech camera is working. You can uninstall the complete software if the camera is still dysfunctional.
- Once the software uninstallation is complete, you can download and install the software again from Logitech’s official website.
Also read: How To Fix Undoing Changes Made To Your Computer in Windows 10, 11
Fix 5: Reinstall the webcam driver
A corrupt, incompatible, or improperly installed driver may be another reason your Windows 10/11 Logitech camera is not working, as the driver is responsible for connecting the webcam to your computer. Thus, here are the steps you can take to reinstall the camera driver to solve the problem.
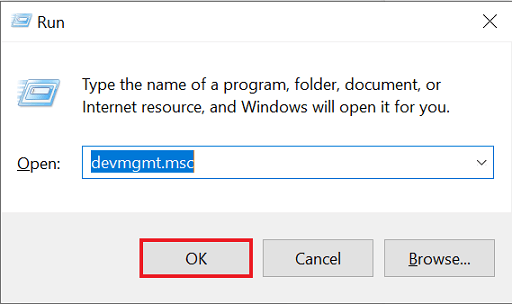
- Firstly, use the combination of Windows and R keys to get the Run tool.
- Next, type devmgmt.msc in the on-screen text box and click OK to access Device Manager.
- After opening the Device Manager, find and double-click on the Imaging devices category.
- You can now right-click your Logitech webcam and choose Uninstall device from the available context menu.
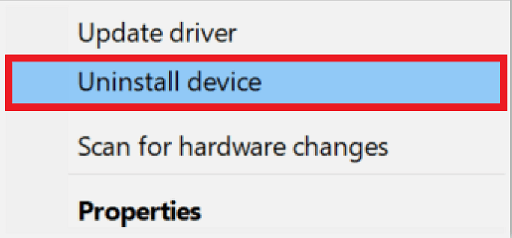
- Mark the Delete the driver software for this device option and click on the Uninstall button.
- Lastly, restart the computer after completing the driver uninstallation to let the changes come into effect.
Fix 6: Update the camera driver
A driver communicates your commands to the computer by translating them into a series of 0s and 1s, i.e., binary codes. If the driver is outdated, your instructions are not communicated to the system correctly, resulting in issues like the Logitech webcam has stopped working and even fatal system crashes. Hence, keeping the driver up-to-date is crucial to ensure error-free performance.
Though there are multiple ways to update drivers (such as updating drivers via the Device Manager and the manufacturer’s official website), we recommend automatic driver updates using a dedicated software tool like Win Riser.
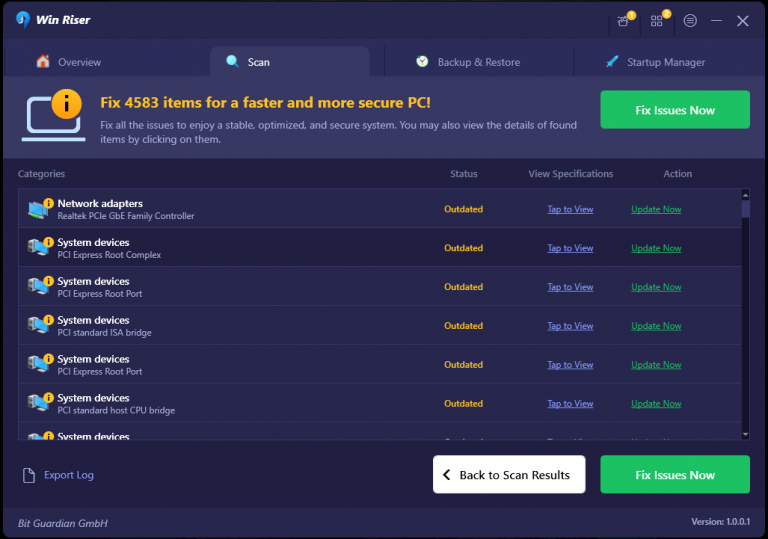
Win Riser is a driver update and optimization tool to update drivers safely with a single click and boost computer performance. It offers many useful features, including an option to navigate back to the old drivers to prevent update-related problems, junk cleaner, malware detection and removal, and an invalid registry cleaner to name a few. Here is how you can use this software to perform driver updates and elevate your device’s performance with minimal effort.
- Firstly, download the software setup from the following link.
- Secondly, double-click on the file you have downloaded in the last step and follow the quick Win Riser installation instructions.
- Win Riser scans the computer automatically after getting installed. Let the comprehensive automatic scan complete (it takes only two to three seconds).
- After the scan is complete, you can go through the results and click Fix Issues Now to install the driver updates and solve all detected problems automatically.
- The last step is to restart the PC for the changes to take effect.
Fix 7: Try using another computer or USB port
In some situations, changing the port or computer can also fix the problem. Hence, you can change the USB port to USB 2.0 (if you use a USB 3.0 port to connect the webcam) and check if the webcam functions on another computer.
The above sections explained various workarounds for the Windows 10/Windows 11 Logitech camera not working issues. If you still have any questions lingering in your mind, you may find the answers in the following section of this write-up.
Frequently Asked Questions
In this section, let us answer the questions you may have about the Logitech webcam not working problem.
Q1. How do I get my Logitech webcam to work?
Firstly, you should ensure your webcam is connected to the computer correctly to make it work. If the webcam still does not work, you can apply the solutions in the guide above to fix the problem.
Q2. How to make my computer recognize the Logitech camera?
You can plug the camera’s USB into the port. Windows will recognize it automatically and install the required driver for the camera.
Q3. Why is my PC not detecting my Logitech C920 webcam?
Your computer may be unable to detect your Logitech C920 camera because of any of the following reasons.
- Incorrect settings
- Outdated/incorrectly installed/corrupt drivers
- Presence of conflicting programs
You can try the fixes in the earlier sections of this article to fix the Logitech C920 camera problems.
Wrapping Up
In this article, we discussed all the effective ways to fix the Windows 11/Windows 10 Logitech camera not working problem. Hopefully, you were able to get rid of the issue after applying the given solutions. However, if the problem persists, you can replace your camera with a new one or take it to the repair center, as there may be some hardware defect with the webcam.
