Is your computer burning hot? Then, cool it down by tweaking your thermal mode settings, including the system cooling policy and power policy. An overheated computer is prone to hardware damage and performance issues, such as system crashes.
Hence, appropriate thermal settings, cooling fan settings, and power settings are crucial to balance performance, energy efficiency, and system health by managing heat, fan speeds, and processor activity.
However, considerable confusion surrounds these policies and settings. Hence, we have compiled this guide to explain these related yet confusing concepts and provide the best settings to keep your PC cool, optimize performance, reduce noise, and extend battery life. Let’s begin by understanding the system cooling policy.
What Is System Cooling Policy in Windows 11
The Windows 11 system cooling policy is a set of settings to ensure your PC’s internal temperature remains cool. It automatically adjusts the clock speed of the processor and the fan speed to control the heat your system generates.
Moreover, there are two options when it comes to system cooling. The policy to keep the system cool can be active or passive.
An active system cooling policy increases the fan speed before slowing the CPU to prioritize performance.
On the other hand, a passive cooling system slows down the CPU before increasing the fan speed to prioritize power saving by reducing the heat before the fan speeds up.
So, should you have an active or passive system cooling policy? Let’s answer this question next.
Should the System Cooling Policy Be Active or Passive
The choice between an active and passive system cooling policy depends on whether you prioritize higher performance or power efficiency.
If your priority is higher performance, you need an active system cooling policy. It increases the fan speed to first cool the system, making it perform better. However, it also consumes more power and generates more fan noise.
If you prioritize power efficiency, you need a passive system cooling policy. It slows down the processor to save power before increasing the fan speed. However, it may result in reduced performance, as the system slows down the processor to manage the temperature.
To cut it short, an active policy is better for desktop users (since they need not worry about low battery), and a passive policy works the best for laptop users (for whom battery is an important consideration).
After deciding whether you want active or passive cooling, let’s help you set the cooling policy on your system.
Also know: Normal CPU Temperature Range and Tips to Control it for PC
How to Set System Cooling Policy
Setting up your computer’s system cooling policy is a fairly straightforward process. Below is how to do it.
- First, access Windows search using the Win+S keyboard shortcut.
- Second, type Control Panel in the on-screen search bar and click on it in the search results.
- Once the Control Panel appears, click on the View By menu and choose Large icons from the on-screen options.
- In this step, click on the Power Options.
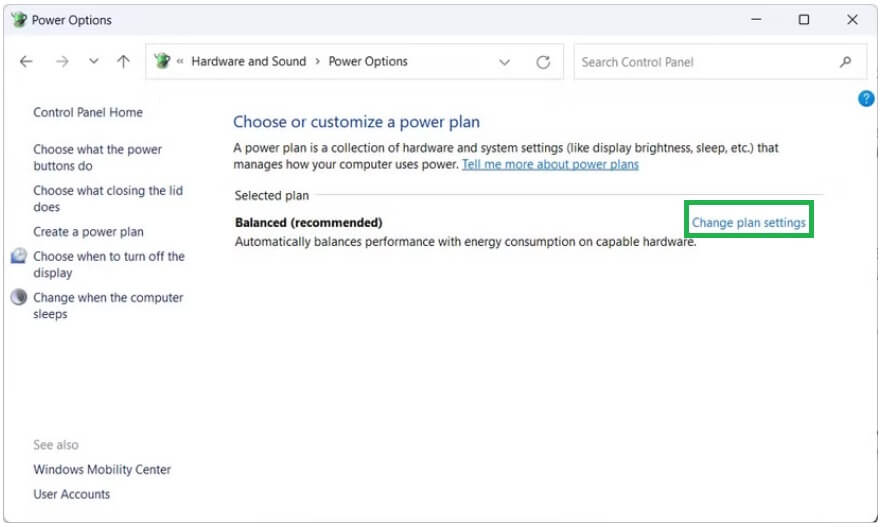
- Next, click on the Change plan settings option next to your current power plan.
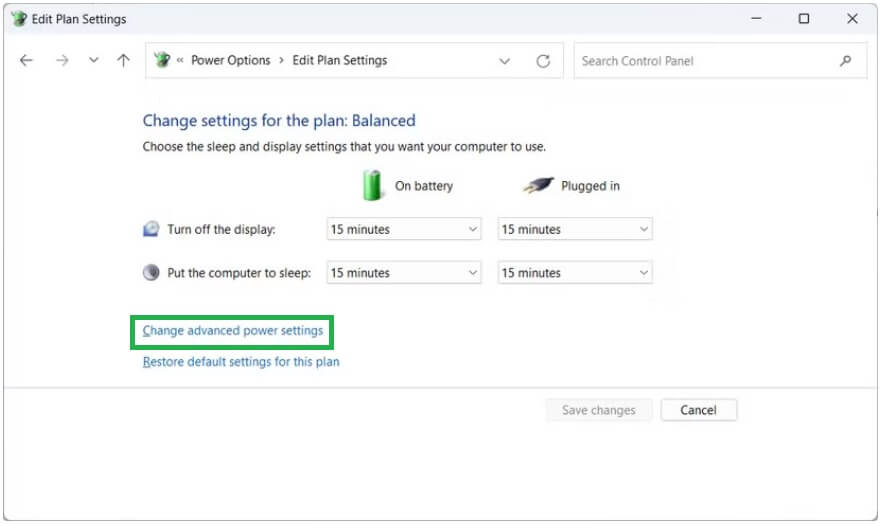
- Now, click on the option to Change advanced power settings.
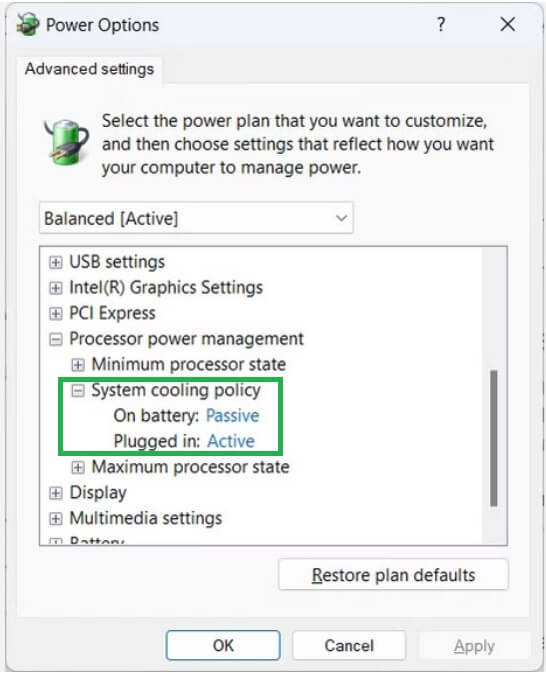
- Once the Power Options appear on your screen, click on the plus sign next to the Processor power management.
- In this step, click the plus sign next to the System cooling policy to expand it.
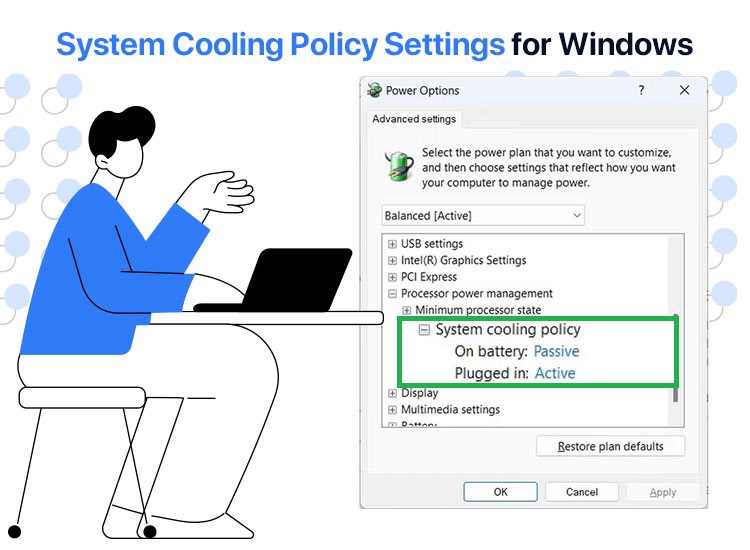
- You can now choose Active or Passive settings for both On Battery and Plugged In, depending on your requirements.
- Lastly, click Apply and OK to save the changes you made in the previous steps.
However, you may find the system cooling policy missing in some instances. Below is what to do if this happens.
What to Do If System Cooling Policy Is Missing
You can follow the steps below to enable the system cooling policy if it is missing on your computer.
- First, activate the search function using the Win+S keyboard shortcut.
- Next, type cmd in the on-screen search bar, right-click Command Prompt in the search results, and choose Run as administrator from the on-screen context menu.
- Once the Administrator Command Prompt appears, type or copy and paste the following command in the on-screen window and press Enter.
REG ADD HKLM\SYSTEM\CurrentControlSet\Control\Power\PowerSettings533251-82be-4824-96c1-47b60b740d00d3a615-a899-4ac5-ae2b-e4d8f634367f /v Attributes /t REG_DWORD /d 2 /f
- Lastly, restart your computer to complete the process.
After adding the system cooling policy to the power options, you can follow the steps in the previous heading of this article to configure the policy on your computer.
That’s all about the system cooling policy. However, users often confuse this policy with the thermal mode settings and use these terms interchangeably. Hence, let’s clear up the confusion by learning more about the thermal settings.
What Are Thermal Mode Settings
Simply put, thermal settings or thermal mode settings are an umbrella term for a set of hardware options offered by various manufacturers, such as Lenovo, Dell, and HP, to balance the system performance, heat, and fan noise. These settings operate in conjunction with the general power policy to manage your system’s temperature and power consumption.
While the system cooling policy or the cooling fan settings are a part of the overall thermal mode settings in Windows 11, they are not one and the same.
So, what are the ideal thermal settings for your computer? Well, that depends on your specific requirements. However, let’s give you a brief idea about it in the next section.
Best Thermal Mode Settings
The following are various thermal settings and how to choose the best one for your needs.
- Balanced: It is the default setting that balances your system performance with power efficiency. The balanced setting is enough for everyday tasks and casual users.
- Best power efficiency: Found through the path Settings>System>Power & battery, the best power efficiency (or similar) settings reduce power consumption by limiting the background activity. It is an ideal setting for those who prioritize long battery life.
- High performance: Found through the path Control Panel>Power Options, the high performance thermal mode settings are the best for those who want top-notch or maximum performance. However, this setting increases the fan speed, power consumption, and temperature.
In addition to the above built-in settings, manufacturers like Lenovo, ASUS, and others offer specific modes, such as Intelligent Cooling (Lenovo) and Armoury Crate or MyASUS (ASUS), to help you balance the system temperature, power, performance, and efficiency. Moreover, these modes are particularly helpful for gaming or heavy tasks.
Also know: Best CPU Temperature Monitoring Tools
System Cooling Policy and Thermal Mode Settings: The Conclusion
Hopefully, now you understand the thermal mode settings, which include your computer’s system cooling policy and cooling fan settings to prevent overheating while ensuring optimal performance and battery efficiency.
To sum it all up, go for an active system cooling policy if you are a PC user, and a passive cooling policy if you are a laptop user for whom battery efficiency matters.
As for other thermal mode settings, choose balanced settings for everyday casual usage, high performance or specific manufacturer modes to boost performance for gaming or heavy activities, and best power efficiency (or similar) settings for long battery life.
If you have any confusion or questions about anything in this guide, please feel free to drop us a line in the comments below. You can also share your feedback or suggestions regarding this article in the comments section.
