Imagine you are all set for an important Zoom call, but your computer’s camera ditches you at the last moment. With the world increasingly going remote, situations like this are neither uncommon nor rare.
Hence, it is a wise move to manage your app permissions for the camera in Windows to avoid frustrating experiences like your camera not working just when you need it. Whether you use your computer for daily video chats, remote work, or online classes, or if you’re privacy-conscious and want to prevent unauthorized camera usage, knowing how to control camera access helps you stay secure and confident while using your device.
In this article, we guide you through powerful built-in camera settings so you can control the apps that can access your camera, prevent suspicious apps from spying, disable camera access system-wide, and troubleshoot common camera permission issues.
By learning how to manage app permissions for your camera in Windows, you can protect your privacy from harmful apps, prevent background apps from recording secretly, fix camera-related errors, allow camera access only for trusted apps, and improve your device security. Hence, let’s get started with camera permissions management right away, covering all three levels of control, i.e., system-wide camera access, app-level access, and permissions for desktop apps.
How to Manage Camera Permissions Settings for Apps in Windows
You can follow the methods below to manage camera permissions for Microsoft Store apps, such as Camera, Teams, and Zoom, and desktop apps, such as Chrome, Zoom Desktop, OBS, and Edge.
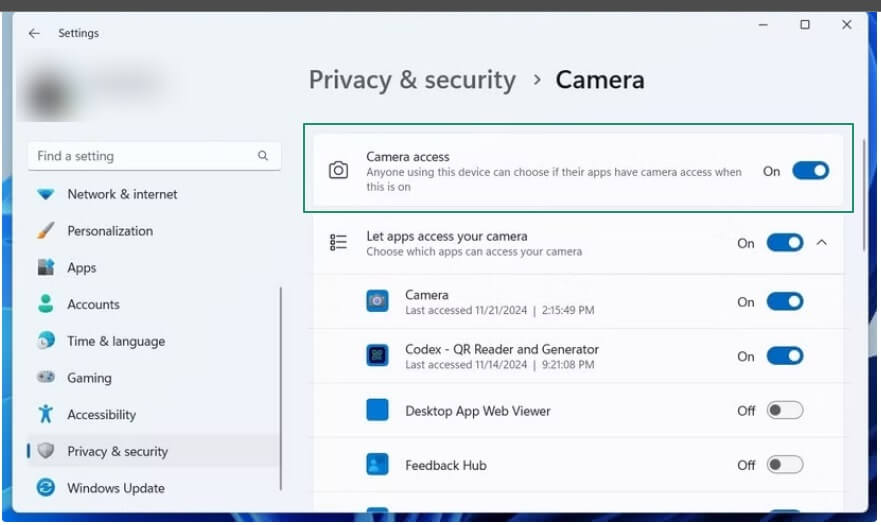
Method 1: Enable or disable camera access for the whole device
Like the electricity switch at home that turns on or off the electricity for the entire house, there is a Windows setting that turns on or off the camera for all apps. Here is how to use it.
- First, press Windows + I to access Settings.
- Next, choose the Privacy & Security settings. Windows 10 users select the “Privacy” settings.
- Find and click Camera Access. Windows 10 users click “Camera.”
- Toggle the Camera switch on or off depending on whether you want to allow or disallow camera access for all applications. If the camera option is greyed out, click “Change” to access the setting and then toggle the switch on or off. Sometimes, the camera option may appear greyed out due to reasons such as a physical privacy switch or shutter on your device, administrator restrictions, or certain antivirus settings. Check these possible causes if you are unable to adjust the camera settings.
Also know: How to Fix Logitech Camera Not Working on Windows 10, 11
Method 2: Activate or deactivate camera access for applications
You need to separately turn on or off camera permissions for apps, even if the camera access is on for the whole device. Here are the steps to do it.
- Begin by pressing Windows + I to access Settings.
- Choose Privacy & Security from the on-screen Settings. Windows 10 users click “Privacy.”
- Navigate to the Camera settings.
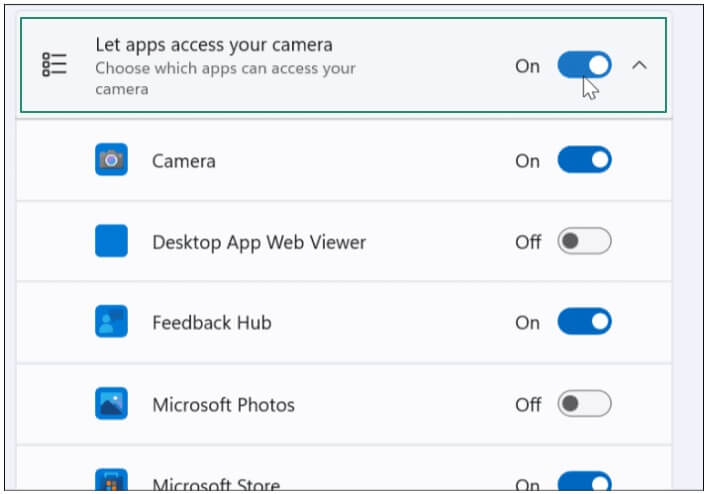
- Toggle on Let apps access your camera. Windows 10 users toggle on “Allow apps to access your camera.”
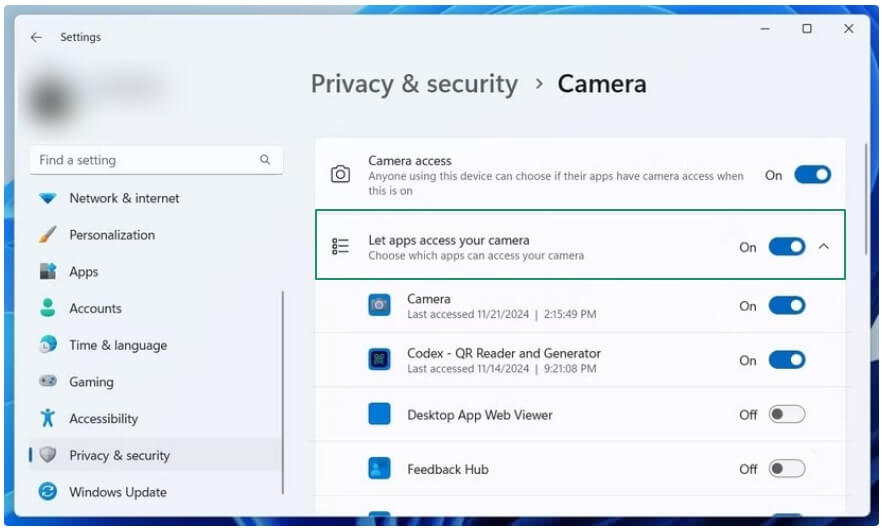
- Lastly, toggle on the applications you trust, such as Teams, Zoom, WhatsApp Desktop, etc.
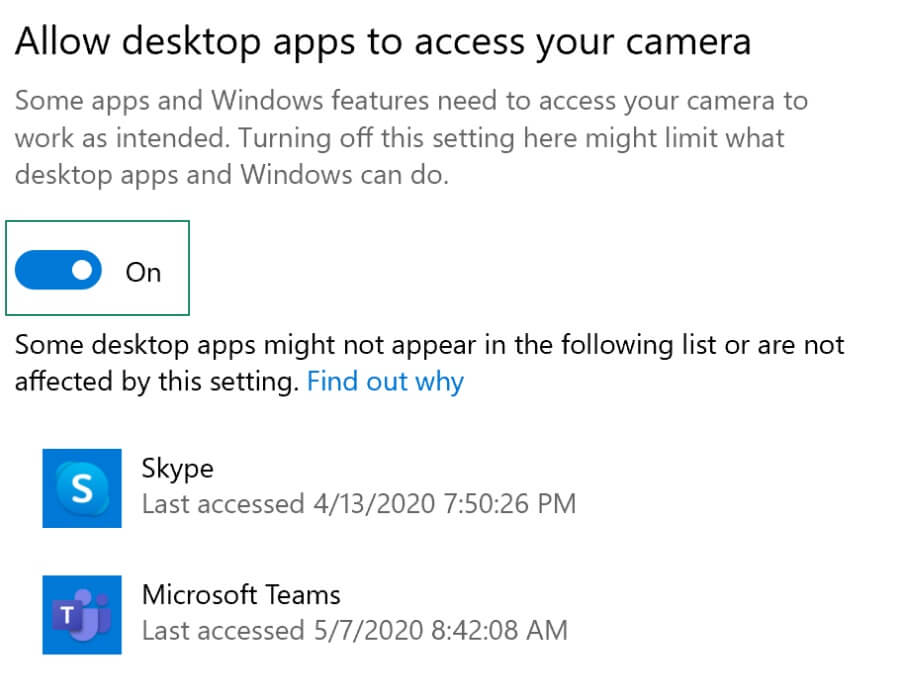
Method 3: Turn on or off access to the camera for the desktop applications
Desktop applications, such as Zoom and Teams, need special permissions to access the camera. Here is how to provide them.
- First, press Windows + I to open the Settings panel.
- Next, navigate to the Privacy & Security settings. Windows 10 users choose “Privacy.”
- Click the Camera setting.
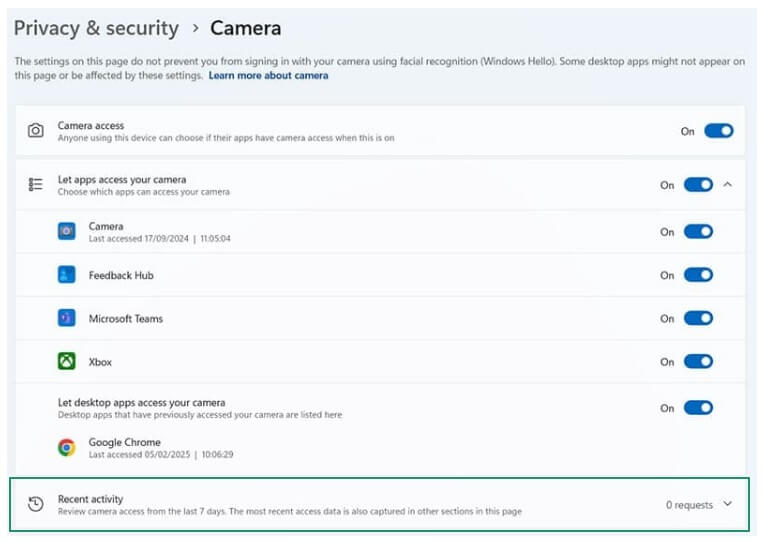
- Scroll to the bottom and toggle on or off Allow desktop apps to access your camera settings to activate or deactivate camera access for desktop applications.
Method 4: Select the applications that can use the camera
To protect your privacy, Windows lets you choose to turn on camera access for specific applications. Below is how to manage app permissions for the camera in Windows, per application.
- In the first step, access Settings using the Windows + I shortcut.
- Next, Windows 11 users choose Privacy & Security, and Windows 10 users select “Privacy.”
- Navigate to the Camera settings.
- Lastly, toggle on or off camera access for specific applications under Let apps access your camera. For example, you can enable camera access for trusted video calling apps, such as Zoom and Teams, and disable the camera permissions for random apps.
Method 5: Check which applications used your device’s camera recently
Windows lets you view your recent camera activity to make it easy for you to spot suspicious camera usage. Hence, below are the steps to view your camera activity history.
- Begin by accessing the Settings panel using the Windows + I shortcut.
- Navigate to Privacy & Security in Settings. Windows 10 users click “Privacy.”
- Next, go to Camera and then to Recent activity to view which applications accessed your webcam and when.
Also know: Set Up Windows Hello for Sign-in with Face, Pin & Fingerprint
Method 6: Disable the webcam entirely
Windows even allows you to turn off the camera completely to ensure maximum privacy protection. Here is how to perform this action.
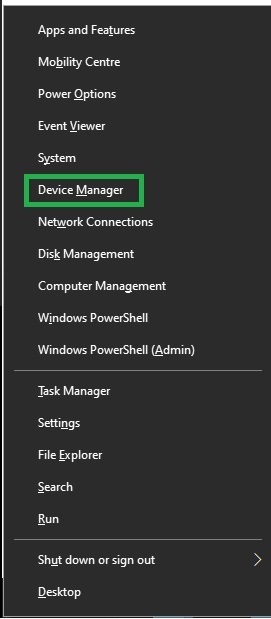
- First, right-click the Start button and choose Device Manager from the menu that appears.
- Next, double-click the Cameras or Imaging Devices category to expand it.
- In this step, right-click the webcam and choose Disable Device from the context menu. You can re-enable it by right-clicking the webcam and selecting “Enable Device” from the options that appear.
Method 7: Manage your camera settings in the browser
Managing browser app permissions for the camera in Windows requires separate steps. Here are the steps to manage camera permissions for the two most popular browsers, Microsoft Edge and Google Chrome.
Microsoft Edge
- Click the three dots in the top right corner.
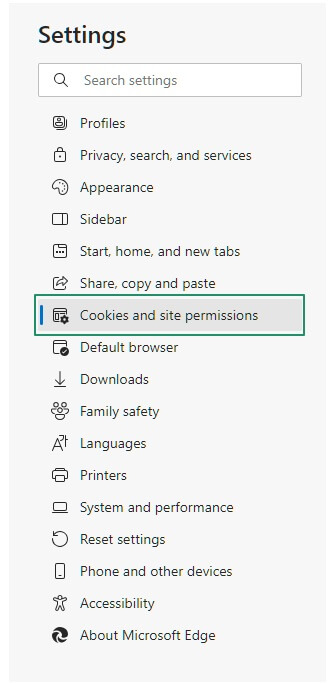
- Choose Settings from the menu that appears.
- Next, navigate to Cookies and Site Permissions.
- You can now select which sites can and cannot access your webcam.
Google Chrome
- Click the three vertical dots in the top right corner.
- Select Settings from the Chrome menu.
- Choose Privacy & Security.
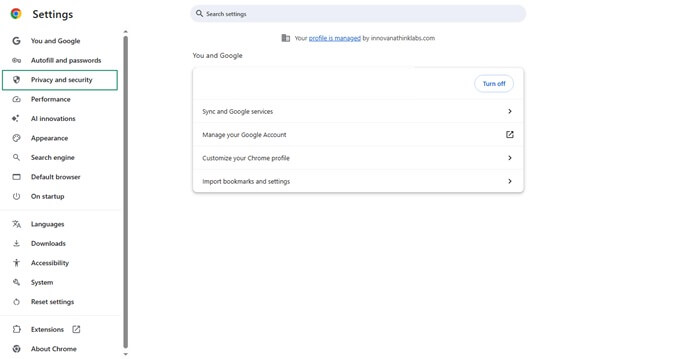
- Navigate to the Site Settings and then click Camera.
- Select the sites that can or cannot use the webcam.
Method 8: Use Group Policy to block camera access
Windows Pro and Enterprise users can disable camera access through the Group Policy settings. Here is how.
- First, use the Windows + R shortcut to access the Run utility.
- In the Run box that appears, type gpedit.msc and press Enter.
- Go to Computer Configuration → Administrative Templates → Windows Components → Camera.
- Choose Allow Use of Camera.
- You can now select “Enabled” to allow the camera or “Disabled” to disallow camera access.
- Lastly, restart your computer.
Method 9: Reset your camera permissions in Settings
If your webcam is not working suddenly, besides updating your camera driver, you can reset your camera permissions to fix the issue. Here is how.
- Begin by accessing the Settings panel through the Windows + I shortcut.
- Navigate to Apps settings.
- Click the Installed Apps.
- Locate the Camera and click Advanced Options.
- Lastly, click Reset and restart your computer.
While that was how to manage app permissions for the camera in Windows, the camera may still not work properly even if the camera access is on, app camera access is on, desktop apps access is on, browser permissions are allowed, and drivers are updated. Hence, below is what you can do in such situations.
Also know: What is Visual Search and How to Use it on a Windows PC
How to Troubleshoot Camera Permission Errors
If you experience any camera problems, first try the general solutions below, and if these don’t work, try the solutions for specific error codes.
General Solutions
- Update Windows. To update Windows, search for check for updates, click the first search result, click the check for updates button, click download & install for available updates, and then restart your computer.
- Update your webcam drivers. To update the camera driver, right-click the Start button, choose Device Manager, double-click Camera or Imaging Devices, right-click your webcam, choose Update Driver, click Search automatically for drivers, follow the on-screen instructions, and then restart your computer.
- Check your antivirus software settings to ensure the antivirus software is not blocking your webcam.
- Close the background applications that use the camera, as they may interfere with its functionality.
- Restart your Windows Camera Frame Server service.
If none of these solutions work, you can check the solutions to the common error codes below.
Fixes for common error codes
Below is how to fix common camera errors in Windows.
0xA00F4244 NoCamerasAreAttached
The “no camera attached 0xa00f4244” error is caused by an outdated or missing camera driver, corrupted or damaged camera software, malware infection, or the camera app not being enabled. You can fix this issue by ensuring the camera is enabled, deactivating the antivirus software, scanning your computer for malware, updating the camera driver, modifying the Windows Registry, and resetting your camera application. For more information, you can refer to this detailed guide.
0x80070005 Access Denied
The 0x80070005 error indicates a permission issue or a lack of administrator permissions. You can solve this by enabling camera access by following the guide in this article, checking the antivirus software to ensure it does not block the camera, and updating the camera driver. Since corrupted system files may also be responsible for this problem, running the System File Checker (SFC) is among the advanced solutions you can try.
0xA00F4243 Another App Is Using the Camera Already
This issue occurs when some other application is using or interfering with the camera, or the camera driver is corrupted/outdated. To fix this problem, ensure camera access is enabled for the apps you intend to use, close all other camera-related or video conferencing apps, update the camera driver, reset your camera app (follow the path Windows + I > Apps > Installed Apps > Camera > Advanced Options > Reset), and run the camera troubleshooter (follow the path Windows + I > System > Troubleshoot > Other Troubleshooters > Camera Troubleshooter > Run).
0xA00F4292 Something Went Wrong
Problematic Windows updates, privilege issues, corrupted system files, or outdated drivers may cause this problem. To fix this issue, you can run the hardware and devices troubleshooting (search for cmd, right-click the first search result, choose run as administrator, type msdt.exe -id DeviceDiagnostic in the Command Prompt, and press Enter), allow apps to access your camera, update the camera drivers, reset the camera application, and run the System File Checker.
That’s all for the comprehensive guide to managing app permissions for the camera in Windows and solving related problems. We hope it helps. However, if you have any questions or confusion, you can write to us in the comments section.
Frequently Asked Questions
Q1. How do I manage app permissions for a camera in Windows 10/11?
You can manage your app permissions for the camera through Settings > Privacy & Security > Camera. For detailed methods and steps, refer to the guide above.
Q2. Why is my camera not working?
The camera may not work in Windows due to problems, such as operating system issues, an outdated camera driver, and interference from the antivirus software or background apps.
Q3. What to do if the camera setting is greyed out?
If the camera setting is greyed out, you can enable the camera access, update the camera driver, check the physical privacy button/switch on your laptop (if there is one), ensure the antivirus software is not blocking the camera, and enable the camera in Group Policy if it is disabled.
Q4. Why has Windows blocked my camera?
Improper privacy settings, the physical privacy shutter or switch, if present on your laptop, or outdated drivers may be the reason Windows has blocked your camera.
Q5. How to check if the camera is allowed for an application?
To check which apps can use the camera, open Settings, click Privacy & Security, click Camera, and navigate to Let apps access your camera.
