Snipping Tool in Windows comes in handy when you want to capture anything on your screen, be it an official document or lecture notes. However, things get annoying when the Snipping Tool is not working, crashes on launch, or the Microsoft Store has blocked its UI.
While the problem is frustrating, it is also easily solvable with the tried and tested fixes in this guide. However, before moving on to troubleshooting, it is important to answer the burning question, “Why is my Snipping Tool not working?” Knowing what may have triggered the problem helps troubleshoot the right way.
Why Isn’t My Snipping Tool Working
Corrupted system files, software conflicts, not having the right permissions, outdated graphics drivers, and Windows updates are the top reasons your Snipping Tool is not opening or has become dysfunctional. Let’s help you fix it.
How to Fix Snipping Tool Not Working
You can restart your computer, restart Windows Explorer, turn on the Snipping Tool notifications, repair or reset the Snipping Tool app, update Windows, allow the app to function in the background, disable automatic date and time, perform an SFC scan, update the app, update the graphics driver, deactivate conflicting programs, and reinstall the Snipping Tool to solve the Windows 11/10/7 Snipping Tool not working, not opening, freezing, or crashing issues. Here are all these solutions explained in detail. Follow them one by one, starting with the first fix, until the problem is solved.
Fix 1: Try basic solutions
Sometimes, simple fixes like restarting your computer, ensuring the shortcut is correct, and restarting Windows Explorer fix complex issues like the Snipping Tool not opening. Hence, before trying other fixes, you can restart the computer, check the shortcut, and restart Windows Explorer. Here is how.
Restarting your computer
- Right-click the Start button.
- Hover over the Shut down or sign out
- Click Restart.
Check the shortcut
The shortcut for Snipping Tool is Windows + Shift + S. Ensure you are using the correct shortcut.
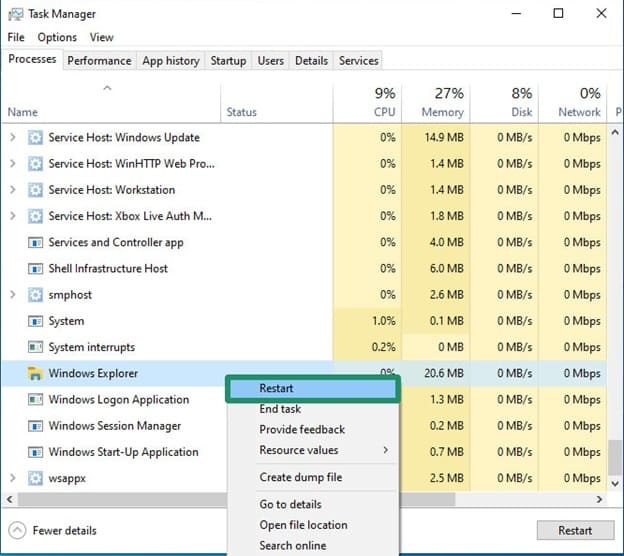
Restarting Windows Explorer
- Press Ctrl + Shift + Esc.
- Find and right-click Windows Explorer.
- Click Restart.
Fix 2: Enable the Snipping Tool notifications
You may be unable to see screenshots after capturing them with the Snipping Tool if its notifications are turned off. Hence, you can follow the steps below to ensure the Snipping Tool notifications are enabled.
- Press Windows + I to open Settings.
- Click System in the Settings panel.
- Next, click Notifications in the System menu.
- Find the Snipping Tool in the list of applications and toggle it
Also know: How to Open the Clipboard in Windows 11
Fix 3: Repair or reset your Snipping Tool application
Repairing or resetting the application fixes the corrupted app files. Thus, the following are the steps to repair the app, and if the repair doesn’t work, to reset it.
- Press Windows + I.
- Click Apps in Settings.
- Next, click Installed Apps.
- Find and click the Snipping Tool in the Installed Apps.
- Click Advanced Options.
- Next, click
- If Windows Snipping Tool is still not working, click Reset to restore the app’s default settings.
Fix 4: Update Windows
Windows updates fix bugs, including app issues like the Windows 11 Snipping Tool not working, and improve device performance. Hence, here are the steps to update Windows.
- Click the Start button.
- Type check for updates in the search bar.
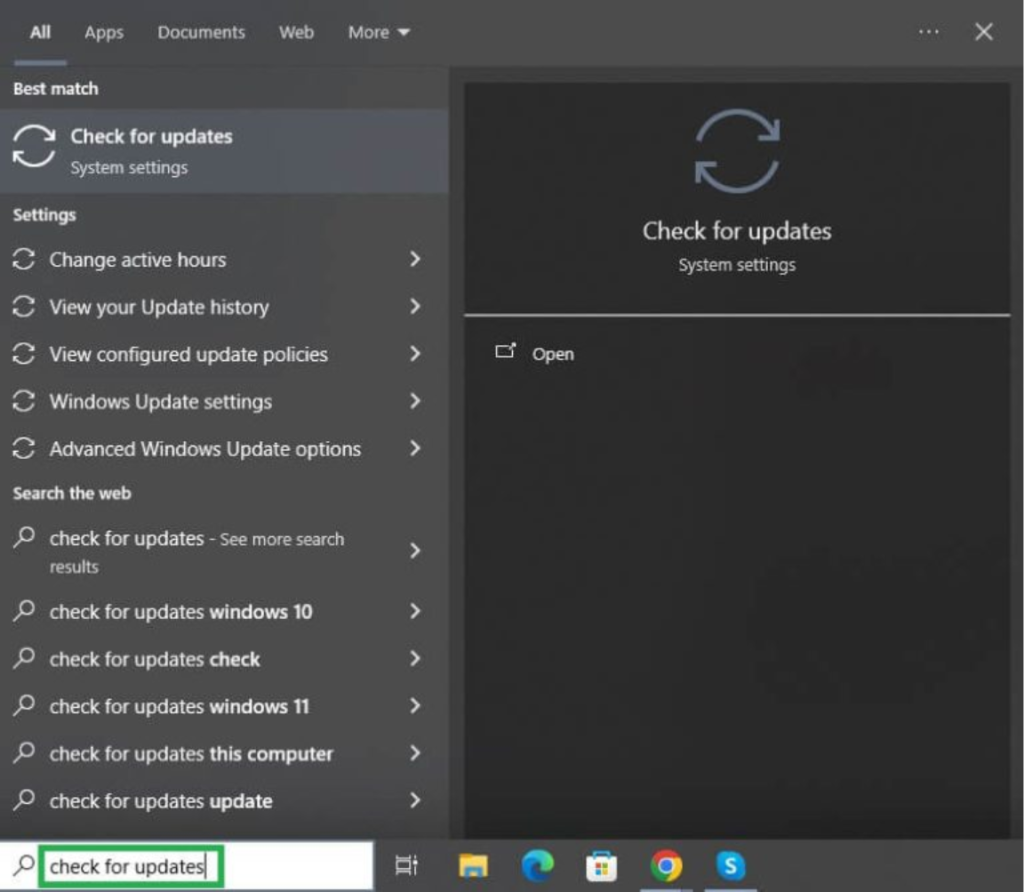
- Next, click Check for updates in the search results.
- Download & Install the available updates.
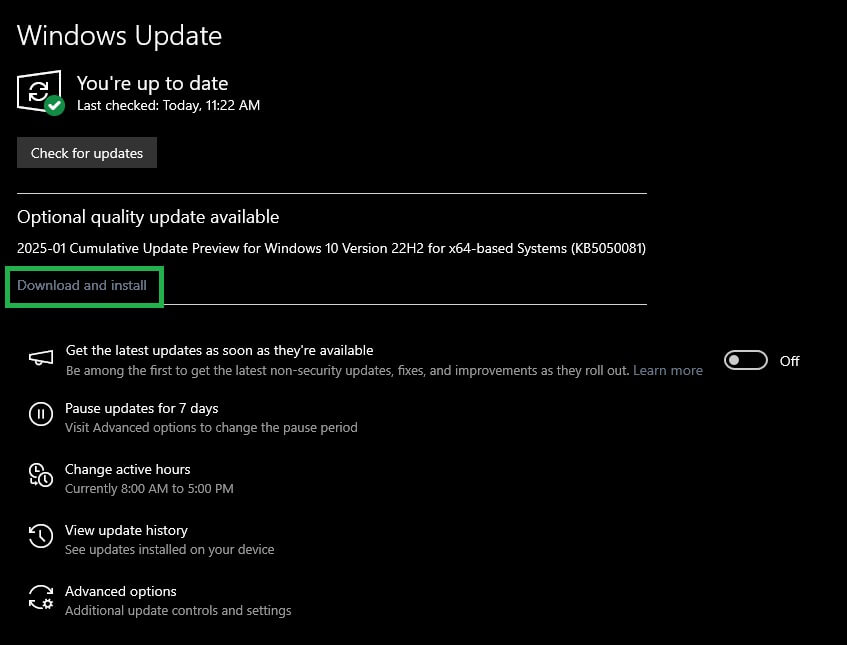
- Lastly, restart your computer to complete the Windows update process.
Fix 5: Allow the Snipping Tool app to run in the background
Snipping Tool may not work or may not respond to its shortcut if the application does not have the required permission to function in the background. Thus, below is how to allow the Snipping Tool to run in the background.
- Press Windows + I to open Settings.
- Click Apps in the Settings panel.
- Next, click Installed Apps.
- Find the Snipping Tool app and click its three-dot menu icon.
- Click Advanced Options.
- Next, click Always in the Let this app run in the background drop-down.
- Close the Settings application and press Windows + Shift + S to check if the Snipping Tool is working. If the shortcut for Windows 10 Snipping Tool is not working, move to the next fix.
Also know: Reverse Image Search Tools
Fix 6: Turn off automatic date and time
The Snipping Tool uses digital certificates to ensure security and smooth functionality. These certificates are essential to verify the application’s authenticity to make sure it works correctly. If the date and time are incorrect on your PC, it can cause certificate verification failure, leading to issues like the Windows 7 Snipping Tool not working. Thus, below are the steps to change the date and time temporarily to solve the Snipping Tool problems. Once the Snipping Tool functions smoothly, you can switch back to automatic date and time settings.
- Press Windows + I to launch the Settings panel.
- Go to Time & Language and then click Date & Time.
- Disable Automatic Time Setting and set it manually (example, set a date like August 2, 2023).
- After a moment, enable automatic settings and try using the Snipping Tool. If the Windows 11 Snipping Tool is not working, try the next solution.
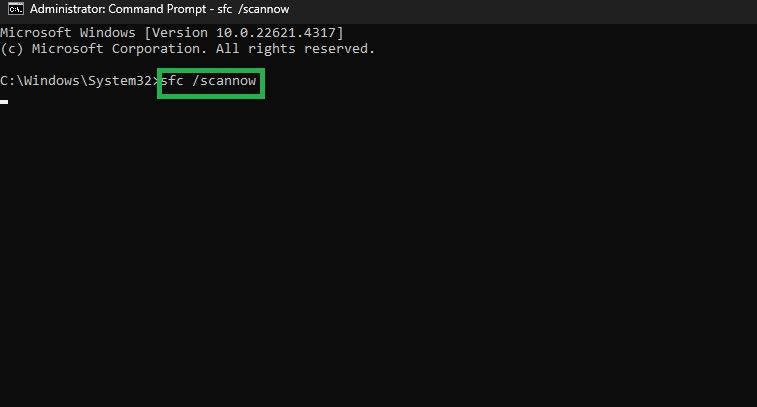
Fix 7: Run SFC scan
If the system files related to the Snipping Tool are missing or damaged, the Snipping Tool may not work. Hence, you can perform an SFC scan to fix the Windows Snipping Tool not working problem. Here is how.
- Click the Start
- Type cmd in the search bar and right-click the first search result.
- Click Run as administrator in the on-screen menu.
- Copy and paste the following command in the Administrator Command Prompt and press
sfc /scannow
- Restart your computer after completing the above process.
Note: If the SFC scan does not solve the problem, you can try running the DISM /Online /Cleanup-Image /RestoreHealth command in the Administrator Command Prompt. If the problem remains unsolved, move to the next fix.
Fix 8: Update the Snipping Tool app
The updates to the Snipping Tool app include bug fixes, such as the Snipping Tool not opening. Hence, you can follow the steps below to download and install the Snipping Tool updates.
- First, check for Windows Updates, as Microsoft offers app updates with the OS updates. To update Windows, click the Start button, search for and open Check for updates, click Check for Updates, click Download & Install, and then restart the computer after completing the update.
- Sometimes, Microsoft releases app updates separately. Hence, open the Microsoft Store, search for the Snipping Tool, and then download any available updates.
Fix 9: Update your graphics driver
A graphics driver update ensures your device is compatible with the latest Windows features and software updates. The driver improves the performance and stability of applications that depend on graphical rendering, for example, the Snipping Tool. It fixes the graphical glitches that interfere with taking screenshots in Windows. Hence, follow these steps to update the graphics card driver to solve the Windows 11/Windows 10/Windows 7 Snipping Tool not working problem.
- Right-click the Start button.
- Click Device Manager to open it.
- In the Device Manager, double-click Display Adapters.
- Right-click your graphics card and then click Update Driver.
- Click Search automatically for drivers.
- Follow the on-screen prompts to download and install the driver update.
- Lastly, restart your computer.
Fix 10: Disable conflicting programs
Some third-party apps can interfere with the functioning of the Snipping Tool. You can close these applications to eliminate conflicts and fix the Snipping Tool not working issue. Here is how.
- Press Ctrl + Shift + Esc to open the Task Manager.
- Look for non-essential processes that may interfere with the Snipping Tool, for example, screen recording, and end them.
- If you feel a specific app is causing problems, you can uninstall it temporarily to solve the problem. To uninstall the app, press Windows + I, click Apps, find the problematic app, and then click Uninstall.
Fix 11: Uninstall and reinstall the Snipping Tool
If none of the above solutions work, uninstalling and reinstalling the Snipping Tool app is the last resort. You can follow the steps below to uninstall and reinstall it.
- Click the Start button.
- Type Snipping Tool in the search bar.
- Right-click the first search result and then click
- Click Uninstall to confirm.
- Lastly, open the Microsoft Store and then download and install the Snipping Tool.
The guide above answered why the Snipping Tool is not opening or is dysfunctional and how to fix it. Hope this helps. However, if you have any questions or concerns that are not addressed in this article or the frequently asked questions below, or if you need help with anything technology-related, you can leave us a comment.
Also know: How to Solve Windows + Shift + S Not Working Problem in Windows 11/10
Frequently Asked Questions
Q1. How do I fix my Snipping Tool not working?
To fix the Snipping Tool not working issue, reset the app. To reset the application, follow the path Windows + I > Apps > Installed Apps > Snipping Tool > Three-dot menu > Advanced Options > Repair > Reset. For detailed solutions, refer to the guide above.
Q2. Why is my Snipping Tool not copying and pasting?
A temporary system glitch, a disabled setting, or a stuck clipboard may be the reason your Snipping Tool is not copying and pasting. To fix the issue, enable the “automatically copy changes to clipboard” setting, reset the Snipping Tool, and restart the clipboard process.
Q3. How do I reset the Snipping Tool?
To reset the Snipping Tool, press Windows + I key, click Apps, click Installed Apps, search for the Snipping Tool, click the three dots next to it, click Advanced Options, and then click Reset. Resetting the application clears its data and restores it to factory settings.
