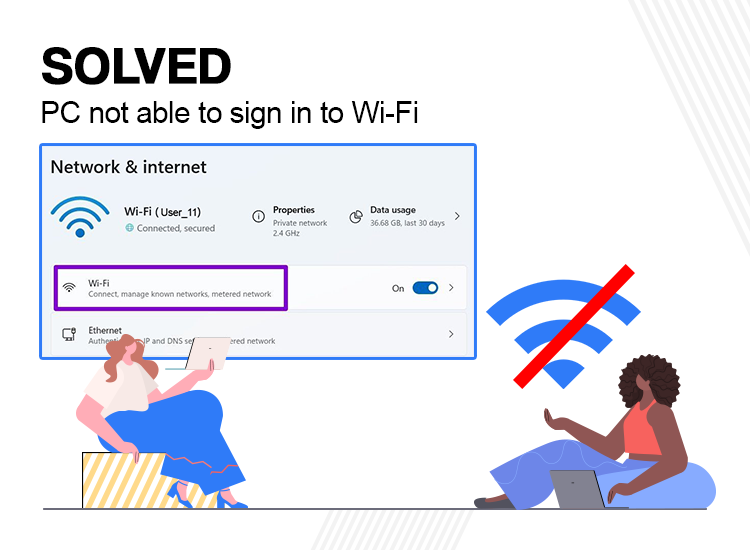
PC won’t connect to WiFi is a common problem and you can solve this problem, easily & quickly. In this article, you will learn various solutions to fix the computer not connecting to the WiFi problem. Read on to the entire article.
Undoubtedly, WiFi has been an essential technology for a long while. Using wireless networking technology, we can connect PCs, smartphones, tablets, and other devices to the Internet. Wi-Fi provides better network connectivity with the highest download speed. Everything seems perfect until you encounter WiFi problems on your computer. It could happen to all of us. When we try to open our web browser and end up with an error saying the computer won’t connect to WiFi. Now, what needs to be done to solve this problem?
Don’t worry, here is a detailed guide to why won’t my PC connect to WiFi and how to fix it.
Why Won’t My PC Won’t Connect to WiFi?
Well, there could be multiple reasons why your Windows PC is unable to connect to WiFi. Listed below are some of the most common reasons.
- It might be possible that WiFi is disabled on your device or Airplane Mode is enabled.
- You are entering the wrong WiFi password.
- You are using outdated network adapter drivers.
- Router issues.
- Incompatible WiFi network.
How to Solve Computer Not Connecting to WiFi
Listed below are some tried and tested solutions to fix the PC won’t connect to WiFi problem. You can use each of these until you find the one that works best for you. Now, without further ado, let’s get started!
Solution 1: Initial Troubleshooting
Before proceeding with more complex and advanced solutions, here are some general workarounds that you can use to resolve the WiFi connectivity problem on a Windows PC or laptop.
- Make sure that your WiFi is turned on.
- Reboot your router and check to see if this fixes WiFi connectivity issues.
- As you may know, WiFi signals can be weak at longer distances. So, move closer to your router for better connectivity and enhanced signal quality.
- Keep in mind that passwords are always case-sensitive. So, make sure that you enter the correct password for your WiFi network.
So, these were some basic tactics to solve the problem. If any of these didn’t work for you, then you can proceed with the solutions below.
Solution 2: Run Windows Network Troubleshooter
Misconfigured network settings are also responsible for WiFi connectivity issues like ‘PC unable to sign in to WiFi’. Such problems are really hard to troubleshoot. Windows comes with a built-in Network Troubleshooter which finds and fixes the problem. You can use Windows Network Troubleshooter to detect and solve any kind of issues with network settings. Here is how to do that:
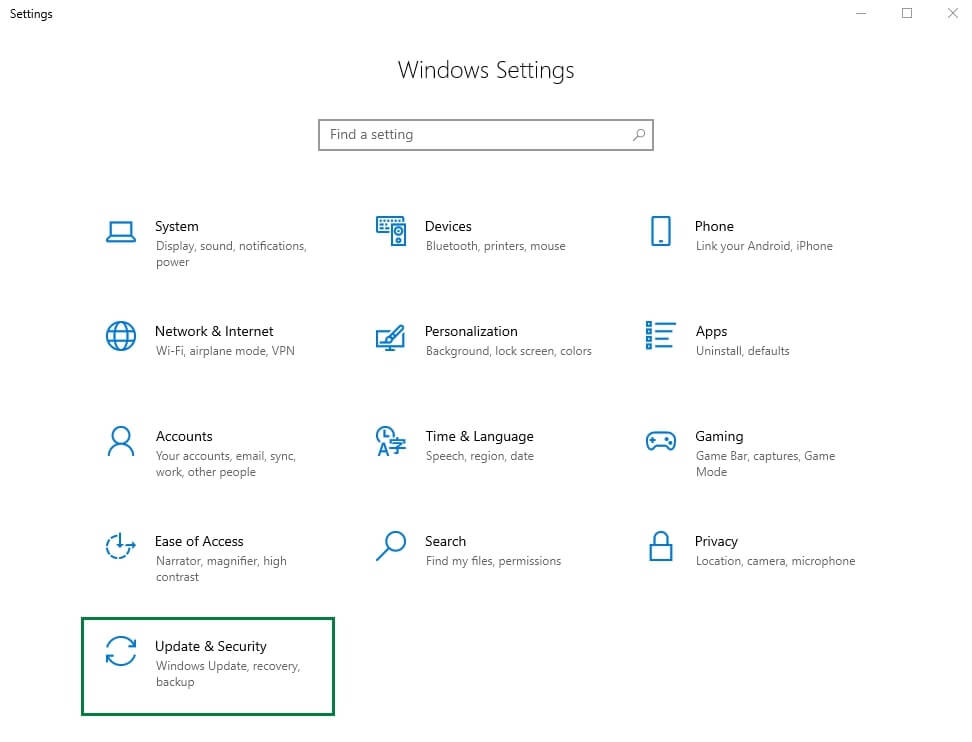
Step 1: Open Windows Settings by pressing the Windows + I keys together from your keyboard.
Step 2: Find and click on the Update & Security option.
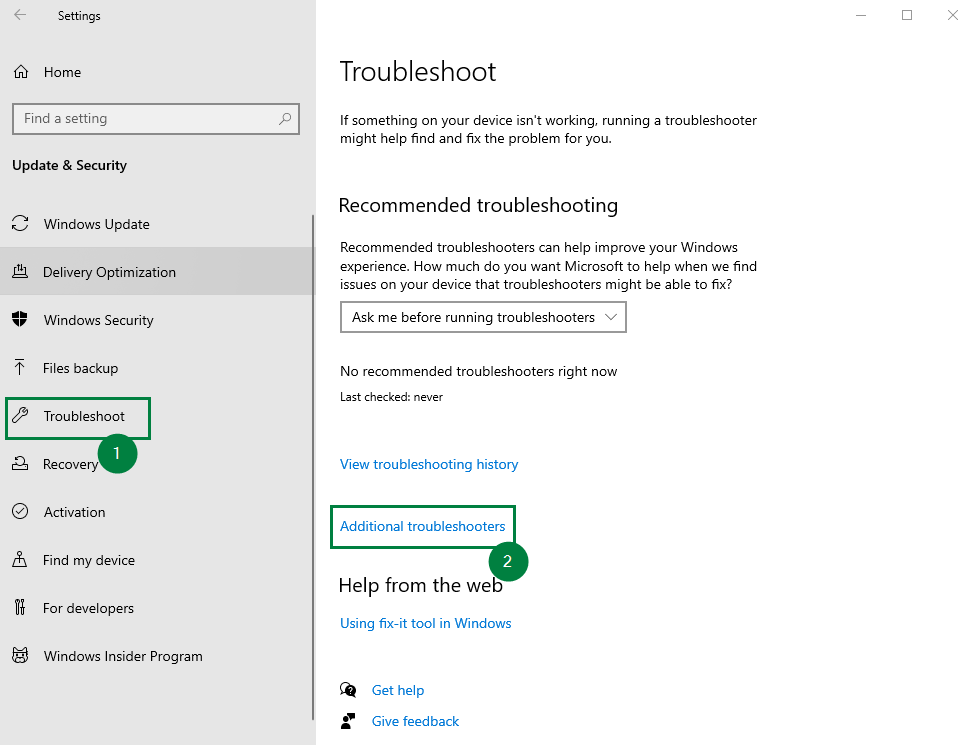
Step 3: Choose Troubleshoot from the left menu pane.
Step 4: Then, click on Additional Troubleshooters.
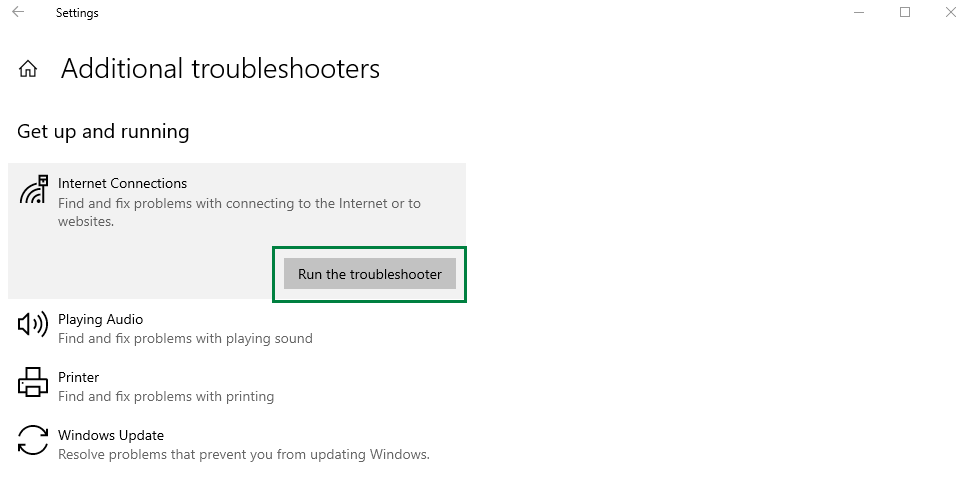
Step 5: Click on Internet Connections and then click Run the troubleshooter.
Now, the troubleshooter will identify and diagnose the problem and make your WiFi work again as expected. But, if this doesn’t work for you, then you can move on to the next solution.
Also know: How to Fix Wifi Network Not Showing Up on Windows PC
Solution 3: Tweaking Group Policy Settings
According to many users, tweaking or changing the settings for Group Policy Editor helps in fixing the WiFi network connection problems. So, you can fix the computer not connecting to the WiFi problem by making some modifications to the Group Policy settings. To do so, follow the steps below:
Step 1: Press the Win + R keys together to open the Run Dialog box.
Step 2: Type gpedit.msc in the Run box and press the Enter key.

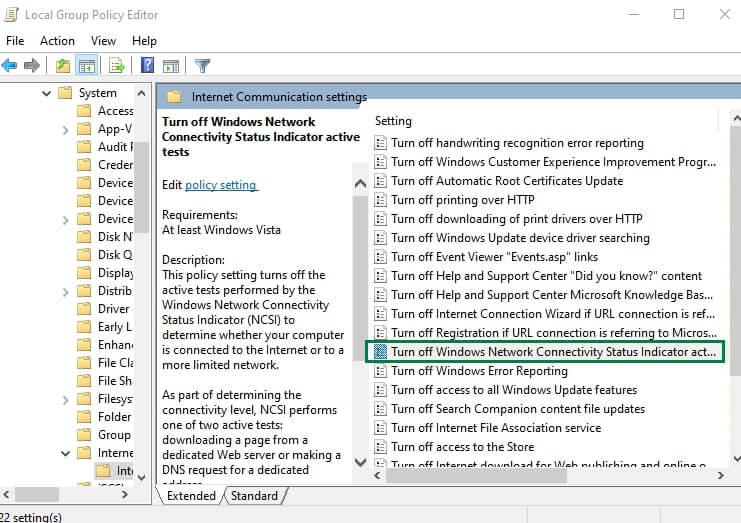
Step 3: On the Group Policy Editor window, head to the following path:
Computer Configuration > Administrative Templates > System > Internet Communication Management > Internet Communicating Settings
Step 4: Now, locate the ‘Turn off Windows Network Connectivity Status Indicator active tests’ on the right pane and double-click on it.
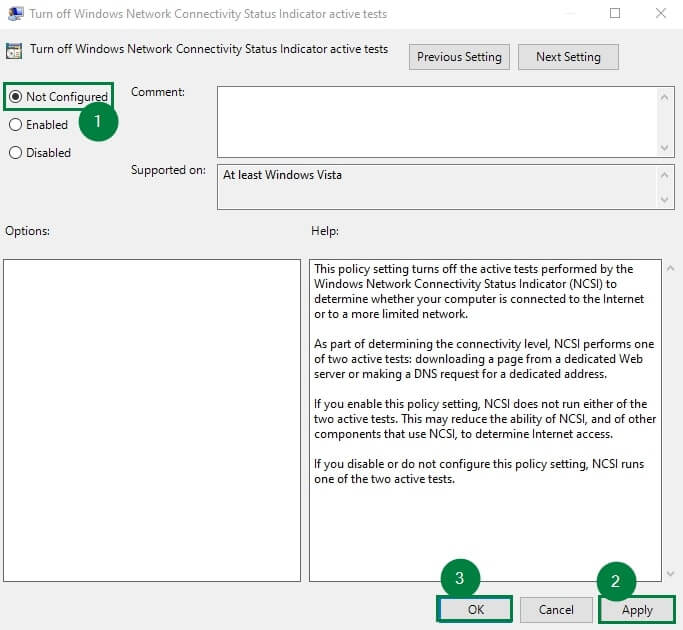
Step 5: Choose Not Configured from the subsequent window.
Step 6: Lastly, click on the Apply and OK options to save the recent changes.
Solution 4: Update your Network Adapter Drivers
Outdated network drivers are majorly responsible for WiFi connectivity issues like ‘PC unable to sign in to WiFi’. To avoid WiFi problems, you should keep your network drivers up-to-date. You can get the latest version of network drivers on the official website of your network adapter manufacturer, and then download and manually install the compatible drivers by following the on-screen instructions. This could be time-consuming and error-prone, especially if you are not confident playing around with the computer.
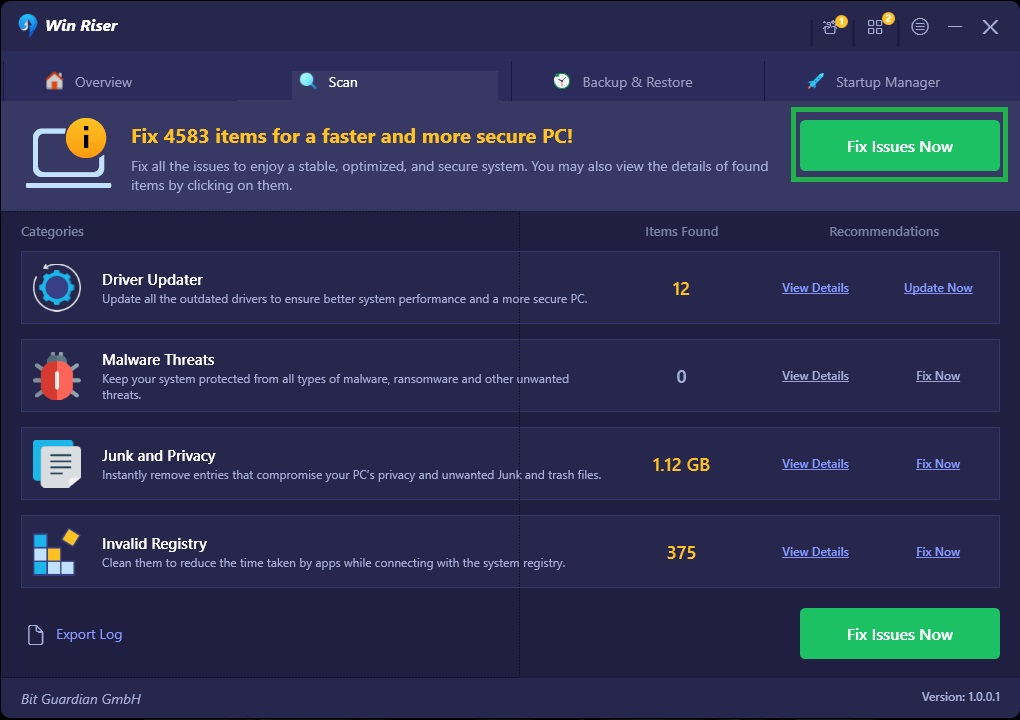
If you are a newbie with no expertise in a technical niche, and unable to find the right driver manually, then you can do it automatically with Win Riser Driver Updater. Win Riser is one of the popular driver updating software that automatically detects your system, scans it for obsolete drivers, and replaces them with the necessary ones.
In addition to this, Win Riser only provides WHQL tested and authenticated drivers. Moreover, it also comes with an in-built malware detection and removal tool to keep your PC free from viruses and any kind of malware.
With Win Riser, you can install all PC drivers in one click. To do so, simply follow these steps:
Step 1: Download Win Riser for Free from the button below.
Step 2: Double-click the downloaded file and follow the setup wizard to complete the installation.
Step 3: After installing, launch Win Riser on your PC and wait until it scans your device for erroneous and out-of-date drivers.
Step 4: Once scanning is complete. Go through the scan results and click on the Fix Issues Now button. This will install all pending driver updates in one go including the network adapter drivers.
Step 5: Restart your system to apply those drivers into effect.
Once you have successfully installed the network drivers as well as other system drivers, then check to see if the computer not connecting to WiFi is resolved. If not, then try our last resort.
Solution 5: Replace your Wireless Adapter
If all else fails, then you should consider replacing your WiFi adapter or router. Certain WiFi routers are not completely compatible with Windows 10, 11. In this case, replacing your wireless router with a more suitable and compatible option is recommended. This is a sure-shot way to solve the WiFi connectivity problem.
Also know: How to Fix Black Screen of Death for Windows 10, 11
How to Fix PC Unable to Sign in to WiFi on Windows 10, 11: Explained
That’s all! We hope using either of these solutions will help you solve the WiFi problems like computer not connecting to WiFi and more. Do you have any questions or better tips & tricks? If yes, then please feel free to share it with us in the comments box below.

2 Comments