If you’re encountering the Wifi network not showing up on laptop error on your Windows 10 device, fret not. This article offers straightforward solutions to help you resolve the issue effortlessly.
We’ll guide you through troubleshooting steps to address the problem of your WiFi network not being visible. In our modern reliance on WiFi for internet access across various devices, the absence of your network can disrupt your connectivity entirely.
Several factors could contribute to this issue, including distance from the router, device or router malfunctions, or poor reception in your location. When faced with the inability to connect, it’s essential to pinpoint the root cause within your wireless network.
Encountering a situation where attempting to join your WiFi yields no results is undoubtedly frustrating. However, rest assured, there are remedies available. Without further delay, let’s explore some of the most effective solutions to rectify this error seamlessly.
Simple Solutions to Resolve the WiFi Network Not Showing Up on Windows 10 Error
In the following sections, we’ll explore effective methods to address the issue of the WiFi network not showing up in Windows 11. Simply follow the solutions provided below sequentially until your WiFi network becomes visible.
Solution 1: Reboot both the Modem and the Wireless Router
If you’re experiencing the issue on your home WiFi network not showing up on laptop, it’s worthwhile to investigate potential router issues, SSID broadcast issues, or interference from other devices. The WiFi network not showing up error is often linked to Internet Service Provider (ISP) issues. Restarting both your modem and wireless router can help re-establish the connection with your ISP.
Also Read: How to Fix WiFi Connected But No Internet on Windows 10, 11 PC
Solution 2: Disable Windows Firewall Windows
A firewall can sometimes interfere with WiFi performance, leading to the WiFi network not showing up on the computer. So, to determine if it’s causing the issue, follow these steps to temporarily deactivate Windows Firewall:
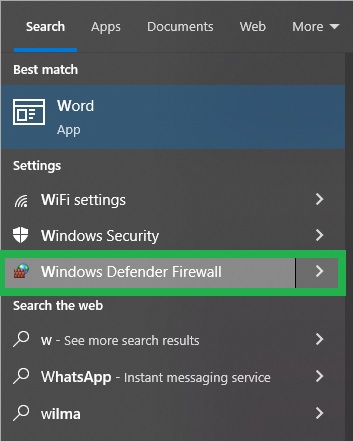
- Type Firewall into the search box and select Windows Defender Firewall from the Start menu.
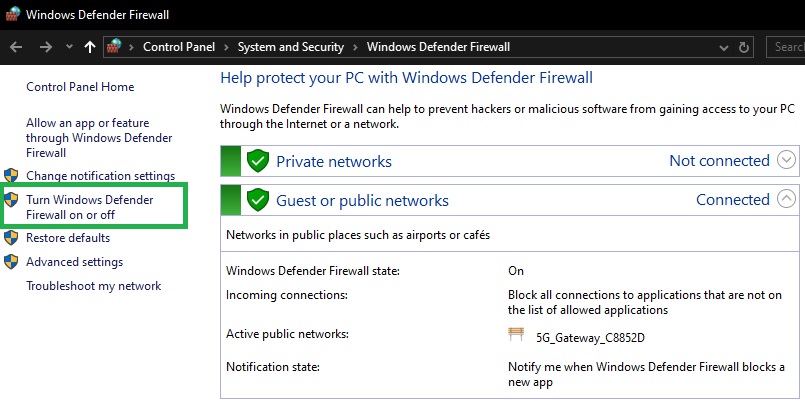
- In the Windows Defender Firewall program, choose Turn Windows Defender Firewall on or off from the left menu.
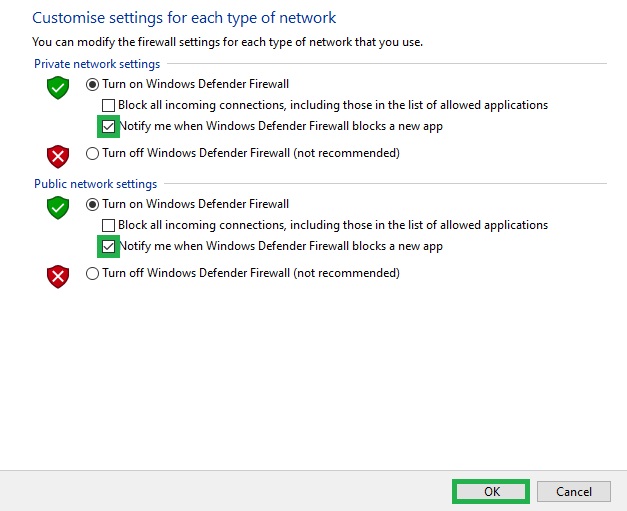
- A window will appear allowing you to adjust the level of protection. Check the box next to Turn off Windows Defender Firewall under both sections. Then, click OK, and restart your computer. After the restart, ensure Windows 10 can locate the WiFi network successfully.
Now, check if the WiFi network is accessible. If not, proceed to the next solution to address the issue, ensuring to undo any changes made previously.
Solution 3: Update the Network Adapter Driver (Recommended)
An outdated network adapter driver is one of the primary reasons for WiFi network not showing up on laptop. Drivers are essential files in Windows that enable devices to communicate with the system. If the driver is outdated or corrupted, it can lead to network issues.
Updating the driver to the latest version is the most effective solution to this problem. Win Riser is a reliable driver updater for Windows 10 that simplifies the process of updating drivers, including the network driver. Additionally, the tool offers features to enhance system performance.
Here’s how to update the network driver and resolve the WiFi network not appearing error in Windows 10:
- Download the Win Riser tool using the provided download button.
- Install the software and run it to initiate a deep scan of your system.
- Once the scan is complete, click the Fix Issues Now button to resolve all detected errors.
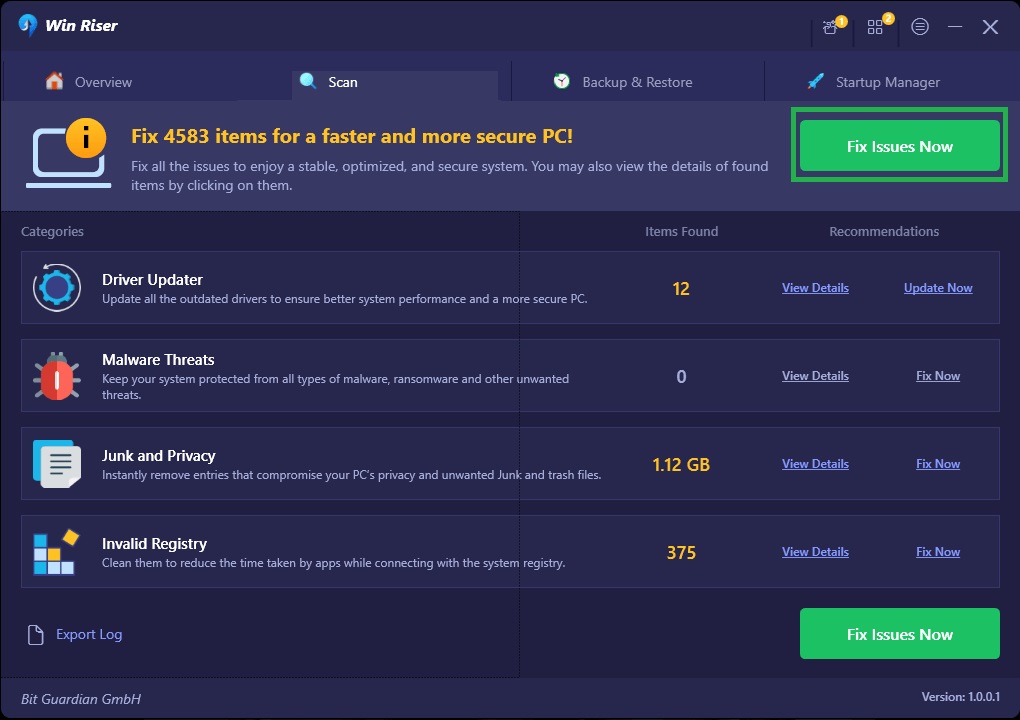
- You can also choose to navigate to the Drivers category and update the network driver(s) individually for a quicker resolution. Still, the above-mentioned method is recommended.
- Restart your computer, as prompted.
This solution effectively addresses WiFi connectivity issues and various other errors. If this solution doesn’t resolve the issue, proceed to the next one to fix the WiFi network not appearing error.
Also Read: How to Fix Acer Laptop Not Connecting to WiFi [Easily & Quickly]
Solution 4: Adjust Router Channel Settings
Another method to resolve the WiFi network not showing up error in Windows 10 is by adjusting router settings. You can implement advanced changes to the router to address this issue. Follow the steps below carefully:
- Open a web browser, then enter the router’s IP address into the address bar.
- You may encounter a warning screen in your browser. To proceed, select Advanced > Proceed from the drop-down menu.
- Enter your email address and password when prompted. If you can’t recall your login credentials, check the router’s back panel for the information.
- Navigate to the Wireless Settings. The name and location of this option may vary depending on your router. Typically, you’ll find it under the Advanced Settings menu.
- Select the frequency band you wish to adjust the channel for (2.4 GHz or 5 GHz). Ensure that any automatic connection functions are disabled.
- Use the drop-down menu labeled Channels to choose a new channel for your WiFi connection.
This method requires a certain level of technical proficiency. So, if this solution resolves the WiFi network not appearing error, it’s advisable to maintain the adjusted settings.
Solution 5: Refresh IP Address Settings
It’s possible that the issue preventing your Windows 10 computer from detecting your WiFi network isn’t related to locating the network itself, but rather to connecting to it. This could occur if your computer’s IP address conflicts with another device on the network. To address this, you’ll need to refresh the IP address settings to resolve the WiFi network not appearing error in Windows 10. Follow the steps below:
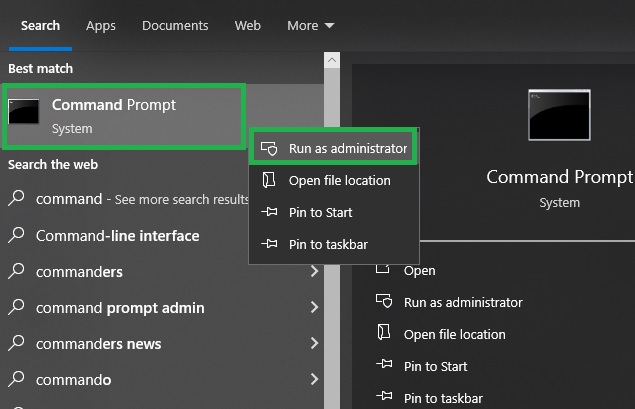
- Navigate to the search bar, type Command Prompt, and select Run as Administrator.
- In the command prompt window, enter the following commands followed by the Enter key:
- ipconfig /release
- ipconfig /renew
After executing these commands, the IPv4 Address box will display a new IP address. Still, if this solution doesn’t resolve the issue of your computer not showing available networks, proceed to the next one to fix the WiFi network not appearing error.
Solution 6: Reset TCP/IP Protocol
Let’s delve into the next solution for resolving the WiFi network not showing up on Windows 11. Manually resetting each TCP/IP connection, if possible, might address various network connection issues, including those hindering your network card from detecting available networks.
Follow these steps to reset the TCP/IP protocol:
- Open the search bar, type Command Prompt, and select Run as Administrator.

- In the command prompt window, enter the following command lines one by one, pressing Enter after each:
- First, netsh int ip reset
- Then, netsh int tcp set heuristics disabled
- Next, netsh int tcp set global autotuninglevel=disabled
- In the end, netsh int tcp set global rss=enabled
This method resets the IP to resolve the WiFi network not showing up on Windows 10. If this solution doesn’t solve the computer not showing available networks, proceed to the next one for further troubleshooting.
Solution 7: Disable IPv6 Protocol
Enabling the IPv6 protocol on your machine can sometimes lead to difficulties connecting to other networks or the internet. Disabling this protocol often resolves issues like the WiFi network not showing up on Windows 10. So, just follow the steps below to address this problem:
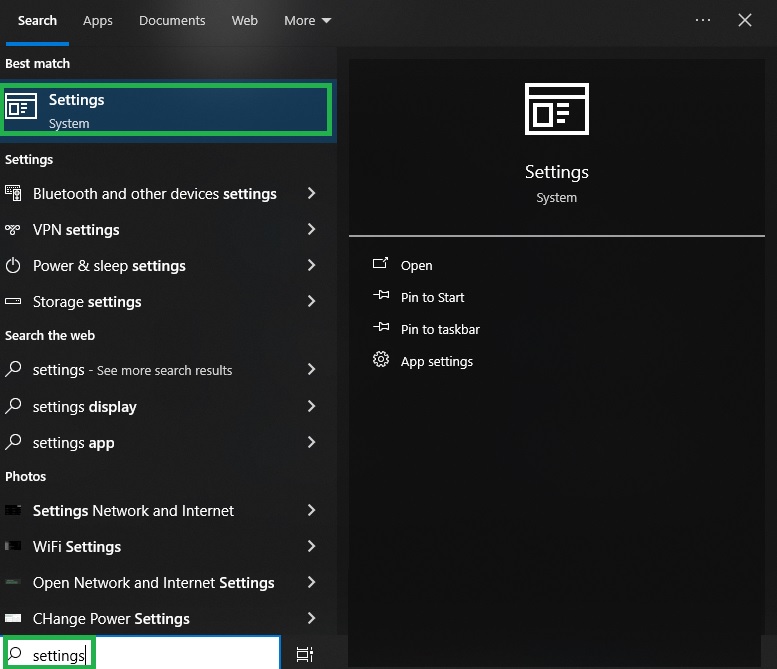
- In the Windows search bar, type Settings, then click open them.
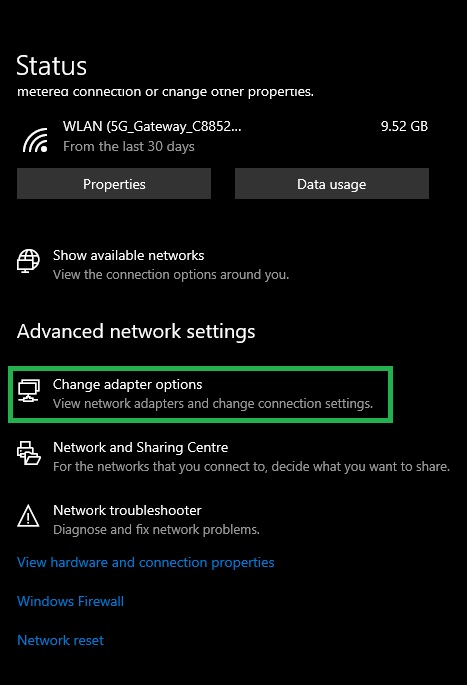
- Then, go to Network and Internet.

- Choose Change adapter options.
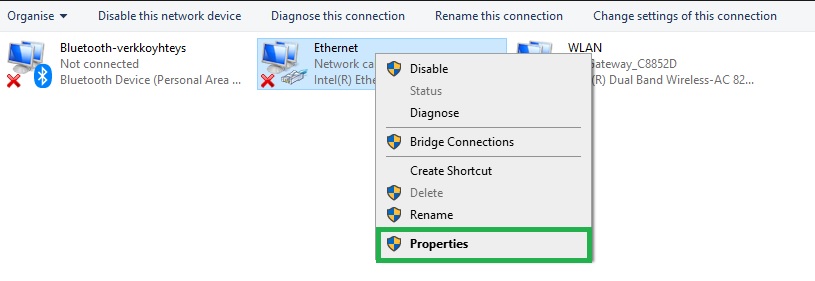
- Use the context menu on the Ethernet, to open Properties.
- Locate Transmission Control Protocol/Internet Protocol Version 6 (TCP/IPv6) in the list of connection components, and click OK.
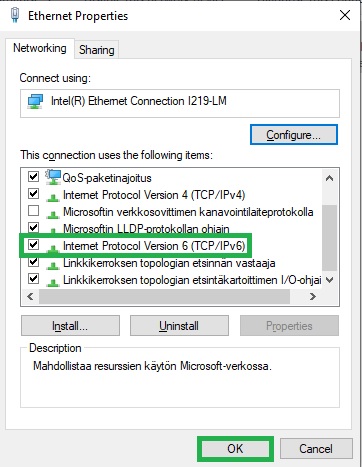
- Uncheck the box next to TCP/IPv6 to disable the IPv6 Protocol.
- Then, click OK to confirm.
- After rebooting your system, verify if the WiFi network is now visible in the list of available networks.
Disabling the IPv6 protocol can effectively resolve the issue of the WiFi network not showing up on the computer.
Solution 8: Utilize Windows Troubleshooter
An effective method to resolve the WiFi network not showing up on the laptop issue is by employing the Windows troubleshooter. This tool is invaluable as it helps your system identify the root cause of the error and also rectify it effortlessly. Follow the steps below to address this problem:
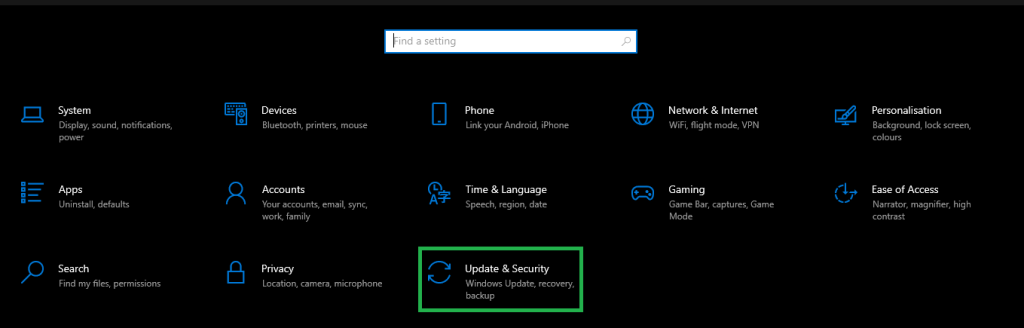
- Press the Win + I keys simultaneously to open Windows Settings.
- In the Settings window, select the Update & Security option.
- From the left menu, choose Troubleshoot, then click on Additional Troubleshooters in the right window.
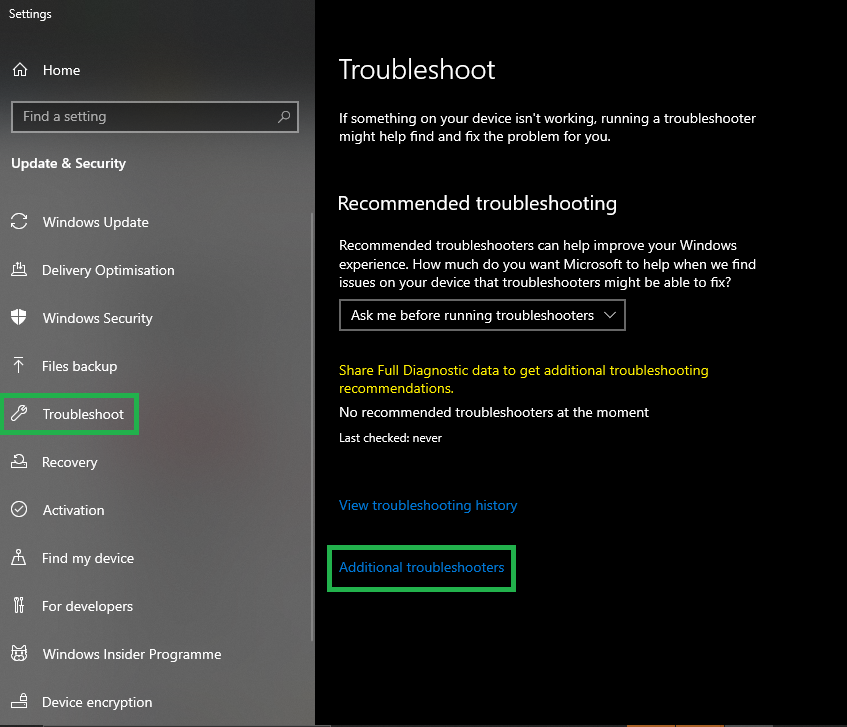
- Scroll down to the bottom of the page and select Network Adapter from the list of potential problems. Then, choose Run the troubleshooter.
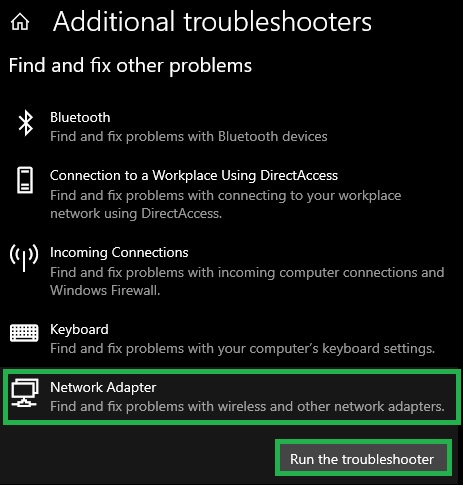
- The troubleshooter wizard will guide you through each step, examining various adapter and system settings likely responsible for your network issues.
- If the troubleshooter successfully resolves the issue, your computer will require a restart.
This straightforward solution leverages the OS’s diagnostic capabilities to address network-related issues comprehensively. After following these steps, you should be able to get rid of the computer not showing available networks the required WiFi connection effortlessly.
Also Read: Realtek Wifi Driver (Wireless LAN) Download for Windows 10, 11 PC
WiFi Network Not Showing Up on Windows 10/11: Solved
And there you have it! We’ve provided all the solutions to address the WiFi network not showing up on the computer error in Windows 10/11. After implementing these fixes, you should no longer encounter this issue on your device. Once you’ve followed all the steps, your desired WiFi network should now be visible in the menu.

2 Comments