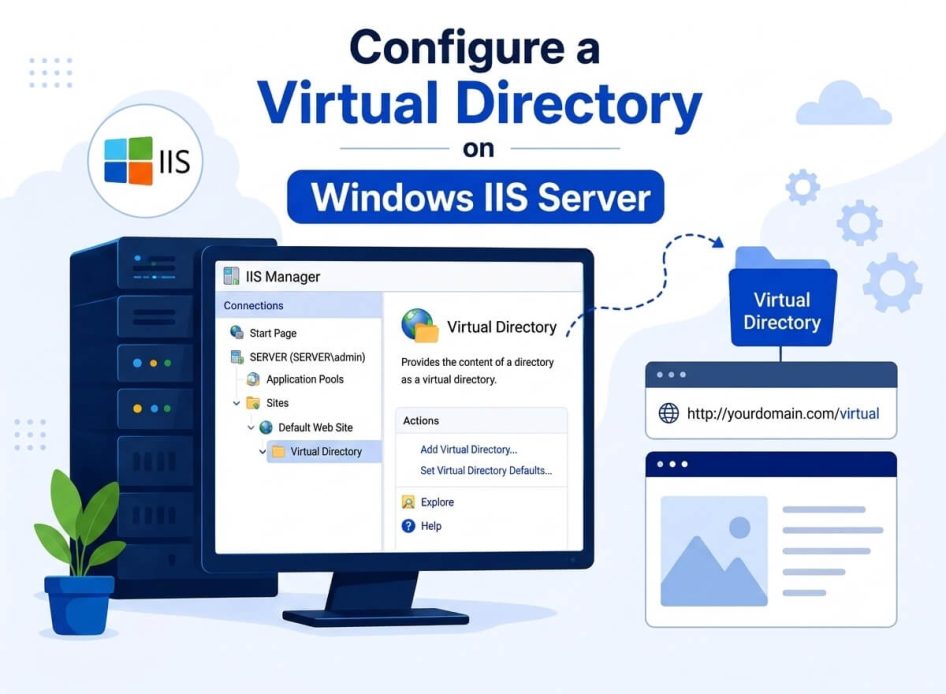
Understanding a virtual directory and how to create it on a Windows IIS (Internet Information Services) server helps manage servers, map friendly URL paths to physical folders, build and deploy web apps that need to reference shared files or external assets without revealing internal file structures, and troubleshoot permission blocks, path mapping errors, or routing problems on web and application servers.
By creating a virtual directory on Windows, you specify a friendly name or alias for a physical directory on the server hard drive that is not present in the home directory. Why? Being shorter than the path of your physical directory, it is more convenient to type.
For example, suppose your development team stores shared project files in a folder named “DevAssets” on the D: drive of your web server (e.g., D:\Projects\DevAssets). To make these files accessible via a friendly URL, you can create a virtual directory named “DevAssets” in IIS. Right-click your website in IIS Manager, select “Add Virtual Directory…” from the context menu, then enter the alias (e.g., “DevAssets”) and the physical path to the folder. This setup allows team members to access the folder contents from http://yourserver/DevAssets without exposing the full internal folder structure of your server.
Creating a virtual directory is easy. Before helping you create one, here is a quick overview of what a virtual directory in IIS exactly is to clear up any confusion you may have.
What Is a Virtual Directory in IIS
A virtual directory is a directory created in IIS to host a local application or navigate to a particular folder on the server where a physical or virtual directory is created. To access a web application, you can use a virtual directory name instead of a physical folder name.
For example, imagine you have a web app called “ParentalControl” on your machine; you can create a virtual directory for this web application. If your virtual directory name is Test, your application URL will be http://localhost/Test.
In another example, imagine an enterprise has employee details stored in a central repository. Rather than directly revealing the file system, it can create a virtual directory accessible via the enterprise’s intranet. Authorized personnel can access these details through a URL, regardless of where they are actually stored on the server, providing a secure access point.
Now that you are familiar with the virtual directory, let’s help you create one in IIS.
Also know: Update Windows Security Signatures Manually Windows
How to Create a Virtual Directory in IIS
To create a virtual directory in IIS, open the IIS Manager, right-click the application or website where you wish to create the virtual directory, click “Add Virtual Directory,” enter the alias, set the physical path to the directory, configure the essential permissions and authentications, and then click OK to create the virtual directory. Here are these steps in detail. You can back up your server using the best server backup software before following the steps below to be on the safe side if anything goes wrong
- Launch IIS Manager. To open it on Windows Server 2012 or Windows Server 2012 R2, click Server Manager on the taskbar, click Tools, and then click Internet Information Services (IIS) Manager. To open it on Windows 8 or Windows 8.1, press and hold the Windows key, press X, click Control Panel, click Administrative Tools, and then double-click Internet Information Services (IIS) Manager. To open it on Windows Server 2008 or Windows Server 2008 R2, click Start on the Taskbar, go to Administrative Tools, and then click Internet Information Services (IIS) Manager. To open it on Windows Vista or Windows 7, click Start on the Taskbar, click Control Panel, double-click Administrative Tools, and then double-click Internet Information Services (IIS) Manager.
- In the Connections pane of IIS Manager, expand the server name, expand Sites, and then expand the Web site to which you wish to add the virtual directory.
- Click the Application to which you wish to add the virtual directory.
- Next, go to the Actions pane and click View Virtual Directories.
- Click Add Virtual Directory…
- In the Add Virtual Directory dialog box, enter the Alias and physical path, and click OK.
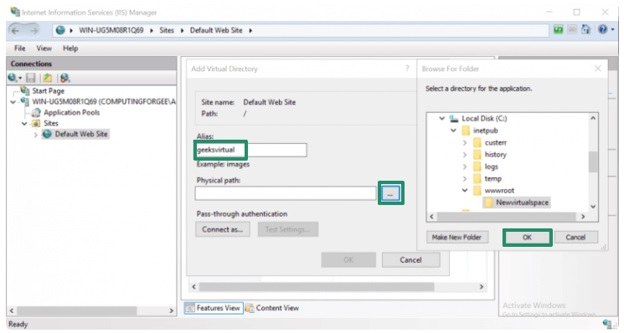
- To configure the server to use specific credentials when accessing the virtual directory content, click Connect as, where you can enter a user name and password that IIS should use to access the folder. This is especially important if the virtual directory points to a network share or a folder requiring special permissions.
If you leave the default setting, IIS will use the application pool identity to access the directory. Make sure the app pool identity has at least read (and, if needed, write) access to the target folder. If it does not have adequate permissions, the site may return 401 Unauthorized or 500-level errors. In common scenarios, such as accessing folders outside the website root or on a network share, using Connect as lets you specify a service account with the right level of access. After configuring credentials, click Test Settings to verify authentication and authorization can succeed for the selected path. If you see failures, review permission settings and user rights for both the IIS app pool identity and any credentials set through Connect as to prevent access issues.
- You can configure the <virtualDirectory> element at the site, server, and app level in the ApplicationHost.config file. There are many configuration options for virtual directories, such as path aliasing (specifies the virtual path for users to access the directory), physical path (defines the real location of the directory on the server), authentication methods (configures the authentication methods to access the directory), authorization rules (sets access control rules to determine which users or groups can access the directory), and logging options (configures logging to track directory access and identifies potential security issues).
After creating the virtual directory on the Windows IIS server, you can also test it as explained in the following section.
Also know: Best Document Management Software for Windows 11/10
How to Test the Virtual Directory
To test the virtual directory:
- Launch Internet Explorer.
- Type the web server’s URL in the Address box.
- Ensure that you can view the default Web site.
- Append the virtual directory alias to the web server URL you typed above and click
However, if you experience issues like 404 Not Found when working with virtual directories, you can check below for solutions.
Troubleshooting Common Virtual Directory Issues
Errors like 404 Not Found and DNS server not responding are common when working with virtual directories. To fix these issues in a virtual directory on a Windows IIS server, follow the steps below.
- Double-check the configuration settings and verify the physical directory exists.
- Review the authentication and authorization settings to ensure the user has the required permissions.
- Examine log files to identify and troubleshoot the root cause of the errors.
- Ensure the app pool’s identity has read access to the target directory.
- Verify the stored passwords and user accounts to ensure they are correct.
Below, we have also answered a few frequently asked questions about a virtual directory to ensure no confusion remains.
Frequently Asked Questions
Q1. How do I add a virtual directory?
To add a virtual directory in IIS, launch IIS Manager, right-click the application or website where you intend to create a virtual directory, click Add Virtual Directory, input an alias, set the directory path, set the essential settings for permissions and authentication, and then click OK to complete the process.
Q2. What is the use of a virtual directory in IIS?
A virtual directory abstracts the physical location of files and directories to enhance security. It also simplifies URL management by allowing for shorter and user-friendly URLs. Moreover, virtual directories allow website structuring logically to improve organization and make it easy to manage and maintain the website. Furthermore, it allows easy redirection to various locations without altering the visible URL and helps separate the content from the application code for easy website updates and maintenance.
Q3. How do I remove a virtual directory from IIS?
To remove a virtual directory, click Start, follow the path Programs > Administrative Tools, click Internet Services Manager, expand the server name in the Internet Information Services window, expand the Web site containing the virtual directory that you wish to delete, right-click the virtual directory, click Delete, click Yes, right-click the Web site, click Stop, right-click the Web site, click Start, and then quit the Internet Information Services.
Q4. What is the difference between a website and a virtual directory?
A website on a web server is the top-level container that hosts and serves applications, web pages, or services. A virtual directory inside a website is a mapping that points to a network share or a physical folder on disk. A website has its own configuration, represents a domain or subdomain, and contains the root directory. A virtual directory looks like a sub-path of the website, allows content organization and separation without moving it into the website’s root folder, and allows hosting multiple applications or shared resources under a common site.
Q5. When should you not create a virtual directory?
You should not create a virtual directory if it points to sensitive system files, data outside the intended app’s scope, or configuration directories. Moreover, avoid creating a virtual directory if it complicates permissions management, impacts performance, applications need physical paths, confuses troubleshooting, or leads to circular references.
Q6. What is the difference between an application and a virtual directory?
A virtual directory is a mapping between a physical directory on the server and a URL. An application is a self-contained code unit that runs within a web server environment and has its own application pools, configuration settings, and other resources.
Q7. How should I secure a virtual directory?
To secure a virtual directory, in IIS, configure appropriate authentication and authorization settings and enable authentication methods, for example, Basic Authentication or Windows Authentication, requiring users to log in before they can access the directory. After that, configure authorization rules to set which users/groups can access the directory. Additionally, you can restrict directory access based on criteria such as IP address and review and update these settings to ensure they are secure.
Hopefully, you no longer feel confused about a virtual directory on a Windows IIS server. If any confusion persists, you can check Microsoft’s IIS documentation for answers or comment with your queries.